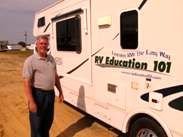
Preventive Maintenance (PM) is maintenance the owner can perform on your RV before a problem exists. These checks are designed to prevent or identify potential problems that could lead to mechanical breakdown, malfunction or failure of a component or system on your RV. Preventive Maintenance consists of cleaning, inspecting, lubricating, adjusting and servicing your RV.
Here are some PM checks you can perform on a typical RV generator. In addition to these checks you should always follow the maintenance schedule and guidelines that came with your specific generator set.
Note: These PM checks are for a gasoline fueled generator. There are diesel propane fueled generators too. Some of these checks apply to all types, but some don’t. Consult your generator owner’s manual for maintenance checks and services for your specific generator.
1) Always check the oil level and the exhaust system prior to starting the generator. Starting and running a generator that is low on oil can result in costly damage to the generator’s engine. Add oil as required. Check your owner manual for the type of oil to use. A damaged exhaust system can result in carbon monoxide gas getting inside the RV. Always inspect the entire generator exhaust system prior to starting the generator. Never operate a generator with a damaged exhaust system!
2)Keep the generator set and the compartment it is housed in clean. You can use compressed air to assist in cleaning out the generator compartment and a clean shop rag to clean the generator set. While you are cleaning the generator check all electrical connectors for secure connections.
Note: always wear safety glasses when using compressed air.
3)Check all of the filters on the generator. A typical generator may have an air filter, fuel filter and oil filter. Check your generator owner manual for the types of filters your generator has and where they are located. Maintenance checks and services for a generator are based on hours of operation. You need to monitor the hour meter on your generator set for all maintenance intervals.
a)Check the air filter for cleanliness. You can remove it and inspect the fins on the back for signs of dirt or debris. You can tap the air filter on a flat surface to help remove some of the dirt and debris. Change a dirty filter, or change it at prescribed intervals. Inspect the air filter more often in dusty conditions.
b)The fuel filter will typically be an in-line type filter. Over time it filters out and collects enough debris that it can interfere with the flow of fuel. Check and replace the fuel filter at prescribed intervals.
c)We’ll talk about the oil filter in just a minute.
4)Change the oil and oil filter (if equipped). This is perhaps the most important PM Service you can perform on your generator to ensure years of reliable service. Change the oil and replace the oil filter at the recommended intervals. It’s really quite simple to do. Your generator owner’s manual will usually describe the steps to follow. If you don’t feel comfortable changing the oil and filter have an authorized RV service center do it for you.
5)Replace the spark plugs at recommended intervals. If you ever replaced the spark plugs in a vehicle you can replace the plugs in the generator, unless due to the constraints of the generator compartment you can’t access the spark plugs. In this case you may want to let an authorized RV service center do it for you. If you decide to do it yourself check your generator owner manual for the correct type of plug to use and double check the spark plug gap before installing the plugs. Do not over tighten spark plugs!
6)Exercise the generator. There are several reasons why you should start and exercise the generator on a regular basis. Moisture build up can cause damage to your generator. When you exercise your generator it heats up the generator windings and eliminates this moisture build up. This monthly exercise regime also lubricates all of the engine seals and components and helps to prevent carbon build up. So, what exactly do I mean when I say exercise your generator? For a gasoline generator I mean that you start and run the generator with at least a 50 % load, for at least two hours every month. It is extremely important that you run it with this minimum rated load. Generators are designed to run with a load placed on them. It’s always better to let your generator run for longer time periods than it is for short time periods. Check your generator owner’s manual for load ratings specific to your unit. Always try to avoid starting or stopping a generator when there is a 120 volt device or appliance turned on.
7)Add a fuel stabilizer during periods of storage or non-use. If it’s a motorhome add a fuel stabilizer to the motorhomes gas tank and run the generator long enough for the stabilizer to get through the fuel system. This will help prevent gas related problems on carbureted generators, like not starting or surging. These are problems you don’t need. Fuel stabilizers can protect the fuel system for up to six months, but keep in mind the importance to exercise the generator when possible.
Well there you have it. Follow these simple steps, and the maintenance and service instructions in the generator owner’s manual, and you can get years of reliable service from your generator set.
A couple of additional tips for generator maintenance are to keep the battery that is used to start the generator maintained, and when running the generator monitor the AC voltage and frequency output with some type of digital plug in meter. I recommend one that can test campground polarity, measure AC line voltage and AC frequency. Frequency is the number of times that electricity alternates per second. U.S. appliances are designed to operate at 60 cycles per second, or 60 hertz.
When you use your generator the governor in the generator must hold the speed constant at, or close to 60 hertz from no load on the generator to a full load. Depending on the load placed on the generator, AC voltage can range from 105 to 135 volts and the frequency can range from 58 to 63 hertz. Anything outside of these parameters can cause problems for your RV electrical system and/or generator set. The meter will let you know when the generator is not operating within the proper ranges and you can have it checked out and repaired before any damage occurs.
Happy Camping,
Mark J. Polk
RV Education 101
RV University
copyright 2009 by Mark Polk owner of RV Education 101
Wednesday, November 11, 2009
Preventive Maintenance Checks for an RV Generator
Tuesday, October 20, 2009
Extend the Life of your RV Awnings
Awnings are a great feature to have on your RV. There are several different types of RV awnings and they serve different purposes. There are window and door awnings that provide shade and keep rain away from your RV windows or entry door. There are slide-out awnings that help protect the top of the slide-out from debris and water. And there are patio awnings. Patio awnings extend the living area of our outdoor world. Similar to the front porch of your home, the patio awning provides us with shade and cover from a light rain when we want to sit and enjoy the great outdoors. The awnings on your RV will provide years of reliable trouble free operation, if you take the time to do a little preventive maintenance and cleaning.
Perhaps the most important component of an awning is the fabric. Fabric used on RV awnings is one of two types, acrylic or vinyl. Acrylic fabric is a woven cloth that lets air circulate through the fabric. This air circulation allows the fabric to dry quickly when it gets wet. Acrylic fabrics are water repellent, but not waterproof. If you have experience tent camping you know that you shouldn’t touch the underside of the tent when it’s wet. Touching the wet fabric allows water to seep through the fabric. The same applies to an acrylic awning fabric. Vinyl awning fabric is mildew resistant, but not necessarily mildew proof. Mildew can form on the dirt and dust that collects on the vinyl fabric. It will be worse in high temperatures, humidity and if the fabric is stored when it is wet.
Some awnings have an aluminum or vinyl wrap-around weather guard that protects the awning fabric when it’s in the travel or stored position. When you open the awning for the first time each year, or if it has been stored for a while, you will need to inspect the awning fabric for any signs of mildew or stains. Remember vinyl awnings will mildew. To prevent dirt from imbedding into the woven fabric of an acrylic awning fabric you should simply hose the fabric off on a routine basis. Avoid scrubbing acrylic awning fabric. Scrubbing can remove the water retardant finish. For stubborn stains blot the approved cleaner on the acrylic fabric with a sponge or soft cloth.
For more difficult stains or mildew on a vinyl awning fabric there are after market commercial cleaners made just for awning fabrics. One method that seems to work well is to spray the inside and outside of the awning fabric with the appropriate cleaner, then roll it up and let it sit for several minutes. This distributes the cleaner over the entire surface of the awning fabric and allows the cleaner time to work. Open the awning and thoroughly rinse both sides of the fabric. It may be necessary to scrub stubborn stains with a brush on a vinyl awning fabric before rinsing. You can clean the awning hardware with the same cleaner you use to wash the RV.
Note: Never use oil based or abrasive cleaners on awning fabrics. Clean and thoroughly rinse both sides of the awning fabric. Carefully follow all awning and cleaner manufacturer directions.
Inspecting the Awning
Inspect the awning fabric for any tears or excessive wear. Talk to your RV dealer about what materials to use to repair or patch the awning fabric.
Do not store the awning when the fabric is wet. Allow enough time for it to dry completely, on both sides, before storing the awning.
While the awning is out, inspect the awning hardware. The bottom awning brackets support most of the load from the awning. Check the lag screws in the awning brackets for secure mounting. Inspect the arm pivot holes for any enlarged holes or broken rivets in the handles.
Check for a warped roller tube. If the roller tube is warped it will be noticeable when you roll the awning out.
Inspect the awning end caps for secure mounting and broken rivets. Caution: Never attempt to remove the awning end caps. Spring tension can result in serious injury.
Make sure the awning rail is securely mounted to the side of the RV.
Note: Have any damaged or broken parts repaired before using the awning.
In addition to cleaning and inspecting your awning there are a few things to keep in mind when using the awning.
Always lower one end of the awning to allow for water runoff. The weight from water pooling on the awning fabric can cause extensive and costly damage.
Any wind gusts over 20 miles per hour can also cause extensive damage to the awning and to the RV. Never leave the awning out unattended. If everyone is leaving the campsite, store the awning in the travel position. When you go to bed, store the awning. Even when you are at the campsite, you should use awning tie downs to prevent any sudden damage caused by high wind gusts or a sudden storm.
You have the option to position the awning arms straight down and stake them to the ground, but you will get better support if they’re attached to the bottom awning brackets on the side of the RV. Remember, it is much easier to prevent damage to your awning than it is to repair it.
Awning Tip: Check with your RV insurance provider to make sure your RV awning is covered in the event of any damage. Some insurance companies require separate insurance coverage on the RV awnings.
For more in-depth information on RV awnings check out our RV Awning Use, Care & Accessories DVD
View a video clip on how to install a window awning in six easy steps
Well that about does it. With the proper care and a little preventive maintenance you and your RV awnings will have it made in the shade.
Happy Camping,
Mark J. Polk
RV Education 101
RV University
copyright 2009 by Mark Polk owner of RV Education 101
Tuesday, September 29, 2009
RV Winterizing 101 (Part 2)
We enjoy using our RV as much as possible throughout the year. But when you can’t use your RV, for whatever reasons and temperatures are approaching freezing, it’s important that you protect it. Last week I talked about preparing your RV’s interior, exterior and chassis for storage during the colder winter months. I mentioned at the beginning of the article that the RV plumbing system is the most vulnerable to damage caused by plummeting temperatures. The good news is it is really quite easy to protect the RV water system from this potential threat. I am including a checklist from my “Checklists for RVers” eBook to help walk you through the winterizing process.
Before you get started there are a few items you will need to have. These items can be found in most RV parts stores:
■ Non-toxic RV/Marine antifreeze. The amount depends on the layout and length of your plumbing lines. Two to three gallons will normally do.
■A water heater by-pass kit, if not already installed.
■ A tank wand to clean out the holding tanks, if you don’t have a built-in flushing system.
■A water pump converter kit, or tubing to connect to the inlet side of the water pump.
■ Basic hand tools to remove drain plugs.
Note: Be sure to read your owner’s manuals for unit specific winterizing guidelines. Follow the steps below that apply to your RV.
■If you have any inline water filters remove and/or bypass before starting.
■Drain the fresh water holding tank.
■Empty and flush the gray and black water holding tanks if it hasn’t already been done. If the RV doesn’t have a built-in flushing system clean the black tank out with a tank cleaning wand.
■Drain the water heater. Open the pressure relief valve and remove the drain plug.
Caution: Never drain the water heater when hot or under pressure. With no water hooked up to the RV and the water pump off, open a hot water faucet to remove any pressure on the system. Allow sufficient time for the tank to cool before draining.
■ Open all hot and cold faucets; don’t forget the toilet valve (pedal or lever) and the outside shower (if equipped).
■Locate and open the low point water drain lines.
■Use the water pump to help force most of the remaining water out of the system, but turn it off as soon as the system is drained to prevent damaging the pump.
Note: It is not necessary to get every drop of water out of the water system, but you want to get most of it out. The non-toxic RV antifreeze will prevent the small amount of remaining water from freezing.
■Recap all drains and close all faucets.
■ By-pass the water heater. If you do not have a by-pass kit installed the water heater will fill up with RV antifreeze before it goes through the water lines, wasting six or ten gallons of antifreeze.
Note: A water heater by-pass kit can save you money in two ways. It saves you from using an extra six or ten gallons of non-toxic RV antifreeze when it’s time to winterize your RV, and a bypass kit also prevents costly damage like ruptured water lines or a ruptured water heater tank. If water is left in the lines or tank they can freeze and expand, splitting the lines or tank. With a bypass kit you simply drain the water heater, put it in the by-pass mode and the antifreeze bypasses the tank and goes directly into the water lines.
■Install a water pump converter kit, or disconnect the inlet side of the water pump (the line coming from the fresh water holding tank to the pump) and connect tubing from the water pump inlet into a one gallon jug of RV antifreeze.
■ Turn the water pump on and pressurize the system. Starting with the closest faucet to the pump, slowly open the hot and then cold valves until the colored RV antifreeze appears. Replace the antifreeze container as required.
■Repeat this procedure on all faucets from the closest to the farthest away. Don’t forget the outside shower (if equipped).
■ Flush the toilet until antifreeze appears.
■Pour a cupful of antifreeze down every drain (all sinks, shower & tub drains).
■Pour some RV antifreeze in the toilet and flush into the holding tank to prevent any water in the tank from freezing.
■If your water heater has an electric heating element, turn it off. This will protect the element if the unit is plugged in (and the switch is on) while in storage.
■Make sure all faucets are closed.
■The unit is winterized.
Note: Consult your owner manuals for unit specific winterizing instructions for icemakers and washing machines.
Now, next spring when it’s time to head out in the RV you won’t have any unpleasant, not to mention costly, surprises waiting for.
For more great winterizing & storing information check out my Winterizing & Storing your RV E-book & my Winterizing & Storing your RV DVD
Happy Camping,
Mark J. Polk
RV Education 101
RV University
copyright 2009 by Mark Polk owner of RV Education 101
RV Winterizing 101 (Part 1)
It’s always sad to come to the realization that another camping season is winding down. Part of this realization is preparing the RV for winter storage, so it will be ready to go camping again next spring. My guess is that most RV owners, especially those in cold climate regions, refer to this winter storage preparation as winterizing your RV. When you hear the term “winterizing” the first thought that comes to mind is to protect the RV water system from potential damage caused by exposure to freezing temperatures. Frozen and damaged water lines are in fact the most common problem related to not winterizing your RV, or not properly winterizing your RV; but there is more to winterizing your RV than just protecting the water system from freezing.
The English dictionary definition for “winterize” is to prepare something, especially a house or an automobile, to withstand cold winter conditions. What I find interesting about this definition is that your RV is essentially a house and automobile combined. With that said, winterizing your RV would entail more than just preparing the water system for cold winter conditions. We would need to be concerned with preparing the RV’s interior, exterior, chassis, and plumbing from the harsh winter months.
Today I will discuss some tips for preparing the RV interior, exterior and the chassis for cold winter storage, and next week I will discuss preparing the plumbing system for the cold winter storage.
RV Interior
When RVs are stored for the winter it’s not uncommon for mice and squirrels to make their winter home in the RV. These animals are notorious for chewing through vehicle wiring, plastic and rubber components, resulting in extensive damage to the RV. If it’s a motorized RV start the engine periodically to keep any chewing squirrels out of the engine compartment area.
Possibly, the most important step is to try and prevent mice and other rodents from being able to access your RV. This can be difficult because they can enter the RV through some very small openings. Start by inspecting the underside of your RV for any gaps or holes. Fill these gaps using silicone or expanding foam. A word of caution, if you never used expanding foam before, you should experiment with it on something other than your RV first. When it dries it can expand a great deal more than you expect. Next, open drawers and cabinet doors inside your RV. Look in all of the corners and crevices, especially where plumbing and wiring enter the RV. If you can see any daylight mice can get in. Fill these areas with silicone or foam.
Remove all food from the RV when it’s being stored and thoroughly clean the RV to remove any remnants of food that might attract mice and other rodents. Some people say mothballs help deter mice from making their home in your RV, and others say an alternative to mothballs is dryer sheets, like Bounce. I have talked to people who swear they work and the smell is much more pleasant. If you are close to where your RV is being stored you may want to use conventional mouse traps and check for mice every week or so.
Next you should defrost the freezer compartment and clean the refrigerator. Leave the doors open and place baking soda in the compartments to absorb any odors. If the RV is in long-term storage, and won’t be plugged in to electricity, it’s a good idea to turn off the main breaker in the distribution panel. Turn the LP gas supply valve off at the cylinder(s) or tank. Close the window blinds to avoid sun exposure to the carpet, drapes and upholstery. Leave doors drawers and cabinets open. Clean the A/C filter(s). If you have vent covers installed on the overhead vents, that prevent rain from getting inside, leave them cracked open to allow for some ventilation. Remove any dry cell batteries from devices like smoke alarms, clocks etc.
RV Exterior
When you store your RV outside for extended periods the exterior begins to show signs of wear, caused by the constant exposure to the elements. Ozone in the air and ultraviolet, (UV) rays from the sun start to take their toll. Ozone causes the paint to fade and makes products like rubber and vinyl dry out, crack, and start to deteriorate. The UV rays from the sun make this aging process happen quicker. Before you store your RV you need to give the exterior a thorough cleaning. Whenever I’m washing or cleaning anything, whether it’s an automobile or the RV, I start from the top and work my way down. It’s a good idea to clean the RV roof before putting the RV in storage too. The type of roof your RV has will determine the cleaner you will need to use. Wash the exterior and if you’re really motivated wax it, using a quality wax formulated for the type of exterior surface your RV has. A good coat of wax protects your RV finish the same as it does an automobile. When you are cleaning the RV exterior inspect all roof seams, body seams and window sealant for any cracks and openings that would allow water to get in. Consult your RV dealer for sealants compatible with these materials and re-seal as required.
Don’t forget to clean the awning fabric, and let it dry completely before storing it. If you have a pop-up or hybrid trailer make sure all of the tenting material is clean and dry before storage.
Ideally you should try to store your RV under a covered area and on a solid surface like concrete. If this isn’t possible avoid parking under trees and in tall grass, fields or wooded areas. If the RV won’t be parked under some type of covered shelter you may want to invest in a cover. Covering your RV can be a logical and cost effective way to help protect your investment. If you decide to use a cover make sure it is made of a breathable material.
Service all locks with a spray lubricant and lubricate all hinges. Insects are attracted to the odorant added to LP gas. You may want to cover LP gas appliance vents to prevent insects from making their winter home inside these vents. If you do cover the vents, remember to remove the cover next spring.
RV Chassis
Just like the exterior of the RV, the tires on your RV can be damaged by the harmful UV rays from the sun. Inflate the tires to the manufacturer’s recommended pressure and cover the tires with covers that will block out the sunlight. Place something like a piece of wood between the ground and the tires. Frozen ground and petroleum based surfaces, like asphalt, can damage tires over time. Make sure that whatever you use to block the tires is larger than the footprint of the tire. No portion of the tire should hang over the edge of the tire block; this can cause internal damage to the tire. For trailers, chock the wheels front and rear. If you are storing a pop-up outdoors angle the tongue downward to assist in snow and water run-off.
Battery maintenance is an important part of winter storage preparation. If you plan to start the unit while in storage, and to periodically plug the unit into shore power leave the batteries in the unit. Plugging it into shore power once a month for about eight hours will help keep the coach batteries topped off. At a minimum you should check and adjust the water levels in all batteries and make sure the batteries are fully charged. A discharged battery will freeze much quicker than a fully charged battery. If the RV is in long-term storage it’s better to remove the batteries and store them where they will not freeze. In either case keep the batteries fully charged when they are in storage.
Note: If your converter charger doesn’t have a three stage charging system (or storage maintenance mode) don’t leave the unit plugged in constantly. This could overcharge the batteries and deplete the electrolyte levels.
If it’s a motorized RV you should fill the fuel tank prior to storage and add a fuel stabilizer. Run the engine and the generator long enough for the stabilizer to get through the entire fuel system. Change the oil and oil filter on the engine and the generator prior to storage. Acids accumulate in used oil and can corrode engine bearings, especially while sitting for long periods of time. If possible exercise the generator for at least two hours every month with a minimum of a ½ rated load on it. Consult your generator owner’s manual for load ratings.
Next week I will discuss how to prepare the RV plumbing system for the cold winter months.
If you would like to learn more about winterizing & storing your RV check out our Winterizing & Storing your RV DVD
Happy Camping,
Mark J. Polk
RV Education 101
RV University
Copyright 2009 by Mark Polk, owner of RV Education 101
Wednesday, September 9, 2009
Trailer Sway; Part 2
In last week’s article I talked about what trailer sway is, and I ended the article by listing some of the most important items associated with trailer sways. This week we want to discuss some of the ways to help control trailer sway based on these causes for trailer sway.
If you missed last week’s article you can read it here: Trailer Sway; What It Is & How To Control It
The most important items associated with trailer sways are:
a) underinflated tires
b) improper weight distribution
c) improper hitch adjustments
d) no sway control
e) air pressure from transfer trucks passing
f) long downhill (descent)
g) lateral wind
h) towing speed
i) inadequate towing vehicle
j) overload conditions
k) hitch to tow vehicle rear axle distance
l) poor trailer design
m) Mismatched tow vehicle & trailer
n) Not completing trailer/tow vehicle checklist
So, to help avoid trailer sway, we recommend the following remedies:
a) Underinflated tires: Never leave on a trip without a tire inspection. If necessary, adjust the inflation pressure according to manufacturer recommendation. Always check and inflate tires when they are cold, before traveling more than one mile. Whenever you stop, inspect the tow vehicle and trailer conditions to include tire conditions. Check tire and hub temperature. In case of abnormally hot tires, or hubs there is something wrong. It may be bearing problems, underinflated tires or axle overloads. Try to identify the problem and correct it.
b) Improper weight distribution: When a trailer is manufactured it has very stringent weight balances. When you add after-market equipment or load the trailer try to balance the loaded weight from side-to-side and front to back. Bad lateral weight distribution can provoke sways and bad front to back weight distribution may generate up/down sways (Figure 3). Remember that the weight over the hitch ball should be 10 to 15% of the total loaded trailer weight. If the trailer has less than 10% tongue weight, load more weight towards the front of the trailer.
c) Hitch adjustments: Whenever using a weight distribution hitch it is extremely important that it is adjusted properly. If you are not sure how to adjust the hitch components take it to an authorized RV service center to have it adjusted.
d) No sway control: Sway controls help to limit the possibility of sway starting. Whenever possible have a sway control installed and make sure you understand how to adjust it.
e) Transfer trucks passing: Large trucks will pass you and you need to be prepared to make slight steering adjustments. When a truck passes you the main factor is the air displacement. The air pressure coming off of the truck pulls and pushes against the trailer. Try to observe wind intensity and direction, as well the air moisture which is the main villain. Humid air is heavier and increases lateral trailer displacements when being passed. Being aware of the situation is the best defense. Be prepared to make slight steering corrections, but do not over steer.
f) Long downhill (descent): When descending inclines reduce your speed, use a lower gear and apply weak vehicle braking, if necessary. Never do any abrupt vehicle braking. Continued use of the vehicle brakes can cause them to fade and not work properly. It may be necessary to manually activate the trailer brakes periodically to help slow down and/or to control sway. Slowly slide the brake lever over to activate the trailer brakes. It is important to manage a safe and manageable speed when descending inclines.
g) Lateral wind: Strong cross winds and windy days in general can be very dangerous when towing a trailer. It is better not to travel on very windy days. If you do experience lateral wind reduce your speed substantially and remain alert.
h) Towing speed: It is difficult to state what a safe speed is when towing a trailer. There are many variables, but not exceeding a speed of 60 miles/hour is a fair assessment. Use lower speeds if the traffic conditions are not normal (lateral winds, high humidity, rain, road conditions, downhill, etc).
i) Inadequate towing vehicle: Your tow vehicle may have enough power to move a trailer down the road, but what must be considered is whether the tow vehicles weight is adequate to support slowing down and to help prevent trailer sway. Every tow vehicle has weight limits and ratings. It is very important that these weight ratings are not exceeded. The farther you are from exceeding weight limits the safer it is for you and your family. A very general rule is the tow vehicles towing capacity should be capable of towing the Gross Vehicle Weight Rating (GVWR) of the trailer you are towing.
j) Overload: Never overload the tow vehicle or the trailer. Overloading tires, axles, Gross Vehicle Weight Ratings (GVWR) and Gross Combined Weight Ratings (GCWR) is extremely dangerous. Make sure all cargo loaded in the trailer is secured and that all weight added is properly distributed.
k) Hitch to tow vehicle rear axle distance: The distance from the tow vehicles rear axle to the hitch ball can contribute to sway. Less distance is always better. Ideally a longer wheelbase vehicle with a shorter overhang from the rear axle to the hitch ball is the best scenario. Basically it is associated with the lever effect. The distance between the rear axle and the hitch ball position may be understood as the lever length; and the longer the distance it is the higher the lateral forces applied to the axle position.
l) Poor trailer design: When there is too much weight behind the trailers axles causing the tongue weight to be less than 10% of the trailers weight it has a natural tendency to sway. In this case it will be necessary to load some of the weight towards the front of the trailer to increase tongue weight. Ideally tongue weight should be between 10 to 15% of the loaded trailer weight.
m) Tow vehicle/trailer checklist: The tow vehicle and trailer must be in good mechanical condition to safely tow. The brakes and suspension on both the vehicle and trailer must be in proper operating condition. Prior to leaving on a trip inspect the suspension (shock absorbers, springs, bars, tires and other components on the trailer and the vehicle) and the operation and adjustment of the electric brakes for the trailer. Tires must be in good condition and inflated properly for the load. A checklist can help you remember what items to check.
Note: Adhering to these recommendations can help prevent sway from starting, but keep in mind there are no guarantees you will not encounter sway. If you do experience trailer sway you should gradually reduce speed, avoid using the vehicle brakes if possible, avoid harsh steering movements if possible and manually apply the trailer brakes by sliding the lever over on the electronic brake control to help bring the sway under control.
Everyone towing a trailer, even the most experienced, is a potential sway victim.When it comes to trailer sway caution is a necessity, but not always sufficient. Safety first! Being aware of what sway is and what you can do to help prevent it can help prepare you in the event your trailer starts to sway.
Note: Something else to keep in mind is wheel bearing and brake maintenance on your trailer. With routine wheel bearing and brake inspections and maintenance you can rest assured that not only will the bearings and brakes operate properly and safely, but you can prevent costly and untimely breakdowns.
Happy Camping,
This article was written by Jose Adauto de Souza & Mark Polk
RV Education 101
RV University
copyright 2009 by Mark Polk owner of RV Education 101
Wednesday, September 2, 2009
Trailer Sway, what it is & how to control it
A few weeks ago I was contacted by Jose Adauto de Souza, who lives and works in Brazil. Adauto is a Petroleum Geologist/Geophysicist close to being retired. Since 1978 he has been a camping enthusiast, starting with tents, then a pop-up, travel trailers and now has a Class A motorhome. (I have been through the same RV progression, and around the same time frame as Adauto).
He is a member of a regional RVing group in Rio de Janeiro State called “Amigos do Rio RV Group (Rio’s Friends) (Brazil)”. Over the last year Adauto has been researching and compiling free RV information for other RV enthusiasts in Brazil, since they do not have a bibliography about RVing in Brazil. He was working on a trailer sway article when he contacted me, to help educate some of the RVers in his group on sway issues. He wanted to know if I would be interested in working together with him on the article. At times it was a bit difficult to tranlate what each of us were saying to each other, but I think we figured it out.
This is part 1 of 2. I will publish part 2 of the article next week.
Trailer sway, that side-to-side fishtailing movement,
occurs when there is a force perpendicular to the tow vehicle and trailer trajectory, applied to the hitch ball. An important factor in controlling sway is the amount of tongue weight applied to the hitch ball, and how that weight is distributed to the tires on the tow vehicle. A general rule is trailer tongue weight should be 10 to 15% of the fully loaded trailer weight, for trailers weighing over 2,000 pounds. If the tongue weight (what generates friction to the tow vehicle rear tires) is properly distributed to the rear tires of the tow vehicle most lateral forces encountered will not be sufficient to start sway. If the lateral forces do overcome the tire friction trailer sway will start.
This would be a good time to include an analysis about tow vehicle and trailer traffic speed. As speed increases, tire traction decreases with a corresponding increase in the possibility of trailer sway. At 60 mph, and under wet road conditions, a weak lateral wind may start a lateral trailer displacement.
Natural trailer balance, when travelling, may be understood as a vertical pendulum, but in the opposite direction
. The trailer sway is similar, but the displacement is horizontal, over the road, with the trailer (and the tow vehicle by consequence) going from one side to the other many times. If the trailers vertical stabilization, associated with the suspension, is working properly it helps in preventing small sways. Weight distribution bars reduce vertical displacements (swings) and transfers the hitch weight to the vehicle and trailer tires. This results in the rear tires gripping the road better, and may avoid these sideslips. So, it is important, before leaving on a trip, that we complete a checklist of all items associated with the tow vehicle and trailer stabilization. These checks would include inspecting items like tires, weight distributing bars, proper hitch adjustments, the trailer and tow vehicle suspension systems, and that all cargo is distributed evenly. If these items are not in a good shape, it will decrease the speed that we can safely travel at.
The bigger the trailer is (taller and longer) increases the chance for sway. There are two reasons for this, an increase in weight and an increase in mass (the area that will receive lateral winds). Weight increase will augment the forces applied to the hitch ball, especially when traveling downhill, due to the gravity, acceleration and also in case of any vehicle brake activation. If there is any unbalanced item in the towing system, it may become sufficient to start sway. If the trailers lateral area is larger, the amount of forces due to lateral winds is also increased. These forces may destabilize the tow vehicle and trailer motion, increasing the chance for sway.
There is another very important item associated with sways, and that is the number of trailer axles. Compared to one axle, two trailer axles increases the number of wheels 100% over the ground, and by consequence the increased tires gripping the road decreases the chance for sway. Another peculiarity associated with one axle is the vertical motion (front-back direction, referred to as porpoising) associated with vehicle brake activation
. In this situation the trailers front end will tend to push downward. This vertical downward motion enhances the tow vehicles back wheel traction, but decreases the front wheel traction, and the forces applied in the opposite direction (up) will reduce the tow vehicles rear wheels traction. Depending upon total weight balance, the tow vehicle and trailer may start a back or front sway and the tow vehicles front motion control will be compromised. It is well known that for both single and dual axle trailers, the larger the trailer is the more unstable it is when talking about porpoising. Proper hitch work can mitigate some of this from occuring.
Statistics prove that 5th wheel trailers are more stable and sways associated with them are seldom reported. Why? It is mainly because a more stable condition is obtained due to the 5th wheel hitch being positioned over and close to the towing vehicle rear axle. In the case of a 5th wheel, lateral forces do not affect it like a trailer that is hitched at the rear of the tow vehicle. The weight at the hitch position of a 5th wheel trailer is higher and over the axle, enhancing the tow vehicle traction on the road surface. But, when towing a 5a wheel, the driver must be more careful in descending an incline because the natural tendency will be for the weight of the trailer to push the towing vehicle.
Always keep in mind the towing vehicle has a maximum tow capacity and that you must compute total RV weights including, passengers, cargo, and fluids and fuel. Also keep in mind that any weight added to the tow vehicle takes the same amount of weight from the towing capacity.
The most important items associated with trailer sways are:
a) underinflated tires
b) improper weight distribution
c) improper hitch adjustments
d) no sway control
e) air pressure from transfer trucks passing
f) long downhill (descent)
g) lateral wind
h) towing speed
i) inadequate towing vehicle
j) overload conditions
k) hitch to tow vehicle rear axle distance
l) poor trailer design
m) Mismatched tow vehicle & trailer
n) Not completing trailer/tow vehicle checklist
This article was written by Jose Adauto de Souza & Mark Polk
Tune in next week for part 2 of the article when we discuss what you can do to help control trailer sway.
Happy Camping,
Mark Polk
RV Education 101
RV University
Copyright 2009 by Mark Polk owner of RV Education 101
He is a member of a regional RVing group in Rio de Janeiro State called “Amigos do Rio RV Group (Rio’s Friends) (Brazil)”. Over the last year Adauto has been researching and compiling free RV information for other RV enthusiasts in Brazil, since they do not have a bibliography about RVing in Brazil. He was working on a trailer sway article when he contacted me, to help educate some of the RVers in his group on sway issues. He wanted to know if I would be interested in working together with him on the article. At times it was a bit difficult to tranlate what each of us were saying to each other, but I think we figured it out.
This is part 1 of 2. I will publish part 2 of the article next week.
Trailer sway, that side-to-side fishtailing movement,
occurs when there is a force perpendicular to the tow vehicle and trailer trajectory, applied to the hitch ball. An important factor in controlling sway is the amount of tongue weight applied to the hitch ball, and how that weight is distributed to the tires on the tow vehicle. A general rule is trailer tongue weight should be 10 to 15% of the fully loaded trailer weight, for trailers weighing over 2,000 pounds. If the tongue weight (what generates friction to the tow vehicle rear tires) is properly distributed to the rear tires of the tow vehicle most lateral forces encountered will not be sufficient to start sway. If the lateral forces do overcome the tire friction trailer sway will start.This would be a good time to include an analysis about tow vehicle and trailer traffic speed. As speed increases, tire traction decreases with a corresponding increase in the possibility of trailer sway. At 60 mph, and under wet road conditions, a weak lateral wind may start a lateral trailer displacement.
Natural trailer balance, when travelling, may be understood as a vertical pendulum, but in the opposite direction
. The trailer sway is similar, but the displacement is horizontal, over the road, with the trailer (and the tow vehicle by consequence) going from one side to the other many times. If the trailers vertical stabilization, associated with the suspension, is working properly it helps in preventing small sways. Weight distribution bars reduce vertical displacements (swings) and transfers the hitch weight to the vehicle and trailer tires. This results in the rear tires gripping the road better, and may avoid these sideslips. So, it is important, before leaving on a trip, that we complete a checklist of all items associated with the tow vehicle and trailer stabilization. These checks would include inspecting items like tires, weight distributing bars, proper hitch adjustments, the trailer and tow vehicle suspension systems, and that all cargo is distributed evenly. If these items are not in a good shape, it will decrease the speed that we can safely travel at.The bigger the trailer is (taller and longer) increases the chance for sway. There are two reasons for this, an increase in weight and an increase in mass (the area that will receive lateral winds). Weight increase will augment the forces applied to the hitch ball, especially when traveling downhill, due to the gravity, acceleration and also in case of any vehicle brake activation. If there is any unbalanced item in the towing system, it may become sufficient to start sway. If the trailers lateral area is larger, the amount of forces due to lateral winds is also increased. These forces may destabilize the tow vehicle and trailer motion, increasing the chance for sway.
There is another very important item associated with sways, and that is the number of trailer axles. Compared to one axle, two trailer axles increases the number of wheels 100% over the ground, and by consequence the increased tires gripping the road decreases the chance for sway. Another peculiarity associated with one axle is the vertical motion (front-back direction, referred to as porpoising) associated with vehicle brake activation
. In this situation the trailers front end will tend to push downward. This vertical downward motion enhances the tow vehicles back wheel traction, but decreases the front wheel traction, and the forces applied in the opposite direction (up) will reduce the tow vehicles rear wheels traction. Depending upon total weight balance, the tow vehicle and trailer may start a back or front sway and the tow vehicles front motion control will be compromised. It is well known that for both single and dual axle trailers, the larger the trailer is the more unstable it is when talking about porpoising. Proper hitch work can mitigate some of this from occuring.Statistics prove that 5th wheel trailers are more stable and sways associated with them are seldom reported. Why? It is mainly because a more stable condition is obtained due to the 5th wheel hitch being positioned over and close to the towing vehicle rear axle. In the case of a 5th wheel, lateral forces do not affect it like a trailer that is hitched at the rear of the tow vehicle. The weight at the hitch position of a 5th wheel trailer is higher and over the axle, enhancing the tow vehicle traction on the road surface. But, when towing a 5a wheel, the driver must be more careful in descending an incline because the natural tendency will be for the weight of the trailer to push the towing vehicle.
Always keep in mind the towing vehicle has a maximum tow capacity and that you must compute total RV weights including, passengers, cargo, and fluids and fuel. Also keep in mind that any weight added to the tow vehicle takes the same amount of weight from the towing capacity.
The most important items associated with trailer sways are:
a) underinflated tires
b) improper weight distribution
c) improper hitch adjustments
d) no sway control
e) air pressure from transfer trucks passing
f) long downhill (descent)
g) lateral wind
h) towing speed
i) inadequate towing vehicle
j) overload conditions
k) hitch to tow vehicle rear axle distance
l) poor trailer design
m) Mismatched tow vehicle & trailer
n) Not completing trailer/tow vehicle checklist
This article was written by Jose Adauto de Souza & Mark Polk
Tune in next week for part 2 of the article when we discuss what you can do to help control trailer sway.
Happy Camping,
Mark Polk
RV Education 101
RV University
Copyright 2009 by Mark Polk owner of RV Education 101
Thursday, August 13, 2009
Preventive Maintenance Keeps your Generator Going & Going & Going....
Preventive Maintenance is maintenance the owner can perform on your RV before a problem exists. These checks are designed to prevent or identify potential problems that could lead to mechanical breakdown, malfunction or failure of a component or system on your RV. Preventive Maintenance consists of cleaning, inspecting, lubricating, adjusting and servicing your RV.
Whether it’s a portable generator you use at home or the generator in your RV here are some simple PM checks you can perform to keep it in top operating condition. In addition to these checks you should always follow the maintenance schedule and guidelines that came with your specific generator set.
Note: These PM checks are for a gasoline fueled generator. Diesel motorhomes come equipped with a diesel or propane fueled generator. Consult your generator owner’s manual for maintenance checks and services for your specific generator.
Always check the oil level prior to starting the generator. Starting and running a generator that is low on oil can result in costly damage to the generator’s engine. Add proper type of oil as required.
Always check the exhaust system prior to starting the generator. A damaged exhaust system can result in carbon monoxide gas getting inside the RV. Inspect the entire generator exhaust system. Never operate a generator with a damaged exhaust system!
Keep the generator set and the compartment it is housed in clean. You can use compressed air to assist in cleaning out the generator compartment and a clean shop rag to clean the generator set. While you are cleaning the generator check all electrical connectors for secure connections.
Note: always wear safety glasses when using compressed air.
Check all of the filters on the generator. A typical generator may have an air filter, fuel filter and oil filter. Check your generator owner manual for the types of filters your generator has and where they are located.
Maintenance checks and services for a generator are based on hours of operation. Monitor the hour meter on your generator set for all maintenance intervals.
Change the oil and oil filter (if equipped). This is perhaps the most important PM Service you can make on your generator to ensure years of reliable service. Change the oil and replace the oil filter at the recommended intervals. If you don’t feel comfortable changing the oil and filter have an authorized RV service center do it for you.
Exercise the generator. There are several reasons why you should start and exercise the generator set on a regular basis. Moisture build up can cause damage to your generator. When you exercise your generator it heats up the generator windings and eliminates this moisture build up. This monthly exercise regime also lubricates all of the engine seals and components and helps to prevent carbon build up. When you exercise the generator it should have a load on it and it should run for at least two hours every month. Check your generator owner’s manual for load ratings specific to your unit.
Add a fuel stabilizer to the motorhomes gas tank or generator gas tank and run the generator long enough for the stabilizer to get through the fuel system. This will help prevent gas related problems on generators, like not starting or surging. Fuel stabilizers can protect the fuel system for up to six months or longer, but keep in mind the importance of exercising the generator too.
Follow these simple steps, and the maintenance and service instructions in the generator owner’s manual, and you can get years of reliable, trouble-free service from your generator set.
Happy Camping,
Mark Polk
RV Education 101
RV University
copyright 2009 by Mark Polk owner of RV Education 101
Subscribe to:
Posts (Atom)