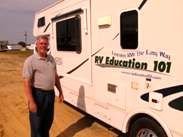
It’s time again for my annual RV spring preparation checklist. If your RV has been sitting idle all winter you need to whip it back into shape for another season of camping. At first glance this checklist looks like it would take two days to complete, but it’s actually something you can do on a Saturday when there’s nothing else to do. Following a checklist helps make sure nothing is overlooked.
■ Depending on how your unit was winterized it will need to be de-winterized.
■ Every spring I like to sanitize the water system. Watch the video.
■ Inspect plumbing for water leaks. With the water system pressurized, either by the water pump or hooked up to city water, inspect the plumbing for any water leaks. Check the operation of the toilet.
■ Remove any protective covering that you may have put over LP gas vents or outside vents to keep insects or rodents out. Remove any mousetraps, mothballs or other items you may have put out. Open all doors, cabinets and compartments and check for rodent intrusion. Clean as required.
■ Wash the unit thoroughly. This is a good time to inspect the roof and body seams, and window sealant for cracks or damage that would allow water to get in. Consult a dealer for sealants compatible with these materials and reseal as required.
■ Inspect the operation of the awning and check the awning fabric for any damage. Clean the awning fabric if necessary and let the fabric dry thoroughly before storing.
■ Inspect the tires for signs of dry rot and wear. Inflate all tires to the recommended tire pressure. Check the lug nuts for proper torque. Any damage evident on the tires should be inspected by a qualified service center.
■ Lubricate all hinges and locks with a graphite spray lubricant.
■ Inspect and clean the RVs interior.
■ Plug in any appliances that you unplugged for storage and replace any dry cell batteries you may have removed. This is a good time to put new batteries in items like smoke alarms, carbon monoxide detectors and clocks.
■ Test the operation of the carbon monoxide alarm, LP gas leak detector and smoke alarm.
■ Check the fire extinguisher. Make sure it is fully charged. A discharged fire extinguisher should be replaced immediately. If it is a dry powder type turn it upside down and tap on the bottom to help release the powder that settled on the bottom.
■ Reset any breakers you may have turned off. If you removed any fuses for storage re-install them.
■ Clean or replace air conditioner filters if it wasn’t done prior to storage and remove any covers that were put over air conditioners.
■ Open vents and windows and air the unit out.
■ If you removed the coach and chassis batteries for storage install them. Whether they were removed or not check the electrolyte levels, clean the terminals and clamps, and check the charge level in all batteries. Recharge batteries as necessary.
■ Check the operation of the electric steps if applicable. Lubricate step mechanism.
■ Test the operation of the hydraulic jacks if applicable. Check hydraulic fluid level.
■ If you didn’t change the oil and filters in the generator prior to storage this is a good time to do it. Inspect the generator exhaust system for damage prior to starting. Start and run the generator for two hours with at least a half rated load on it. Consult the generators owner manual for load ratings.
■ Turn the generator off and plug the unit into shore power. Turn the refrigerator on in the electric mode. Allow sufficient time to cool and check for proper operation.
■ Check all 12-volt interior lights and accessories.
■ Test the monitor panel for proper operation.
■ Check the operation of slide-outs if applicable.
■ Check the remaining 120-volt appliances for proper operation.
■ Test the Ground Fault Interrupter (GFI) for proper operation.
■ Turn the refrigerator off, leave the doors open and allow sufficient time for it to get to room temperature so it can be checked in the LP gas mode.
Note: Before using the LP gas system it’s a good idea to have a leak test and gas operating pressure test preformed. A qualified technician with the proper equipment should do these tests.
■Once this is accomplished, turn the LP gas valve on and check the operation of all LP gas appliances. Be sure the water heater is full of water before testing the water heater. If a gas appliance is not operating properly have it inspected by a qualified technician. Insects are attracted to the odorant added to LP gas and build nests that can affect the appliance from operating properly.
■ If your unit was in long-term storage and you didn’t change the engine oil and filter prior to storage this would be a good time to do it or schedule to have it done.
■ Check all fluid levels in transmission, power steering, engine coolant, engine oil, windshield washer and brakes. Consult vehicle owner’s manual.
■ Start the engine and check for proper readings on all gauges. Check for proper operation of dash air conditioner.
■ Check the condition of windshield wiper blades and replace if necessary.
■ Check the operation of all chassis lights.
■ In addition to this if you have a pop-up or travel trailer the wheel bearings and brakes (if equipped) should be inspected at least once annually. Inspect any canvas for dry rot and tears; inspect all hitch work and coupler for damage. Inspect the breakaway switch and pigtail for proper operation.
This list is not all-inclusive, but it seems to work for me. Now for the fun part, load your clothes, food, and personal belongings, hit the road and have fun exploring this wonderful country we live in.
This checklist was taken from our Checklist for RVers Ebook
Happy RV Learning,
Mark Polk
RV Education 101
RV University
RV Orientation
Go for the RV Gold
Follow us on FACEBOOK
RV Consumer
Subscribe to:
Post Comments (Atom)


No comments:
Post a Comment