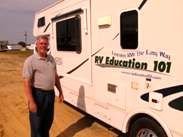
As we head toward colder temperatures, I would like to suggest a few preventive maintenance checks to prepare your RV for the fall and winter camping seasons. Please don’t confuse these checks with winterizing your RV or preparing it for winter storage.
In no particular order, here are my top 7 pre-winter RV checks:
1. Inspect your RV batteries
Check all battery connections for secure mounting. Clean the batteries with a 50/50 mixture of baking soda and water, if necessary. If you have lead-acid batteries, check the electrolyte level in each cell and add distilled water, if necessary. Many older converter chargers provide a constant charge of approximately 13.5 volts, which is too high for fully-charged batteries and can cause the electrolyte to boiled off, resulting in an early death for the batteries.
Check water levels weekly, at a minimum, when using the RV. Test the battery state-of-charge and charge any batteries that are at or below 80 percent. A discharged or partially-charged battery will freeze much faster than a fully-charged battery. Use a digital voltmeter to measure voltage and get a quick picture of the batteries’ depth of discharge. If you don’t feel comfortable working on or around batteries, have a reputable RV service center perform battery maintenance for you.
Note: A 12-volt battery that is charged should read 12.5 to 12.7 volts. Readings less than 12.5 indicate the battery state of charge is below 80 percent and the battery needs to be charged. A 6-volt battery that is charged should read 6.25 to 6.37 volts. Readings below 6.25 indicate the battery state of charge is below 80 percent and the battery needs to be charged.
2. Test automotive antifreeze
The antifreeze in your tow vehicle or motorhome radiator should always have a 50- to 70-percent concentration of antifreeze to water. Water does a good job helping to cool an engine but it freezes quickly during cold winter temperatures. Water can also cause certain metals to rust and corrode over time. The proper concentration of antifreeze is necessary to provide freeze protection and chemical protection against corrosion.
To test the antifreeze, use quality test strips, a float-type hydrometer or a refractometer. A refractometer is the most accurate testing device.
Inspect all coolant hoses for signs of damage or leaks. Coolant hoses deteriorate from the inside out. Inspect all hoses for wear, cracks, soft spots, brittle areas and leaks. Inspect hose clamps for secure mounting and replace any damaged coolant hoses or clamps as required
3. Use a fuel stabilizer product like STA-BIL
Fuel stabilizers provide excellent protection against stale fuel during periods of storage. They contain corrosion inhibitors, remove water and help to clean fuel injectors. There are fuel stabilizers designed for use with gasoline and diesel engines. I use a fuel stabilizer in gas-powered lawn equipment, ATVs, boats, motorcycles and RVs.
4. Furnace checkup
One LP-gas appliance that gets overlooked during warm weather is the forced-air furnace. Most service requirements for the furnace need to be accomplished by a reputable RV service center, but there are a few things the owner can do to prepare the furnace for cold-weather operation.
The battery plays an important role in the proper operation of the furnace. Keeping lead-acid batteries watered and fully charged will prevent many furnace-related problems. Inspect furnace ducting that is above floor level for damage, such as crushed ducting or obstructions that could affect furnace operation. Make sure the furnace air return is not blocked or restricted. Test the operation of the furnace before the day arrives when you actually need it. Have a certified technician test your LP-gas system annually for proper appliance operating pressure and leaks.
5. Inspect all safety devices and replace all dry-cell batteries
Carbon monoxide is deadly. Test the CO detector, LP-gas leak detector and smoke alarm for proper operation every time you use your RV. Instruct individuals on symptoms and what to do if they are exposed to carbon monoxide or if they hear LP-gas leak detector alarms. Replace all dry-cell batteries when you change the settings on your clocks in the spring and fall. Make sure you have a charged fire extinguisher on hand and that you and other adults know how to operate it.
6. Clean, inspect and reseal your roof as necessary
Not that this is directly related to fall or winter use, but I like to inspect the roof twice a year, at a minimum, and I think spring and fall are good times of the year to make these checks.
Note: Exercise caution any time you work on the roof of your motorhome. The roof surface can be slippery and a fall can result in serious injury, or worse.
Clean your roof with an approved cleaner for the type of roofing material your motorhome has. Every time you clean the roof, inspect the sealants around all of the openings and the seams on the roof. Water will take the path of least resistance, and if there is the smallest opening, it will find it. Thoroughly inspect the roof sealants for potential leaks and reseal any areas of the roof seams and around openings where you suspect a leak. Make sure you use sealants compatible with your roofing material. Keep in mind that your warranty can be voided if you fail to perform some of these required inspections. Check your motorhome owner’s manual for roof inspection intervals.
7. Plan for non-use
If you don’t plan to use your RV over the fall and winter months, winterize the plumbing system to prevent freezing. Prepare all other systems for short or long-term storage.
Check out our Winterizing & Storing DVD
Winterizing & Storing E-book
Happy RV Learning,
Mark Polk
RV Education 101
RV University
RV Orientation
Go for the RV Gold
Follow us on FACEBOOK
RV Consumer
Subscribe to:
Post Comments (Atom)


No comments:
Post a Comment