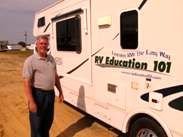
Normally I would be discussing RV antifreeze used to protect the water system in your RV or boat from freezing, but today I want to talk briefly about automotive antifreeze. If I were the CEO of an automotive antifreeze company my entire focus would be on the need to regularly flush the coolant system and add new antifreeze to the vehicle cooling system.
I would do this for two reasons.
1) From a business standpoint I would do it to increase revenue. The average consumer doesn’t relate changing antifreeze in their vehicles like they relate to changing the engine oil on a regular basis. If they were educated on the benefits of changing the antifreeze in their vehicles my company profits would soar.
That brings me to reason number two.
2) The coolant system of any vehicle performs a very important job; to prevent the heat producing engine from overheating and quite possibly seizing up. When you don’t flush and replace the antifreeze periodically rust, scale and corrosion can build up in the radiator and engine coolant passages, and eventually result in an overheated engine.
Let’s talk a minute about what a vehicle coolant system is intended to do. First of all, if an engine did not have methods for transferring the heat that is produced through combustion and friction the hot metal parts would melt down and seize up. Heat that the engine produces is basically removed through the exhaust system and through the cooling system. All heat producing sections of an internal combustion engine need to be cooled, including the combustion chamber, heads, cylinder walls and the engine block itself. The way this is done is by circulating coolant around these heat producing areas of the engine. The coolant picks the heat up and releases much of it as it circulates through the vehicles radiator.
Water does a good job helping to cool an engine but it has some drawbacks. Most importantly it freezes quickly during cold winter temperatures. Water can also cause certain metals to rust and corrode over time. This is why the water in a vehicle cooling system is mixed with what we refer to as antifreeze. Glycol antifreeze does several things to help your engine:
1) It helps to lower the freezing point of water.
2) The corrosion inhibitors that are added help prevent scale and rust build-up in the cooling system.
3) It provides protection against boiling in the hot summer months.
4) Antifreeze helps keep the engine operating at its most efficient temperature regardless of operating conditions and outside temperatures.
When we don’t flush and replace the antifreeze at recommended intervals these chemicals start to break down and cannot perform the job as effectively as new antifreeze can. Just like used engine oil breaks down and needs to be replaced for maximum lubrication and cooling performance.
How many of you have ever witnessed a vehicle sitting along the side of a road with steam billowing out of the engine compartment from overheating? I cannot count the number of times I have seen this. Many times the cause is due to the failure of a part within the cooling system. If a radiator hose, heater hose, water pump, thermostat or fan belt fails the result is an overheated engine. Or, if the coolant system hasn’t been flushed and the antifreeze replaced for several years the result is an overheated engine. The bottom line is periodic inspections of the cooling system components, and flushing and replacing antifreeze at recommended intervals will add years of life to the vehicles engine and prevent untimely breakdowns.
Keep in mind that glycol antifreeze is poisonous to humans and pets and that it needs to be disposed of properly. You should follow the guidelines in your vehicle owner’s manual for flushing and replacing antifreeze and make sure you are using the proper type of antifreeze recommended for your particular vehicle.
Remember, getting here is supposed to be half the fun! Add the vehicle cooling system to your pre-trip inspection if you don’t already include it.
Happy RV Learning,
Mark Polk
RV Education 101
RV Online Training
Showing posts with label rv winterizing. Show all posts
Cold Weather RVing
There are lots of things to do and see in the wintertime; beautiful winter scenery, snow skiing, hunting, riding snowmobiles and much more. It’s no wonder so many people enjoy using their RV’s year round. When winter approaches each year I get numerous e-mails requesting information about using RV’s in cold temperatures. One reason I haven’t written on this subject in the past is because it would require more than just a short article to thoroughly cover this topic. Another reason for not writing about this in the past is that there are no guarantees that your RV can or will be 100% protected from the harsh winter elements by following written advice on the subject.
What I can do is offer you some suggestions and ideas that will help to protect your RV if you plan to use it during the cold winter months. I just can’t guarantee that it will be 100% protected. These suggestions and ideas are for short term winter camping in your RV. If you plan to take extended RV trips in cold weather there are many other precautions and measures that need to be considered, like using insulated skirting around the bottom of the RV for example.
Note: What we will be concentrating on in this article is how to protect your RV during cold weather camping. It is extremely important that you also understand how to protect yourself and other campers in cold temperatures.
One of the first considerations for cold weather RVing is if you will be traveling in temperatures below freezing. If this is the case, and there is water in the RV water system, your plumbing lines or water heater tank could freeze, resulting in costly repair bills, not to mention ruining your winter wonderland RV trip. To avoid this from happening I travel with the water system winterized. It is actually much easier to winterize an RV than most people think it is, and it’s not very expensive either. I have winterized and de-winterized our RV as many as four times in one winter.
The good news is it is still possible to use the bathroom facilities when you are traveling with the RV winterized. We take one gallon jugs filled with water to use in the toilet, and if your holding tanks are not heated you can put some RV antifreeze in the holding tanks to prevent the contents from freezing. Add the RV antifreeze (1-2 gallons) through the toilet for the black water holding tank and down the shower or tub drain for the gray water tank. The antifreeze will also protect the shower or tub P-trap which is usually located below floor level. The amount of antifreeze required for the holding tanks will be based on the size of the tanks, and it will be necessary to add more RV antifreeze as waste water is added to the tanks to prevent the antifreeze from being diluted.
Don’t allow the holding tanks to fill completely, before emptying them, during cold weather camping. This will reduce the chance of freezing, resulting in damage to the holding tanks. Take bottled water along for drinking and other needs like cooking, washing up and brushing your teeth when the RV is winterized. We have a five gallon jug that we always take on trips, filled with tap water from our house, for our pet’s drinking water and our other needs. This comes in handy when the RV is winterized.
When we arrive at our destination I try to select a site that will be exposed to the sun throughout the day, but also where there is some type of wind break available. Position the RV on the site so the front or rear will be facing the brunt of any wind, not the side of the RV. If there is an electrical hook-up I de-winterize the water system so we can use everything. All of the water lines in our motorhome are in a heated space, so we don’t need to be too concerned about the water system freezing as long as the RV has heat. We leave the water heater turned on whenever the water heater tank is full so there is no chance of it freezing. Some water heaters operate off of LP gas and electricity. Keep in mind if it’s in the electric mode it will use 9 to 13 amps.
It’s important that you know where all of the plumbing on your RV is located. Some RVs have heat ducts going to the basement storage areas where the water system is exposed to outside temperatures, but many RVs do not. If portions of the RV water system are below floor level, in areas that are not heated, it is possible for it to freeze and damage the water lines. If you are hooked up to an external water supply one option is to leave a faucet in the RV dripping, to keep the water moving, and decrease the possibility of water lines freezing. Another option is to use heat tape to protect the exposed water lines. Heat tape can be purchased at most hardware or building supply stores. Make sure it is suitable for the types of water lines in your RV, and if you plan to use it on a water hose.
If it is extremely cold outside and the possibility exists that the outside water supply could freeze, or if the campground water supply is shut off for the winter, I fill our fresh water holding tank and use it for all of our water requirements. Again, keep in mind where your fresh water tank is located; ours is in a heated area. If the campgrounds shower facilities are still open it’s a good idea to use them to avoid the gray water holding tank from filling so quickly. In this situation it might be in your best interest to keep the RV winterized and just use the campgrounds facilities.
The best source for heat is to use the RVs forced air furnace. There are a couple of things you need to be aware of when you use the RV furnace. First of all it will consume more LP gas than any of the other LP gas fired appliances. The LP tank or cylinders should be full before leaving on your trip, and you will need to monitor the LP gas supply carefully during your stay. Second, if you are not plugged into an electrical supply the furnace fan can quickly drain the auxiliary battery(s). Batteries that are not fully charged in cold temperatures can freeze resulting in not being able to use the RV furnace. I recommend that you plan your stay where you have access to an electrical supply when camping in cold weather. When we are plugged into electricity we set the forced air furnace on a low setting, around 60 degrees, and supplement the heat with thermostatically controlled ceramic heaters. These heaters work extremely well and you don’t need to be concerned about a fire or carbon monoxide.
Caution: Carbon monoxide is deadly. You cannot see it, taste it or smell it. Never use your range burners or oven as a source of heat. If your RV is not equipped with a carbon monoxide detector you should purchase a battery operated model designed for use in RV’s. Always test the carbon monoxide detector for proper operation before each trip.
You also need to be aware of the symptoms of carbon monoxide poisoning:
* Dizziness
* Vomiting
* Nausea
* Muscular twitching
* Intense headache
* Throbbing in the temples
* Weakness and sleepiness
* Inability to think coherently
If you or anybody else experiences any of these symptoms get to fresh air immediately and if the symptoms persist seek medical attention. Information on carbon monoxide poisoning.
If you will be camping where you don’t have access to an electrical hook-up one option is to use a generator. A generator can keep the RV batteries topped off and allow you to use the RV furnace. You will need to have a sufficient supply of fuel on hand for the generator. If it’s a portable generator make sure the exhaust is directed away from the area where you are camping. Regardless of the type of generator always make sure the exhaust system is in proper operating condition and the carbon monoxide detector is working properly.
Here are a few more cold weather RV tips in no particular order:
* Do not store any water hoses with water in them. If you need to use it, it will probably be frozen. You can take it inside to thaw out if need be, or use a hair dryer.
* Covering the windows with curtains, drapes or almost anything will help to hold some of the heat in. It helps to cover overhead vent openings too.
* It may be necessary to take military type showers to keep from filling the gray water tank so quickly. Heat up some water, take the water and a tall glass and enjoy your shower.
* Leave cabinets or drawers open where water lines are located to allow heat to circulate around plumbing.
* Try to avoid opening the entry door as much as possible.
* Oh and don’t forget the electric blanket. It can be a lifesaver at night.
* If you haven’t purchased your RV yet and you know you will be using an RV in cold weather see if the manufacturer offers an arctic package option when you buy it. Some packages include higher R-factor insulation values, enclosed underbelly, heated holding tanks, dual pane windows and more.
Happy RV Learning,
Mark Polk
RV Education 101
RV University
RV Orientation
Go for the RV Gold
Follow us on FACEBOOK
RV Consumer
What I can do is offer you some suggestions and ideas that will help to protect your RV if you plan to use it during the cold winter months. I just can’t guarantee that it will be 100% protected. These suggestions and ideas are for short term winter camping in your RV. If you plan to take extended RV trips in cold weather there are many other precautions and measures that need to be considered, like using insulated skirting around the bottom of the RV for example.
Note: What we will be concentrating on in this article is how to protect your RV during cold weather camping. It is extremely important that you also understand how to protect yourself and other campers in cold temperatures.
One of the first considerations for cold weather RVing is if you will be traveling in temperatures below freezing. If this is the case, and there is water in the RV water system, your plumbing lines or water heater tank could freeze, resulting in costly repair bills, not to mention ruining your winter wonderland RV trip. To avoid this from happening I travel with the water system winterized. It is actually much easier to winterize an RV than most people think it is, and it’s not very expensive either. I have winterized and de-winterized our RV as many as four times in one winter.
The good news is it is still possible to use the bathroom facilities when you are traveling with the RV winterized. We take one gallon jugs filled with water to use in the toilet, and if your holding tanks are not heated you can put some RV antifreeze in the holding tanks to prevent the contents from freezing. Add the RV antifreeze (1-2 gallons) through the toilet for the black water holding tank and down the shower or tub drain for the gray water tank. The antifreeze will also protect the shower or tub P-trap which is usually located below floor level. The amount of antifreeze required for the holding tanks will be based on the size of the tanks, and it will be necessary to add more RV antifreeze as waste water is added to the tanks to prevent the antifreeze from being diluted.
Don’t allow the holding tanks to fill completely, before emptying them, during cold weather camping. This will reduce the chance of freezing, resulting in damage to the holding tanks. Take bottled water along for drinking and other needs like cooking, washing up and brushing your teeth when the RV is winterized. We have a five gallon jug that we always take on trips, filled with tap water from our house, for our pet’s drinking water and our other needs. This comes in handy when the RV is winterized.
When we arrive at our destination I try to select a site that will be exposed to the sun throughout the day, but also where there is some type of wind break available. Position the RV on the site so the front or rear will be facing the brunt of any wind, not the side of the RV. If there is an electrical hook-up I de-winterize the water system so we can use everything. All of the water lines in our motorhome are in a heated space, so we don’t need to be too concerned about the water system freezing as long as the RV has heat. We leave the water heater turned on whenever the water heater tank is full so there is no chance of it freezing. Some water heaters operate off of LP gas and electricity. Keep in mind if it’s in the electric mode it will use 9 to 13 amps.
It’s important that you know where all of the plumbing on your RV is located. Some RVs have heat ducts going to the basement storage areas where the water system is exposed to outside temperatures, but many RVs do not. If portions of the RV water system are below floor level, in areas that are not heated, it is possible for it to freeze and damage the water lines. If you are hooked up to an external water supply one option is to leave a faucet in the RV dripping, to keep the water moving, and decrease the possibility of water lines freezing. Another option is to use heat tape to protect the exposed water lines. Heat tape can be purchased at most hardware or building supply stores. Make sure it is suitable for the types of water lines in your RV, and if you plan to use it on a water hose.
If it is extremely cold outside and the possibility exists that the outside water supply could freeze, or if the campground water supply is shut off for the winter, I fill our fresh water holding tank and use it for all of our water requirements. Again, keep in mind where your fresh water tank is located; ours is in a heated area. If the campgrounds shower facilities are still open it’s a good idea to use them to avoid the gray water holding tank from filling so quickly. In this situation it might be in your best interest to keep the RV winterized and just use the campgrounds facilities.
The best source for heat is to use the RVs forced air furnace. There are a couple of things you need to be aware of when you use the RV furnace. First of all it will consume more LP gas than any of the other LP gas fired appliances. The LP tank or cylinders should be full before leaving on your trip, and you will need to monitor the LP gas supply carefully during your stay. Second, if you are not plugged into an electrical supply the furnace fan can quickly drain the auxiliary battery(s). Batteries that are not fully charged in cold temperatures can freeze resulting in not being able to use the RV furnace. I recommend that you plan your stay where you have access to an electrical supply when camping in cold weather. When we are plugged into electricity we set the forced air furnace on a low setting, around 60 degrees, and supplement the heat with thermostatically controlled ceramic heaters. These heaters work extremely well and you don’t need to be concerned about a fire or carbon monoxide.
Caution: Carbon monoxide is deadly. You cannot see it, taste it or smell it. Never use your range burners or oven as a source of heat. If your RV is not equipped with a carbon monoxide detector you should purchase a battery operated model designed for use in RV’s. Always test the carbon monoxide detector for proper operation before each trip.
You also need to be aware of the symptoms of carbon monoxide poisoning:
* Dizziness
* Vomiting
* Nausea
* Muscular twitching
* Intense headache
* Throbbing in the temples
* Weakness and sleepiness
* Inability to think coherently
If you or anybody else experiences any of these symptoms get to fresh air immediately and if the symptoms persist seek medical attention. Information on carbon monoxide poisoning.
If you will be camping where you don’t have access to an electrical hook-up one option is to use a generator. A generator can keep the RV batteries topped off and allow you to use the RV furnace. You will need to have a sufficient supply of fuel on hand for the generator. If it’s a portable generator make sure the exhaust is directed away from the area where you are camping. Regardless of the type of generator always make sure the exhaust system is in proper operating condition and the carbon monoxide detector is working properly.
Here are a few more cold weather RV tips in no particular order:
* Do not store any water hoses with water in them. If you need to use it, it will probably be frozen. You can take it inside to thaw out if need be, or use a hair dryer.
* Covering the windows with curtains, drapes or almost anything will help to hold some of the heat in. It helps to cover overhead vent openings too.
* It may be necessary to take military type showers to keep from filling the gray water tank so quickly. Heat up some water, take the water and a tall glass and enjoy your shower.
* Leave cabinets or drawers open where water lines are located to allow heat to circulate around plumbing.
* Try to avoid opening the entry door as much as possible.
* Oh and don’t forget the electric blanket. It can be a lifesaver at night.
* If you haven’t purchased your RV yet and you know you will be using an RV in cold weather see if the manufacturer offers an arctic package option when you buy it. Some packages include higher R-factor insulation values, enclosed underbelly, heated holding tanks, dual pane windows and more.
Happy RV Learning,
Mark Polk
RV Education 101
RV University
RV Orientation
Go for the RV Gold
Follow us on FACEBOOK
RV Consumer
RV 101® - RV Winterizing 101 (Part 2)
RV 101® - Winterizing Your RV Part 1 click HERE.
We enjoy using our RV as much as possible throughout the year. But when you can’t use your RV, for whatever reasons and temperatures are approaching freezing, it’s important that you protect it. Last week I talked about preparing your RV’s interior, exterior and chassis for storage during the colder winter months. I mentioned at the beginning of the article that the RV plumbing system is the most vulnerable to damage caused by plummeting temperatures. The good news is it is really quite easy to protect the RV water system from this potential threat. I am including a checklist from my “Checklists for RVers” eBook to help walk you through the winterizing process.
Before you get started there are a few items you will need to have. These items can be found in most RV parts stores:
■ Non-toxic RV/Marine antifreeze. The amount depends on the layout and length of your plumbing lines. Two to three gallons will normally do.
■A water heater by-pass kit, if not already installed.
■ A tank wand to clean out the holding tanks, if you don’t have a built-in flushing system.
■A water pump converter kit, or tubing to connect to the inlet side of the water pump.
■ Basic hand tools to remove drain plugs.
Note: Be sure to read your owner’s manuals for unit specific winterizing guidelines. Follow the steps below that apply to your RV.
■If you have any inline water filters remove and/or bypass before starting.
■Drain the fresh water holding tank.
■Empty and flush the gray and black water holding tanks if it hasn’t already been done. If the RV doesn’t have a built-in flushing system clean the black tank out with a tank cleaning wand.
■Drain the water heater. Open the pressure relief valve and remove the drain plug.
Caution: Never drain the water heater when hot or under pressure. With no water hooked up to the RV and the water pump off, open a hot water faucet to remove any pressure on the system. Allow sufficient time for the tank to cool before draining.
■ Open all hot and cold faucets; don’t forget the toilet valve (pedal or lever) and the outside shower (if equipped).
■Locate and open the low point water drain lines.
■Use the water pump to help force most of the remaining water out of the system, but turn it off as soon as the system is drained to prevent damaging the pump.
Note: It is not necessary to get every drop of water out of the water system, but you want to get most of it out. The non-toxic RV antifreeze will prevent the small amount of remaining water from freezing.
■Recap all drains and close all faucets.
■ By-pass the water heater. If you do not have a by-pass kit installed the water heater will fill up with RV antifreeze before it goes through the water lines, wasting six or ten gallons of antifreeze.
Note: A water heater by-pass kit can save you money in two ways. It saves you from using an extra six or ten gallons of non-toxic RV antifreeze when it’s time to winterize your RV, and a bypass kit also prevents costly damage like ruptured water lines or a ruptured water heater tank. If water is left in the lines or tank they can freeze and expand, splitting the lines or tank. With a bypass kit you simply drain the water heater, put it in the by-pass mode and the antifreeze bypasses the tank and goes directly into the water lines.
■Install a water pump converter kit, or disconnect the inlet side of the water pump (the line coming from the fresh water holding tank to the pump) and connect tubing from the water pump inlet into a one gallon jug of RV antifreeze.
■ Turn the water pump on and pressurize the system. Starting with the closest faucet to the pump, slowly open the hot and then cold valves until the colored RV antifreeze appears. Replace the antifreeze container as required.
■Repeat this procedure on all faucets from the closest to the farthest away. Don’t forget the outside shower (if equipped).
■ Flush the toilet until antifreeze appears.
■Pour a cupful of antifreeze down every drain (all sinks, shower & tub drains).
■Pour some RV antifreeze in the toilet and flush into the holding tank to prevent any water in the tank from freezing.
■If your water heater has an electric heating element, turn it off. This will protect the element if the unit is plugged in (and the switch is on) while in storage.
■Make sure all faucets are closed.
■The unit is winterized.
Note: Consult your owner manuals for unit specific winterizing instructions for icemakers and washing machines.
Now, next spring when it’s time to head out in the RV you won’t have any unpleasant, not to mention costly, surprises waiting for.
For more great winterizing & storing information check out my Winterizing & Storing your RV E-book & my Winterizing & Storing your RV video
Happy Camping,
Mark J. Polk
RV Education 101
RV University
copyright 2009 by Mark Polk owner of RV Education 101
We enjoy using our RV as much as possible throughout the year. But when you can’t use your RV, for whatever reasons and temperatures are approaching freezing, it’s important that you protect it. Last week I talked about preparing your RV’s interior, exterior and chassis for storage during the colder winter months. I mentioned at the beginning of the article that the RV plumbing system is the most vulnerable to damage caused by plummeting temperatures. The good news is it is really quite easy to protect the RV water system from this potential threat. I am including a checklist from my “Checklists for RVers” eBook to help walk you through the winterizing process.
Before you get started there are a few items you will need to have. These items can be found in most RV parts stores:
■ Non-toxic RV/Marine antifreeze. The amount depends on the layout and length of your plumbing lines. Two to three gallons will normally do.
■A water heater by-pass kit, if not already installed.
■ A tank wand to clean out the holding tanks, if you don’t have a built-in flushing system.
■A water pump converter kit, or tubing to connect to the inlet side of the water pump.
■ Basic hand tools to remove drain plugs.
Note: Be sure to read your owner’s manuals for unit specific winterizing guidelines. Follow the steps below that apply to your RV.
■If you have any inline water filters remove and/or bypass before starting.
■Drain the fresh water holding tank.
■Empty and flush the gray and black water holding tanks if it hasn’t already been done. If the RV doesn’t have a built-in flushing system clean the black tank out with a tank cleaning wand.
■Drain the water heater. Open the pressure relief valve and remove the drain plug.
Caution: Never drain the water heater when hot or under pressure. With no water hooked up to the RV and the water pump off, open a hot water faucet to remove any pressure on the system. Allow sufficient time for the tank to cool before draining.
■ Open all hot and cold faucets; don’t forget the toilet valve (pedal or lever) and the outside shower (if equipped).
■Locate and open the low point water drain lines.
■Use the water pump to help force most of the remaining water out of the system, but turn it off as soon as the system is drained to prevent damaging the pump.
Note: It is not necessary to get every drop of water out of the water system, but you want to get most of it out. The non-toxic RV antifreeze will prevent the small amount of remaining water from freezing.
■Recap all drains and close all faucets.
■ By-pass the water heater. If you do not have a by-pass kit installed the water heater will fill up with RV antifreeze before it goes through the water lines, wasting six or ten gallons of antifreeze.
Note: A water heater by-pass kit can save you money in two ways. It saves you from using an extra six or ten gallons of non-toxic RV antifreeze when it’s time to winterize your RV, and a bypass kit also prevents costly damage like ruptured water lines or a ruptured water heater tank. If water is left in the lines or tank they can freeze and expand, splitting the lines or tank. With a bypass kit you simply drain the water heater, put it in the by-pass mode and the antifreeze bypasses the tank and goes directly into the water lines.
■Install a water pump converter kit, or disconnect the inlet side of the water pump (the line coming from the fresh water holding tank to the pump) and connect tubing from the water pump inlet into a one gallon jug of RV antifreeze.
■ Turn the water pump on and pressurize the system. Starting with the closest faucet to the pump, slowly open the hot and then cold valves until the colored RV antifreeze appears. Replace the antifreeze container as required.
■Repeat this procedure on all faucets from the closest to the farthest away. Don’t forget the outside shower (if equipped).
■ Flush the toilet until antifreeze appears.
■Pour a cupful of antifreeze down every drain (all sinks, shower & tub drains).
■Pour some RV antifreeze in the toilet and flush into the holding tank to prevent any water in the tank from freezing.
■If your water heater has an electric heating element, turn it off. This will protect the element if the unit is plugged in (and the switch is on) while in storage.
■Make sure all faucets are closed.
■The unit is winterized.
Note: Consult your owner manuals for unit specific winterizing instructions for icemakers and washing machines.
Now, next spring when it’s time to head out in the RV you won’t have any unpleasant, not to mention costly, surprises waiting for.
For more great winterizing & storing information check out my Winterizing & Storing your RV E-book & my Winterizing & Storing your RV video
Happy Camping,
Mark J. Polk
RV Education 101
RV University
copyright 2009 by Mark Polk owner of RV Education 101
RV 101® - RV Winterizing 101 (Part 1)
It’s always sad to come to the realization that another camping season is winding down. Part of this realization is preparing the RV for winter storage, so it will be ready to go camping again next spring. My guess is that most RV owners, especially those in cold climate regions, refer to this winter storage preparation as winterizing your RV. When you hear the term “winterizing” the first thought that comes to mind is to protect the RV water system from potential damage caused by exposure to freezing temperatures. Frozen and damaged water lines are in fact the most common problem related to not winterizing your RV, or not properly winterizing your RV; but there is more to winterizing your RV than just protecting the water system from freezing.
The English dictionary definition for “winterize” is to prepare something, especially a house or an automobile, to withstand cold winter conditions. What I find interesting about this definition is that your RV is essentially a house and automobile combined. With that said, winterizing your RV would entail more than just preparing the water system for cold winter conditions. We would need to be concerned with preparing the RV’s interior, exterior, chassis, and plumbing from the harsh winter months.
Today I will discuss some tips for preparing the RV interior, exterior and the chassis for cold winter storage, and next week I will discuss preparing the plumbing system for the cold winter storage.
RV Interior
When RVs are stored for the winter it’s not uncommon for mice and squirrels to make their winter home in the RV. These animals are notorious for chewing through vehicle wiring, plastic and rubber components, resulting in extensive damage to the RV. If it’s a motorized RV start the engine periodically to keep any chewing squirrels out of the engine compartment area.
Possibly, the most important step is to try and prevent mice and other rodents from being able to access your RV. This can be difficult because they can enter the RV through some very small openings. Start by inspecting the underside of your RV for any gaps or holes. Fill these gaps using silicone or expanding foam. A word of caution, if you never used expanding foam before, you should experiment with it on something other than your RV first. When it dries it can expand a great deal more than you expect. Next, open drawers and cabinet doors inside your RV. Look in all of the corners and crevices, especially where plumbing and wiring enter the RV. If you can see any daylight mice can get in. Fill these areas with silicone or foam.
Remove all food from the RV when it’s being stored and thoroughly clean the RV to remove any remnants of food that might attract mice and other rodents. Some people say mothballs help deter mice from making their home in your RV, and others say an alternative to mothballs is dryer sheets, like Bounce. I have talked to people who swear they work and the smell is much more pleasant. If you are close to where your RV is being stored you may want to use conventional mouse traps and check for mice every week or so.
Next you should defrost the freezer compartment and clean the refrigerator. Leave the doors open and place baking soda in the compartments to absorb any odors. If the RV is in long-term storage, and won’t be plugged in to electricity, it’s a good idea to turn off the main breaker in the distribution panel. Turn the LP gas supply valve off at the cylinder(s) or tank. Close the window blinds to avoid sun exposure to the carpet, drapes and upholstery. Leave doors drawers and cabinets open. Clean the A/C filter(s). If you have vent covers installed on the overhead vents, that prevent rain from getting inside, leave them cracked open to allow for some ventilation. Remove any dry cell batteries from devices like smoke alarms, clocks etc.
RV Exterior
When you store your RV outside for extended periods the exterior begins to show signs of wear, caused by the constant exposure to the elements. Ozone in the air and ultraviolet, (UV) rays from the sun start to take their toll. Ozone causes the paint to fade and makes products like rubber and vinyl dry out, crack, and start to deteriorate. The UV rays from the sun make this aging process happen quicker. Before you store your RV you need to give the exterior a thorough cleaning. Whenever I’m washing or cleaning anything, whether it’s an automobile or the RV, I start from the top and work my way down. It’s a good idea to clean the RV roof before putting the RV in storage too. The type of roof your RV has will determine the cleaner you will need to use. Wash the exterior and if you’re really motivated wax it, using a quality wax formulated for the type of exterior surface your RV has. A good coat of wax protects your RV finish the same as it does an automobile. When you are cleaning the RV exterior inspect all roof seams, body seams and window sealant for any cracks and openings that would allow water to get in. Consult your RV dealer for sealants compatible with these materials and re-seal as required.
Don’t forget to clean the awning fabric, and let it dry completely before storing it. If you have a pop-up or hybrid trailer make sure all of the tenting material is clean and dry before storage.
Ideally you should try to store your RV under a covered area and on a solid surface like concrete. If this isn’t possible avoid parking under trees and in tall grass, fields or wooded areas. If the RV won’t be parked under some type of covered shelter you may want to invest in a cover. Covering your RV can be a logical and cost effective way to help protect your investment. If you decide to use a cover make sure it is made of a breathable material.
Service all locks with a spray lubricant and lubricate all hinges. Insects are attracted to the odorant added to LP gas. You may want to cover LP gas appliance vents to prevent insects from making their winter home inside these vents. If you do cover the vents, remember to remove the cover next spring.
RV Chassis
Just like the exterior of the RV, the tires on your RV can be damaged by the harmful UV rays from the sun. Inflate the tires to the manufacturer’s recommended pressure and cover the tires with covers that will block out the sunlight. Place something like a piece of wood between the ground and the tires. Frozen ground and petroleum based surfaces, like asphalt, can damage tires over time. Make sure that whatever you use to block the tires is larger than the footprint of the tire. No portion of the tire should hang over the edge of the tire block; this can cause internal damage to the tire. For trailers, chock the wheels front and rear. If you are storing a pop-up outdoors angle the tongue downward to assist in snow and water run-off.
Battery maintenance is an important part of winter storage preparation. If you plan to start the unit while in storage, and to periodically plug the unit into shore power leave the batteries in the unit. Plugging it into shore power once a month for about eight hours will help keep the coach batteries topped off. At a minimum you should check and adjust the water levels in all batteries and make sure the batteries are fully charged. A discharged battery will freeze much quicker than a fully charged battery. If the RV is in long-term storage it’s better to remove the batteries and store them where they will not freeze. In either case keep the batteries fully charged when they are in storage.
Note: If your converter charger doesn’t have a three stage charging system (or storage maintenance mode) don’t leave the unit plugged in constantly. This could overcharge the batteries and deplete the electrolyte levels.
If it’s a motorized RV you should fill the fuel tank prior to storage and add a fuel stabilizer. Run the engine and the generator long enough for the stabilizer to get through the entire fuel system. Change the oil and oil filter on the engine and the generator prior to storage. Acids accumulate in used oil and can corrode engine bearings, especially while sitting for long periods of time. If possible exercise the generator for at least two hours every month with a minimum of a ½ rated load on it. Consult your generator owner’s manual for load ratings.
Winterizing Part 2: How to prepare the RV plumbing system for the cold winter months.
If you would like to learn more about winterizing & storing your RV check out our Winterizing & Storing your RV ebook
and Winterizing and Storing Your RV video
Happy Camping,
The English dictionary definition for “winterize” is to prepare something, especially a house or an automobile, to withstand cold winter conditions. What I find interesting about this definition is that your RV is essentially a house and automobile combined. With that said, winterizing your RV would entail more than just preparing the water system for cold winter conditions. We would need to be concerned with preparing the RV’s interior, exterior, chassis, and plumbing from the harsh winter months.
Today I will discuss some tips for preparing the RV interior, exterior and the chassis for cold winter storage, and next week I will discuss preparing the plumbing system for the cold winter storage.
RV Interior
When RVs are stored for the winter it’s not uncommon for mice and squirrels to make their winter home in the RV. These animals are notorious for chewing through vehicle wiring, plastic and rubber components, resulting in extensive damage to the RV. If it’s a motorized RV start the engine periodically to keep any chewing squirrels out of the engine compartment area.
Possibly, the most important step is to try and prevent mice and other rodents from being able to access your RV. This can be difficult because they can enter the RV through some very small openings. Start by inspecting the underside of your RV for any gaps or holes. Fill these gaps using silicone or expanding foam. A word of caution, if you never used expanding foam before, you should experiment with it on something other than your RV first. When it dries it can expand a great deal more than you expect. Next, open drawers and cabinet doors inside your RV. Look in all of the corners and crevices, especially where plumbing and wiring enter the RV. If you can see any daylight mice can get in. Fill these areas with silicone or foam.
Remove all food from the RV when it’s being stored and thoroughly clean the RV to remove any remnants of food that might attract mice and other rodents. Some people say mothballs help deter mice from making their home in your RV, and others say an alternative to mothballs is dryer sheets, like Bounce. I have talked to people who swear they work and the smell is much more pleasant. If you are close to where your RV is being stored you may want to use conventional mouse traps and check for mice every week or so.
Next you should defrost the freezer compartment and clean the refrigerator. Leave the doors open and place baking soda in the compartments to absorb any odors. If the RV is in long-term storage, and won’t be plugged in to electricity, it’s a good idea to turn off the main breaker in the distribution panel. Turn the LP gas supply valve off at the cylinder(s) or tank. Close the window blinds to avoid sun exposure to the carpet, drapes and upholstery. Leave doors drawers and cabinets open. Clean the A/C filter(s). If you have vent covers installed on the overhead vents, that prevent rain from getting inside, leave them cracked open to allow for some ventilation. Remove any dry cell batteries from devices like smoke alarms, clocks etc.
RV Exterior
When you store your RV outside for extended periods the exterior begins to show signs of wear, caused by the constant exposure to the elements. Ozone in the air and ultraviolet, (UV) rays from the sun start to take their toll. Ozone causes the paint to fade and makes products like rubber and vinyl dry out, crack, and start to deteriorate. The UV rays from the sun make this aging process happen quicker. Before you store your RV you need to give the exterior a thorough cleaning. Whenever I’m washing or cleaning anything, whether it’s an automobile or the RV, I start from the top and work my way down. It’s a good idea to clean the RV roof before putting the RV in storage too. The type of roof your RV has will determine the cleaner you will need to use. Wash the exterior and if you’re really motivated wax it, using a quality wax formulated for the type of exterior surface your RV has. A good coat of wax protects your RV finish the same as it does an automobile. When you are cleaning the RV exterior inspect all roof seams, body seams and window sealant for any cracks and openings that would allow water to get in. Consult your RV dealer for sealants compatible with these materials and re-seal as required.
Don’t forget to clean the awning fabric, and let it dry completely before storing it. If you have a pop-up or hybrid trailer make sure all of the tenting material is clean and dry before storage.
Ideally you should try to store your RV under a covered area and on a solid surface like concrete. If this isn’t possible avoid parking under trees and in tall grass, fields or wooded areas. If the RV won’t be parked under some type of covered shelter you may want to invest in a cover. Covering your RV can be a logical and cost effective way to help protect your investment. If you decide to use a cover make sure it is made of a breathable material.
Service all locks with a spray lubricant and lubricate all hinges. Insects are attracted to the odorant added to LP gas. You may want to cover LP gas appliance vents to prevent insects from making their winter home inside these vents. If you do cover the vents, remember to remove the cover next spring.
RV Chassis
Just like the exterior of the RV, the tires on your RV can be damaged by the harmful UV rays from the sun. Inflate the tires to the manufacturer’s recommended pressure and cover the tires with covers that will block out the sunlight. Place something like a piece of wood between the ground and the tires. Frozen ground and petroleum based surfaces, like asphalt, can damage tires over time. Make sure that whatever you use to block the tires is larger than the footprint of the tire. No portion of the tire should hang over the edge of the tire block; this can cause internal damage to the tire. For trailers, chock the wheels front and rear. If you are storing a pop-up outdoors angle the tongue downward to assist in snow and water run-off.
Battery maintenance is an important part of winter storage preparation. If you plan to start the unit while in storage, and to periodically plug the unit into shore power leave the batteries in the unit. Plugging it into shore power once a month for about eight hours will help keep the coach batteries topped off. At a minimum you should check and adjust the water levels in all batteries and make sure the batteries are fully charged. A discharged battery will freeze much quicker than a fully charged battery. If the RV is in long-term storage it’s better to remove the batteries and store them where they will not freeze. In either case keep the batteries fully charged when they are in storage.
Note: If your converter charger doesn’t have a three stage charging system (or storage maintenance mode) don’t leave the unit plugged in constantly. This could overcharge the batteries and deplete the electrolyte levels.
If it’s a motorized RV you should fill the fuel tank prior to storage and add a fuel stabilizer. Run the engine and the generator long enough for the stabilizer to get through the entire fuel system. Change the oil and oil filter on the engine and the generator prior to storage. Acids accumulate in used oil and can corrode engine bearings, especially while sitting for long periods of time. If possible exercise the generator for at least two hours every month with a minimum of a ½ rated load on it. Consult your generator owner’s manual for load ratings.
Winterizing Part 2: How to prepare the RV plumbing system for the cold winter months.
If you would like to learn more about winterizing & storing your RV check out our Winterizing & Storing your RV ebook
and Winterizing and Storing Your RV video
Happy Camping,
Cold Weather RVing By Mark Polk
Here some cold weather RV tips in no particular order:
Do not store any water hoses with water in them. If you need to use it, it will probably be frozen. You can take it inside to thaw out if need be, or use a hair dryer.
Covering the windows with curtains, drapes or almost anything will help to hold some of the heat in. It helps to cover overhead vent openings too.
It may be necessary to take military type showers to keep from filling the gray water tank so quickly. Heat up some water, take the water and a tall glass and enjoy your shower.
Leave cabinets or drawers open where water lines are located to allow heat to circulate around plumbing.
Block off sections of the RV you won’t be using with blankets or sheets. The more heat where you are the better.
Try to avoid opening the entry door as much as possible.
Oh and don’t forget the electric blanket. It can be a lifesaver at night
Read the full article:
Do not store any water hoses with water in them. If you need to use it, it will probably be frozen. You can take it inside to thaw out if need be, or use a hair dryer.
Covering the windows with curtains, drapes or almost anything will help to hold some of the heat in. It helps to cover overhead vent openings too.
It may be necessary to take military type showers to keep from filling the gray water tank so quickly. Heat up some water, take the water and a tall glass and enjoy your shower.
Leave cabinets or drawers open where water lines are located to allow heat to circulate around plumbing.
Block off sections of the RV you won’t be using with blankets or sheets. The more heat where you are the better.
Try to avoid opening the entry door as much as possible.
Oh and don’t forget the electric blanket. It can be a lifesaver at night
Read the full article:
Labels:
cold weather RVing,
rv winterizing
Subscribe to:
Posts (Atom)