Showing posts with label RV Education 101. Show all posts

RV Toilet Chemicals Still Have Formaldehyde...REALLY?

Question: Why do they still sell toilet chemicals with formaldehyde in them? I haven’t used them in years, but still see them on the shelves of reputable stores.

Mark Says: Some states like California have been fighting to ban using formaldehyde in holding tank chemicals. The reason manufacturer’s use it is because formaldehyde does a good job controlling odors.

I should start by addressing what many consider the problem to be with formaldehyde in holding tank chemicals. Certain chemical additives like formaldehyde can cause septic tank failures by killing the bacteria needed for a septic tank to operate properly. The way formaldehyde controls odors is by killing the bacteria that causes the odor. So it kills the bacteria in the RV holding tanks as it attempts to control odors.

When you empty your holding tank the formaldehyde also kills the bacteria used to breakdown the wastes in the septic tank. When this happens over a period of time, like at a campground the septic tank can’t operate properly and the septic system gets clogs resulting in health risks and high costs to repair the problem.

So, what can we as RVers do to help? Even though formaldehyde helps control odors you should use holding tank deodorizers that do not contain formaldehyde. Look for enzyme or citrus based products that are biodegradable for use in your RV or boat and pass the word along to other RVers..

Happy RV Learning,

Mark Polk

RV 101® - How-To Winterize your RV Water System in 7 Easy Steps

It’s always sad to come to the realization that another camping season is winding down.  Depending on where you live, part of this realization is preparing the RV for winter storage so it will be ready to go camping again next spring.  A major part of winterizing your RV is to protect the RV water system from potential damage, caused by exposure to freezing temperatures.


RV Buzz Tip: Frozen and damaged water lines are in fact the most common problem related to not winterizing your RV, or not properly winterizing your RV.


The RV plumbing system is the most vulnerable system to damage caused by plummeting temperatures. The good news is, it is easy to protect the RV water system from this potential threat.  Here are my top 7 steps to winterizing your RV plumbing system.


Before you get started there are a few items you will need to have. These items can be found in most RV parts stores:
 1) Non-toxic RV/Marine antifreeze. The amount depends on the layout and length of your plumbing lines. Two to three gallons will normally do it.
2) A water heater by-pass kit, if not already installed.
3) A wand to clean out the black water holding tank if the RV doesn’t have a built-in black tank clean-out system.
4) A water pump converter kit, or tubing to connect to the inlet side of the 12-volt water pump.
5) Basic hand tools to remove and install drain plugs.


Note: Be sure to read your RV owner’s manuals for unit specific winterizing guidelines. Follow all steps below that apply to your RV.

Step # 1:  If you have any inline water filters remove and bypass before starting. Drain the fresh water holding tank. Drain and flush the gray and black water holding tanks. If the RV doesn’t have a built in tank flushing system clean the black tank out with a tank cleaning wand. Drain the water heater. Open the pressure relief valve and remove the drain plug.


RV Buzz Caution:  Never drain the water heater when it is hot or under pressure. With no water hooked up to the RV and the water pump turned off open a hot water faucet to remove any pressure from the system. Allow the tank time to cool before draining.


Step # 2: Open all hot and cold faucets; don’t forget the toilet valve and outside shower. Locate and open the low point water drain lines. Use the water pump to help force most of the water out of the system, but turn it off as soon as the system is drained to prevent damaging the pump. Recap all drains and close all faucets.

Step # 3: By-pass the water heater. If you do not have a by-pass kit installed the water heater will fill up with RV antifreeze before it goes through the water lines, wasting six or ten gallons of antifreeze.

Step # 4: Install a water pump converter kit, or disconnect the inlet side of the water pump (the line coming from the fresh water holding tank) and connect tubing from the water pump inlet into a one gallon jug of RV antifreeze.

Step # 5: Turn the water pump on and pressurize the system. Starting with the closest faucet to the pump slowly open the hot and then cold valves until the pink colored RV antifreeze appears. Replace the antifreeze container as required. Repeat on all faucets from the closest to the farthest away. Don’t forget the outside shower.

Step # 6: Flush the toilet until antifreeze appears. Pour a cupful of antifreeze down each drain. Pour some RV antifreeze in the toilet and flush into the holding tank to prevent any water in the tank from freezing. If your water heater has an electric heating element, turn it off. This will protect the element if the unit is plugged in while in storage. Make sure all faucets are closed.

Step # 7: Consult your owner manuals for winterizing icemakers and washing machines.

The unit is winterized. Now, next spring when it’s time to head out in the RV you won’t have any unpleasant, not to mention costly, surprises waiting for.

For more information on this topic check out our Winterizing & Storing your RV

Copyright ©️ by Mark Polk
Happy RV Learning,

Mark Polk
RV Education 101
RV University
RV Orientation
Go for the RV Gold
Follow us on FACEBOOK
RV Consumer

RV Poll Results (4th Installment)

rvconsumersmallnobackground
Every few months I like to post some of our previous RV poll results. I think it makes for some interesting reading. You can see how other RV enthusiasts responded to various RV related topics and it might make you consider an aspect about RVing you haven’t considered in the past. Keep in mind that these RV poll’s are only intended to give me some idea of what our newsletter readers are interested in, how they use their RVs, and of course just for fun.

RV Poll Question: What is your favorite season of the year to use your RV?
RV Poll Response: Spring 8%, Summer 25%, Fall 35%, Winter 3%, Year Round 28%

RV Poll Question: Have you ever had any plumbing lines freeze in your RV?
RV Poll Response: Yes 24%, No 76%

RV Poll Question: Do you treat the fuel system in your RV, or any other gasoline powered equipment, with a fuel preservative while sitting in storage?
RV Poll Response: Yes RV 11%, Yes other equipment 22%, Yes both RV & equipment 34%, No 25%, NA 8%

RV Poll Question: Do you travel in your RV with the propane cylinders, or tank, turned on or turned off?
RV Poll Response: Turned on 73%, Turned off 27%

RV Poll Question: Do you plan to use your RV more in 2011 than you did in 2010?
RV Poll Response: Yes 73%, No 22%, New RV owner in 2011 5%

RV Poll Question: I purchased my first RV from:
RV Poll Response: Dealer 59%, Private owner 35%, Family member 2%, Friend 3%, Given to me 1%

RV Poll Question: Do the passengers in your motorhome wear seatbelts while traveling?
RV Poll Response: All passengers 79%, No passengers 19%, Kids only 3%

RV Poll Question: After winter RV storage, how do you prepare your RV for travel and camping?
RV Poll Response: Do it myself 92%, Pay to have it done 4%, Get in it and go 4%

RV Poll Question: Has your RV ever been broken into?
RV Poll Response: Yes while traveling 1%, Yes while stored 7%, Yes at campground 2%, No never 91%

RV Poll Question: Do you primarily watch TV shows on your television or on your computer?
RV Poll Response: Computer 4%, TV 96%

RV Poll Question: During an RV trip, do you watch television or do you leave the remote at home?
RV Poll Response: Watch some TV on RV trips 74%, Watch a lot of TV on RV trips 13%, Leave remote at home 13%

RV Poll Question: How many e-newsletters do you subscribe to?
RV Poll Response: 1-2 24%, 3-5 43%, 5 or more 33%

RV Poll Question: Are you happy with your current RV, or would you prefer a different type or size?
RV Poll Response: Happy with current RV 70%, Prefer different size or type RV 30%

RV Poll Question: Do you have trouble with RV odors from the holding tanks?
RV Poll Answer: Yes 19%, No 81%

RV Poll Question: How do you adjust tire pressure when traveling by RV?
RV Poll Response: I carry a portable air compressor 70%, Drive to nearest service center with air support 30%

To read more RV poll results visit these links:

Some Interesting RV Poll Results

More Interesting RV Poll Results

RV Poll Results (3rd Installment)

Happy RV Learning,

Mark Polk
RV Education 101
RV University
RV Orientation
Go for the RV Gold
Follow us on FACEBOOK
RV Consumer

Pre-winter RV Checks for the RV Consumer

As we head toward colder temperatures, I would like to suggest a few preventive maintenance checks to prepare your RV for the fall and winter camping seasons. Please don’t confuse these checks with winterizing your RV or preparing it for winter storage.

In no particular order, here are my top 7 pre-winter RV checks:
1. Inspect your RV batteries

Check all battery connections for secure mounting. Clean the batteries with a 50/50 mixture of baking soda and water, if necessary. If you have lead-acid batteries, check the electrolyte level in each cell and add distilled water, if necessary. Many older converter chargers provide a constant charge of approximately 13.5 volts, which is too high for fully-charged batteries and can cause the electrolyte to boiled off, resulting in an early death for the batteries.

Check water levels weekly, at a minimum, when using the RV. Test the battery state-of-charge and charge any batteries that are at or below 80 percent. A discharged or partially-charged battery will freeze much faster than a fully-charged battery. Use a digital voltmeter to measure voltage and get a quick picture of the batteries’ depth of discharge. If you don’t feel comfortable working on or around batteries, have a reputable RV service center perform battery maintenance for you.

Note: A 12-volt battery that is charged should read 12.5 to 12.7 volts. Readings less than 12.5 indicate the battery state of charge is below 80 percent and the battery needs to be charged. A 6-volt battery that is charged should read 6.25 to 6.37 volts. Readings below 6.25 indicate the battery state of charge is below 80 percent and the battery needs to be charged.

2. Test automotive antifreeze

The antifreeze in your tow vehicle or motorhome radiator should always have a 50- to 70-percent concentration of antifreeze to water. Water does a good job helping to cool an engine but it freezes quickly during cold winter temperatures. Water can also cause certain metals to rust and corrode over time. The proper concentration of antifreeze is necessary to provide freeze protection and chemical protection against corrosion.

To test the antifreeze, use quality test strips, a float-type hydrometer or a refractometer. A refractometer is the most accurate testing device.

Inspect all coolant hoses for signs of damage or leaks. Coolant hoses deteriorate from the inside out. Inspect all hoses for wear, cracks, soft spots, brittle areas and leaks. Inspect hose clamps for secure mounting and replace any damaged coolant hoses or clamps as required

3. Use a fuel stabilizer product like STA-BIL

Fuel stabilizers provide excellent protection against stale fuel during periods of storage. They contain corrosion inhibitors, remove water and help to clean fuel injectors. There are fuel stabilizers designed for use with gasoline and diesel engines. I use a fuel stabilizer in gas-powered lawn equipment, ATVs, boats, motorcycles and RVs.

4. Furnace checkup

One LP-gas appliance that gets overlooked during warm weather is the forced-air furnace. Most service requirements for the furnace need to be accomplished by a reputable RV service center, but there are a few things the owner can do to prepare the furnace for cold-weather operation.

The battery plays an important role in the proper operation of the furnace. Keeping lead-acid batteries watered and fully charged will prevent many furnace-related problems. Inspect furnace ducting that is above floor level for damage, such as crushed ducting or obstructions that could affect furnace operation. Make sure the furnace air return is not blocked or restricted. Test the operation of the furnace before the day arrives when you actually need it. Have a certified technician test your LP-gas system annually for proper appliance operating pressure and leaks.

5. Inspect all safety devices and replace all dry-cell batteries

Carbon monoxide is deadly. Test the CO detector, LP-gas leak detector and smoke alarm for proper operation every time you use your RV. Instruct individuals on symptoms and what to do if they are exposed to carbon monoxide or if they hear LP-gas leak detector alarms. Replace all dry-cell batteries when you change the settings on your clocks in the spring and fall. Make sure you have a charged fire extinguisher on hand and that you and other adults know how to operate it.

6. Clean, inspect and reseal your roof as necessary

Not that this is directly related to fall or winter use, but I like to inspect the roof twice a year, at a minimum, and I think spring and fall are good times of the year to make these checks.

Note: Exercise caution any time you work on the roof of your motorhome. The roof surface can be slippery and a fall can result in serious injury, or worse.

Clean your roof with an approved cleaner for the type of roofing material your motorhome has. Every time you clean the roof, inspect the sealants around all of the openings and the seams on the roof. Water will take the path of least resistance, and if there is the smallest opening, it will find it. Thoroughly inspect the roof sealants for potential leaks and reseal any areas of the roof seams and around openings where you suspect a leak. Make sure you use sealants compatible with your roofing material. Keep in mind that your warranty can be voided if you fail to perform some of these required inspections. Check your motorhome owner’s manual for roof inspection intervals.

7. Plan for non-use

If you don’t plan to use your RV over the fall and winter months, winterize the plumbing system to prevent freezing. Prepare all other systems for short or long-term storage.

Check out our Winterizing & Storing DVD
Winterizing & Storing E-book

Happy RV Learning,

Mark Polk
RV Education 101
RV University
RV Orientation
Go for the RV Gold
Follow us on FACEBOOK
RV Consumer

RV 101- RV Education 101 Tips for Improving Fuel Economy for the RV Consumer

Mark Polk, founder of RV Education 101 stated, “If there were 7 easy steps you could take to improve fuel economy in your RV and automobiles would you do it? Of course you would! So here they are:”


1) Check and replace your air filter if it’s dirty. A clean air filter can improve your fuel economy up to 10%.

2) Check and adjust your tire pressure to the proper pressure for the load. This alone can increase fuel economy by 3%, not to mention preventing premature tire wear and failures caused by over or under-inflated tires. Tires can look normal when they are seriously under-inflated. Use a quality air pressure gauge and check your tires when they are cold, before traveling more than one mile.

3) For every 5mph you travel over 60mph is equivalent to paying ten cents more per gallon at the pump. If you are traveling down the Interstate at 70 mph add twenty cents to the price at the pump! Speeding and rapid acceleration reduces fuel economy anywhere from 5 to 33% depending on your individual driving habits.

4) Keep your vehicles tuned up and in top running condition. A poorly tuned engine can lower fuel economy by 10 to 20%. Poor emissions and/or a faulty oxygen sensor can cause up to 40% reduction in fuel economy.

5) Following recommended service and maintenance schedules/intervals will save a significant amount of fuel.

6) Using synthetic oils can increase fuel economy by 2%.

7) Adding weight that you don’t need reduces fuel economy significantly. A friend once told me, if you haven’t used it in the last 6 months you don’t need it!

See, it really is easy to improve our fuel economy. Try following these 7 easy steps to improve your fuel economy. You, and your wallet, will be glad you did.

For more RV 101 educational information visit http://www.rveducation101.com/ and http://www.rvconsumer.com/

RV Education 101 and RV Cooking Show Partner to Expand Offering to the RV Consumer

Bookmark and Share

Harrells, NC (April 1 3 , 2011) – Combining forces to offer RVing consumers a learning resource for using and maintaining their RVs as well as discovering interesting RV destinations and delicious dishes, RV Education 101 and RV Cooking Show aim to help RVers become RV savvy in more ways than one .

RV Education 101 is the premier provider of educational videos, books and RV information and is also the producer of "Mark’s RV Garage", an internet television style how-to series teaching RVers the ins and outs of RVing . The RV Cooking Show, part RV travel guide, part cooking class on wheels shares information about not-to-be missed RV destinations and shows RVers how to create fantastic destination-related dishes in their own RV kitchens.
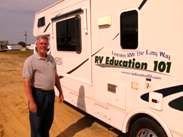
Mark and Dawn Polk, RV Education 101 owners agree , “It’s a great fit for both of our audiences . There’s more to RVing than the RV itself. We want to offer technical information, but we also want to provide relevant information on the entire scope of RVing. The joint venture with RV Cooking Show is a great way to help educate consumers about many aspects of RVing and for people new to RVing to see firsthand what it’s all about.”

“Partnering with industry experts such as the Polk’s is a tremendous benefit to our audience. Their experience in RV know-how paired with our traveling and dining expertise serves viewers a well-rounded diet of RV smarts,” remarked Evanne Schmarder, producer and host of the RV Cooking Show. “ We are absolutely delighted to be associated with RV Education 101 and Mark’s RV Garage.”

Dawn adds, “RV Education 101 is the industry's voice on operational and safety issues and RV Cooking Show is the industry’s voice on destinations and location- related food preparation in the RV kitchen. RVers are hungry for both categories – travel and meal planning / preparation along with RV knowledge and information.”

Go to RV Education 101

and RV Cooking Show for more details

###

About RV Education 101
RV Education 101 produces professional RV how-to instruction training videos and DVD's, books and e-books on using and maintaining your Recreation Vehicle (RV). RV expert Mark Polk provide s viewers with as much RV information, tips and safety advice as possible includ ing RV walk through training and orientation videos, RV winterizing and storing, trailer towing, towing behind your motorhome, and essential RV items that you won’ t want to leave home without.

About RV Cooking Show
Part RV travel guide – part cooking class on wheels, the RV Cooking Show takes viewers on adventures to some of the most sought-after or interesting but little-known RV locales in the country and then creates healthy, easy, delicious destination-related dishes in host Evanne Schmarder’s RV kitchen.

Media Contacts:
E-mail: Dawn Polk

E-mail: Evanne Schmarder

Dawn Polk, RV Education 101, 910-484-7615
Evanne Schmarder, RV Cooking Show, 702-460-9863


Mark's RV Garage Internet TV Show


Don't miss the first episode of Mark's RV Garage, with host Mark Polk, as he gives you an inside look into RV's, RV products, installations, RV destinations and much more. Go to RV Consumer on February 7, 2011 to view the first episode of Mark's RV Garage, and keep checking back for new episodes.

RVIA Trade Show in Louisiville 2010 Part 3

Talk about outdoor kitchens! The slide-out on this trailer was about 18 inches wide and not only can you watch football on the big screen, you can cook a thick juicy steak while your doing it. But if starts to rain I would move the tailgate party inside.

You wouldn't know by looking at the picture, but this is the rear of a Fleetwood Type A motorhome. It has a sofa and TV for relaxing and when it's time to for bed the queen size bed drops down from the ceiling at the push of a button. Pretty neat huh?

Onan had a display in Louisville of all of the generators they have produced for RV's over the years. I think this one was circa 1927. Don't forget the pull cord, this was long before they were equipped with electric starters.

Something else I noticed in Louisville were Type A motorhomes that manufacturers brand as a Type A/C combination, like this Fleetwood product. As you are aware most Type C motorhomes have sleeping arrangements up front over the cab. These A/C combinations are equipped with a bed up front that drops down when you need it and stores against the ceiling when you don't. This actually used to be quite common many years ago. I guess it's like fashion, old styles always seem to come back again.

Happy RV Learning,

Mark Polk
RV Education 101
RV University
RV Orientation
Go for the RV Gold
Follow us on FACEBOOK
RV Consumer
RV Videos on Demand

10 RV Battery Quick Tips

Today I would like to offer 10 quick tips to help extend the life of your RV and automobile lead acid batteries. Battery maintenance is not that difficult but always keep safety in mind when you work around batteries. Lead acid batteries contain sulfuric acid which is extremely corrosive and can cause severe burns or even blindness. The hydrogen gas that batteries produce when they’re charging is very explosive. When you work around batteries you need to wear goggles and gloves, remove all jewelry and do not smoke or use any open flames.


Tip #1
Routine maintenance and recharging a discharged battery as soon as possible will extend the life of the battery.

Tip #2
Sulfation will occur when a battery’s state of charge drops below 80 %, or 12.4 volts. Recharging a battery at an 80% state of charge will prevent battery sulfation.

Tip #3
Never let a battery discharge below 10.5 volts. You can measure the voltage with a digital voltmeter. Measuring the voltage gives you a quick picture of the batteries depth of discharge so you know when they need to be recharged. Set the voltmeter on DC voltage and put the red lead on the positive terminal and the black lead on the negative terminal.

Tip #4
Reducing the battery’s depth of discharge will increase the life of the battery. A battery discharged to 50 % everyday will last twice as long as it would if it’s cycled to 80%.

Tip #5
RV’s have parasitic loads that will discharge the battery over time. Some but not all of these loads are LP gas leak detectors, the TV antenna power booster, clocks, stereos and appliance circuit boards. If your RV is equipped with a battery disconnect switch make sure it is in the OFF position when you are not using the RV or when it is in storage. If your RV is not equipped with a battery disconnect switch you can purchase a battery disconnect that installs directly to the battery.

Tip #6
Hot temperatures and overcharging kill batteries. During hot weather or during high usage check the batteries frequently. Checking the electrolyte levels and adding distilled water as required can save your lead acid batteries.

Tip #7
When you add water to a battery, use mineral free water. Distilled water is best. Regular tap water can cause calcium sulfation.

Tip #8
Properly charging your batteries needs to be done in stages. A bulk charge should be performed to return the battery to 90% of a full charge in the first few hours. An absorption charge is used for the remaining 10 percent to prevent any battery gassing and loss of water, and then a float charge to keep the battery fully charged.

Tip #9
Batteries should only be watered after charging unless the plates are exposed prior to charging.

Tip #10
To prevent water loss from bubbling and gassing leave the vent caps on batteries while charging.

Note:
The lead and plastic used to construct batteries can be recycled. More than 97% of all battery lead is recycled. Be sure and recycle your old batteries.

Here is a video on how to test your RV Batteries:
Happy RV Learning,

Mark Polk
RV Education 101
RV University
RV Orientation
Go for the RV Gold
Follow us on FACEBOOK
RV Consumer

Tips to Increase Engine Life

Today we’re going to talk about some easy ways to increase the life of your tow vehicle or motorhome’s engine. Actually there are many ways to to increase engine life in a vehicle, but I want to narrow the list to what I consider the most important. When all you hear every day is how poorly the economy is doing, it only makes sense to buckle down and take better care of what you already own.


A little bit of preventive maintenance (PM) now can pay big dividends in the long run. What’s that old saying? An ounce of prevention is worth a pound of cure! So, what can we do to extend the life of your tow vehicle, motorhome, or your automobile engine? Let’s take a look.

■Routine Oil and Oil Filter Changes
This is number one on my list. I have known people who I think change their engine oil and filter more frequently than it is needed, but it is usually the other way around. You should follow the vehicle manufacturer’s guidelines for changing the engine oil and filter. If at all possible try to change the oil and oil filter prior to any long-term storage. Acids accumulate in used oil and can corrode the engine bearings. Don’t forget the generator oil and filter, too.

■Help your Engine Breathe
A dirty or clogged air filter can rob life from your engine. When the engine can breathe properly it not only lasts longer but is more fuel efficient. Recommendations for checking and replacing air filters are normally based on driving conditions. It only takes a couple of minutes to check the air filter. I check mine when I change the engine oil, and the filter gets replaced if it’s dirty.

■Pay Attention to Service Intervals
The manufacturer recommends service intervals for a reason. You guessed it, to maximize efficiency and extend the life of the engine. Whether it’s a diesel or gasoline engine it’s important that you pay attention to, and follow these recommended service intervals. If you don’t perform your own routine maintenance, find a local dealership or repair shop you can trust and put the vehicle on a routine service schedule.

■Keep it Running Cool:
Just as clean engine oil lubricates moving parts and extends the engine’s life, clean engine antifreeze helps the major components of the engine stay cool and extends the engine’s life. Follow the engine manufacturer’s guidelines for flushing and replacing the coolant (make sure to use the proper type of coolant for the engine). Every time you lift the hood, check the coolant level and inspect coolant hoses for damage. Coolant hoses deteriorate from the inside out. Inspect all hoses for wear, cracks, soft spots, brittle areas and leaks. Replace any damaged hoses or clamps as required.

■Perform Pre-Trip Checks:
Before moving the tow vehicle or RV, make the following checks concerning the engine. Check all fluid levels in the power steering resevoir, engine coolant, engine oil, windshield washer and brake fluid. Check the transmission fluid while you are at it. Consult your vehicle owner’s manual for proper procedures to check and add fluids. Start the engine, allow it to reach operating temperature and check for proper readings on all gauges. Look under the vehicle for signs of leaks. Have any leaks checked out and repaired before using the vehicle.

■Driving is Important, Too:
Smart drivers can extend the life of their vehicle engine. Watching RPMs, knowing when to shift gears and monitoring gauges all contribute to extending the life of your engine. Always warm an engine up before driving. Don’t race a cold engine; accelerate slowly until the engine is up to operating temperature. Avoid quick starts and fast stops whenever possible. Always monitor your gauges. If a gauge is reading outside of the normal operating range, pull over when it is safe and have it checked/repaired.

■Proper Storage Procedures:
Proper storage procedures can extend the life of your engine, whereas improper procedures can harm the life of your engine. I already mentioned that changing the oil and oil filter prior to long-term storage (say three or more months) can help your engine. Acids accumulate in used oil and can corrode the engine bearings. Start the engine periodically when the motorhome is in storage and run it until it reaches operating temperature. Fill the fuel tank and add a fuel preservative to the tank. Run the engine and generator long enough to get the preservative through the fuel system. Protect the engine compartment from critters. Squirrels and mice love to chew on plastic, rubber and anything else they can find, and a vehicle engine compartment makes a safe and cozy winter home. If the motorhome is stored outside I recommend starting the engine more often to deter these critters from calling it home.

If the RV has a generator exercise it on a regular basis. When you run the generator make sure there is at least a ½-rated load on it. Check your generator owner’s manual for instructions on exercising it.
I mentioned earlier that there are many other factors that can extend the life of your engine, but I think these are some of the most important. If any one of these items is not properly maintained it could end up costing you thousands of dollars in repairs. Maintaining your vehicles engine is not that difficult to do, and in times of uncertainty it is what I would call cheap insurance.

Happy Camping.

Mark Polk

RV Education 101

RV University
RV Orientation
Go for the RV Gold

Inspecting your RV for Water Damage


I received a question from a concerned RVer the other day that went something like this; “My neighbor just paid an expensive repair bill for water damage on his RV and I would like to know what I can do to prevent this same thing from happening to me?”

One thing is for sure, if there is a way for water to get in your RV it will find it. Water leaks on an RV can cause extensive damage and can be extremely costly to repair. To protect your investment and your wallet you need to take the time to REALLY inspect for water leaks. The outside of your RV may look fine but the internal damage caused by water over a period of time can result in the entire roof, floor or wall rotting away without you even knowing it, until it’s too late. You should inspect your RV for water leaks twice a year at a minimum, and especially prior to storage if it will be stored outside.

Here are a few things to look for during your routine inspections.

* To stop a leak before it starts thoroughly inspect all roof and body seams. Reseal any seams or sealants that show signs of cracking or separation. Consult your RV dealer for sealants compatible with different types of materials.

* Look for any discoloration, and feel for any soft spots on the ceiling around roof vents, air conditioners, TV antennas, plumbing vents, and any other openings that were cut in the roof. Soft spots are an indication that water damage has already started. Find the source of the leak and have it repaired immediately.

* Look for any discoloration or wrinkles in the wallpaper, and feel for any soft spots on the walls around all windows, doors, slide outs, or any other openings that were cut in the side walls.

* Identify the location of items like the water heater, furnace, outside shower, potable water fill and city water inlet on the outside of the RV and then access those areas from the inside of the RV. Look for any indications of water damage around these openings.

* Open all overhead cabinets and look in the top corner where the walls meet the ceiling for any discoloration and feel for any soft spots. This would indicate a leak at the seam where the sidewall and the roof attach.

* Check in all outside storage compartments for any indications of water leaks or water damage.

* Check for any soft spots on the roof itself especially around the roof seams at the front and rear of the RV. Thoroughly inspect all sealants on the roof around every opening.

Caution: Be extremely careful when working on the roof of your RV, a fall can cause serious injuries, or be fatal. Not all roofs are designed to be walked on. It may be necessary to use 2X4 foot sections of 1/2″ plywood to distribute your weight over the roof rafters.

* Some Class C motor homes are notorious for leaks in the cab over bed area. Look for any signs of discoloration and feel for soft spots. Remove the mattress and feel for water.

* If your RV has fiberglass sidewalls look and feel the outside walls for any signs of delamination. Delamination is caused by water getting between the exterior fiberglass and the sidewall. When this happens the exterior fiberglass separates from the sidewall of the RV. You can stand at the front or rear of the RV and look down the side for any noticeable ripples or what looks like a bubble. You can also press on the sidewalls. If you feel the exterior fiberglass move it is delaminating. Many times delamination starts where an opening was cut in the sidewall of the RV. Have any noticeable damage repaired immediately!

The key to preventing water damage on your RV is to perform these inspections on a routine basis and to discover and repair any leaks while in the early stages. If you don’t feel comfortable performing these inspections have an authorized service center do it for you.

To watch a video on inspecting for water leaks click here

Happy Camping,

Mark Polk
RV Education 101
RV University
RV Orientation
Go for the RV Gold


RV Educated? Calculating Propane Usage


Did you ever plan an RV trip to a remote area and wonder how long the LP gas in your LP cylinders or LP tank would last? If so there is a way there is a way to roughly calculate propane usage.

The first piece of the puzzle is knowing how much propane is in your RV cylinders or tank when full. Remember an RV propane cylinder or tank is full at 80% of its capacity to allow for expansion. Wait until your cylinder or tank is nearly empty and the next time you have it filled ask the attendant how much it holds.

The next step is to multiply your propane container capacity using one of these formulas, (gallons or pounds), to determine the container BTU capacity.

BTUs per gallon equal 91,502.
BTUs per pound equal 21,548.

Now, divide your container BTU capacity by the total BTU demand of the LP gas appliances you plan to use. BTU appliance demand can normally be found on the appliance itself, or in the appliance owner’s manual.
This will give you an idea of how long you can expect your LP gas to last.

For example: If your RV propane container holds 14 gallons of LP gas when it’s full, you multiply 14 X 91,502. The result is 1,281,028. Now divide this figure by the total BTU demand of any LP gas appliances you will be using. Let’s say, for the sake of an example, the total BTU demand will be 43,800 BTUs. In this case you would have approximately 29 hours of use before running out of LP gas.

However, keep in mind that the amount of LP gas in the container and varying temperatures will affect these calculations too. This is especially true in cold weather. At temperatures below zero degrees the per hour container BTU capacity will be reduced by 50% or more.

Calculating propane usage can give you a general idea of how long you can use your LP gas fired appliances before needing to find a propane filling station.
All of our RV walk through training DVD's cover the LP gas system and much more.

Happy Camping,

Mark Polk


RV Tire Age can result in Tire Failure


Tire failure on RV’s can be extremely dangerous and can cause extensive damage to your RV. There are lots of reasons for tire failure on RV’s, like under inflation, over inflation, overloading and the age of the tires. Today I want to discuss how the age of your RV tires, and exposure to the elements, can lead to tire failure.

Tires are designed and built to be used. The rubber used in tires ages faster when they are not used, so more use results in longer tire life. The problem is lots of RV’s don’t get used that much.

When tires are manufactured compounds are added to help protect the rubber from weather cracking and ozone damage. The problem is the tire needs to be rolling down the road, heating up and flexing for these compounds to work their way to the surface of the tire and protect the rubber from damage. So, when tires sit still, like in storage they start to dry out causing them to age faster.

Weather cracking or checking occurs on all tires when they are exposed to heat and sunlight. This is especially true of the tires sidewall. Ozone in the air and UV rays from the sun shorten the life of your tires. It’s not uncommon to see RV tires with low mileage and plenty of tread that are ruined by the damaging effects of ozone and UV rays. Ozone in the air causes tires to dry rot and deteriorate. UV rays from the sun , and not using the RV make it happen quicker.

You need to inspect your tires for weather checking or cracks in the sidewalls before each trip. Cracks less than 1/32 of an inch deep are ok, but if the cracks are more than 2/32 of an inch deep the tire should be replaced immediately. If you notice damage to the tires and you’re not sure what to do have them inspected by a professional.

This faster aging and weather cracking are why tire manufacturers recommend replacing the tires on RV’s when they are 5 to 6 years old, especially if the RV isn’t used that much.

So how can you tell how old the tires are? All tires manufactured in the United States have a DOT number. The DOT number may be on the inside or outside sidewall. At the end of the DOT number the last three or four digits in identify how old the tire is. Older tires used three digits. The first two identify the week of the year the tire was built and the third identifies the year. Newer tires use four digits. For example 3208 is the 32nd week of the year and 08 is the year 2008. If you question the age of your tires, especially on a used RV, and you can’t find the DOT number have them inspected by a qualified tire center.

Even though there are many other factors that can affect the life of your RV tires you can see that the age of the tires is one of the most important consideration.

Watch a 20/20 report on how the age of tires can result in dangerous tires http://www.youtube.com/watch?v=mDgSk5xWkrI

Now that we know how age and the elements can affect the life of your RV tires what can we do to help extend the life of tires when they’re not being used?

Considering where and how your RV is being stored can add life to your tires. Of course a covered, dry garage is the best scenario, but we know this isn’t always possible.

The first step is to clean the tires. Clean the tires with a mild soap and water. Avoid using tire dressings. Sidewall rubber contains antioxidants and anti-ozones that are designed to work their way to the surface of the rubber to help protect it. Washing tires excessively removes these protective compounds and can age tires prematurely. The same is true of most tire dressing designed to make your tires shine.

Inflate the tires to the recommended inflation pressure on the tire sidewall when in storage.

Avoid storing tires on petroleum based products like asphalt and other heat absorbing surfaces, and avoid storing tires on frozen ground.

If stored outside you should place some type of barrier between the tire and the ground surface. Make sure the blocking is wider than the tires tread and longer than the tires footprint. If tires are not blocked properly and the load distributed evenly the tire sidewalls can be damaged.

Avoid any exposure to heat and sunlight. If the RV is stored outside cover the tires with covers that block out the sun.

The RV should be stored with the least amount of weight on the tires as possible. That means it should be unloaded prior to storage.

You should move the RV every few months help prevent sidewall cracking from the tire sitting in one position for too long.

Following these simple tire storage tips can add life to your RV tires, but keep in mind that tire age and exposure to the elements are leading causes for tire failure. Make sure you know the age of your RV and automobile tires and always inspect your tires for signs of weather cracking before each trip.

For more information on maintaining your RV check out our RV Care & Maintenance DVD


Happy Camping,

Mark Polk

RV Extended Stay Maintenance Checks

Normally when you plan a trip in your RV you conduct some type of pre-trip checks to make sure the RV is properly prepared for travel. When it’s time to leave the campground you perform these checks again for the return trip. But what happens when you find that perfect campground or RV Park and stay put for extended periods of time? Do you conduct routine maintenance checks on the RV to make sure it is in a safe and operable condition while it’s parked? Most likely you do, but if not here are some extended-stay maintenance checks to consider performing.


Inflate the tires to the manufacturer’s recommended pressure. Tires can lose as much as 2 to 3 psi a month. If you stay in one spot for three or six months the tire pressure could be dangerously low. If the unit is not being moved check and adjust the tire pressure on a monthly basis. Ozone in the air and UV rays from the sun shorten the life of your RV tires. Ozone causes tires to dry rot and deteriorate and UV rays make it happen quicker. This is especially true of the tires sidewall. You should inspect your tires periodically for any checking or cracks in the tire sidewalls. If you notice any damage, have the tires inspected by a professional before using the RV. Tire failure on an RV can be extremely dangerous and can cause costly damage to the RV. Keep the tires covered with covers that block out the sunlight when the RV is sitting in one spot or not in use.


Place some type of RV leveling blocks between the ground and the tires. Be sure that whatever you use is larger than the footprint of the tire. No portion of the tire should hang over the edge of the tire block. This can cause internal damage to the tire. There are actually several reasons for blocking tires. First is to make sure the RV is as level as possible so more weight isn’t on one tire than the others. Storage surface areas can cause your tires to age prematurely. You don’t want to leave the tires in contact to any heat producing material or petroleum based material like asphalt for long periods of time. You also don’t want them exposed to constant cold or moisture, like sitting on the frozen ground. The wood or blocking acts as a barrier between the tires and the ground surface they are being stored on.


If it’s a motorized RV you should fill the fuel tank prior to parking it for a long stay and add a fuel stabilizer. Run the engine and the generator long enough for the fuel stabilizer to get through the fuel system. If you are not using the generator you should exercise it monthly with a minimum of a ½ rated load on it. Consult your generator set owner’s manual for rated loads.


Check and fill the water levels in all batteries and make sure the batteries stay fully charged. The electrolyte levels in batteries will be depleted through long term use. Check the water levels once or twice a week depending on usage. Many RV converter chargers provide a constant charge of about 13.5 volts which is too high for fully charged batteries and the electrolyte is boiled off, resulting in an early death for the batteries. You can use a digital voltmeter to measure voltage and get a quick picture of the batteries depth of discharge. A fully charged battery should read about 12.7 volts. Don’t check the voltage when the RV is plugged in, you will get a false reading. For a true reading of the batteries they should be tested after resting for 12 hours. Resting means the battery is disconnected from any charger or any load for at least 12 hours.


Change the oil and oil filter on the engine and the generator prior to long stays or long term storage. Acids accumulate in used oil and can corrode engine bearings.


Routinely test the operation of the carbon monoxide detector, LP gas leak detector and smoke alarm. Check the fire extinguisher monthly to make sure it is fully charged. Clean or replace air conditioner filters as required.


Before moving the RV, after extended- stays or storage, check all fluid levels in the transmission, power steering, engine coolant, engine oil, windshield washer and brakes. Consult your vehicle owner’s manual for proper levels. Start the engine and check for proper readings on all gauges. Check the condition of windshield wiper blades and replace them if necessary. Check the operation of all chassis lights. Make sure the vehicle emissions / inspection sticker is up to date.


Complete your normal pre-trip checks before heading out on the road again.


I realize there are many other items that could be added to this list, but this is a good starting point. You can tailor this list to your own personal needs.


For more great information on maintaining your RV check out our RV Care & maintenance DVD.


Happy Camping,


Mark Polk


RV Tire Tips for Safer RV Trips


It seems as though I talk about tire safety all of the time. The reason I do is because tires are an important safety topic concerning RVers that are often times overlooked.

Just recently I read a newspaper article that summed up just how overlooked tires, in general, are. The article stated, “The Rubber Manufacturers Association found that 29 million drivers believe that tires require no regular maintenance.” This number might be considered small when compared to our current deficit, but it is quite large when you consider 29 million people are driving around the country on tires they don’t know the condition of.

With peak travel season quickly approaching I thought it would be a good time to offer some tire tips for safer trips. These tire tips apply to your automobile as well.

Watch the RV Tire Tips Video

Two of the biggest problems with RVs today are overloading the RV and under inflated tires. With multiple slide-out rooms, large holding tank capacities and the ample amount of storage space available on today’s RVs it’s easy to see why so many are overloaded. We have a natural tendency to fill every nook and cranny of available storage space on our RVs.

Another problem is out of balance loads. You can be within an axle or tire’s load capacity on one end of an axle, and be over capacity on the other axle end. This is a common problem with RVs and many times the cause is poor weight distribution and/or improper loading of the RV. When this happens the tire or tires on the end of the axle that is overloaded are subject to tire failure. The bottom line is overloaded RVs and under inflated tires can be extremely dangerous. The only way to make sure that your RV is not overloaded is to have it weighed.

Weight ratings for RV’s are established by the manufacturer and are based on the weakest link in the chain. When you exceed a weight rating you are overloading one or more components on the RV and risk wearing the component out prematurely or complete failure of the component. In many cases the tires on your RV are the weakest link. Just like the axles on your RV, your tires have load ratings too. The maximum ratings are molded into the side of the tires. Keep in mind these are maximum ratings. The sidewall of the tire shows the maximum load and the inflation pressure for that load. Never set the inflation pressures below the recommendations you find on the vehicle manufacturers placard and do not exceed the maximum inflation pressure ratings found on the tires sidewall.

The tires on your RV are the most vulnerable component affected by overloading the RV. There are numerous reasons for this. First and foremost is when the tires are not inflated properly for the load. Failure to maintain correct tire pressure can result in fast tread wear, uneven wear, poor handling, and excessive heat buildup, which can lead to tire failure.

The only way to correctly measure the inflation pressure in your tires is with a quality inflation pressure gauge. Using your boot, a billie club or a hammer is not accurate, and never depend on your eyes to check tire inflation. There can be as much as 20 PSI difference between tires that look the same to your eye. You need to invest in an accurate inflation pressure gauge. You should get one with a double, angled foot. This makes it much easier to check the outer tire of a dual set.

Check all of your tires on a regular basis and adjust the pressure according to the manufacturer’s recommendation. Never check inflation pressure when the tires are hot. You’ll get a higher-pressure reading and if you let some air out they will be under inflated when they are cold. If you have dual wheels you’ll want to add extension hoses to the valve stems to make the job of checking tire inflation easier. It can be nearly impossible to check the inner dual without extension hoses. The best extension hoses will have stainless steel reinforcement and external braiding for long trouble-free life.

Ozone in the air and UV rays from the sun shorten the life of your tires. It’s not uncommon to see RV tires with low mileage and plenty of tread that are ruined by the damaging effects of ozone and UV rays. Ozone in the air causes tires to dry rot and deteriorate. UV rays from the sun make it happen quicker. This is especially true of the tires sidewall. Inspect your tires for checking or cracks in the sidewalls. If you notice any damage to the tires have them inspected by a professional.

Keep the tires covered with covers that will block out the sunlight when you’re not using your RV. You should also place something like a piece of wood between the ground and the tires. Be sure that whatever you use is larger than the footprint of the tire. No portion of the tire should hang over the edge of the tire block. This can cause internal damage to the tire.

Occasionally washing your tires with soap and water is OK using a soft brush. Sidewall rubber contains antioxidants and anti-ozones that are designed to work their way to the surface of the rubber to protect it. Washing tires or scrubbing excessively removes these protective compounds and can age tires prematurely. The same is true of most tire dressings. Products that contain petroleum, alcohol or silicone are bad for tires.

Tire failure can be extremely dangerous and can cause extensive damage to your RV. There are no
guarantees, but by practicing good tire maintenance you can feel much safer and secure that the weakest link on your RV will do its job while you’re out exploring this wonderful country we live in.
If you would like to learn more about maitaining your RV check out our RV Care & Maintenance DVD


Happy RV Learning,

Is your Tire Pressure Gauge Accurate?

We often talk about the importance of checking the inflation pressure in tires, but is your tire pressure gauge giving you accurate information? After writing my article titled, “Take the Visual RV Tire Test” I received several emails regarding the accuracy of tire pressure gauges.

One person commented, “I understand that tire pressure in an RV is crucial and can cause serious problems if not inflated correctly. Well, the problem is this, how do you know if the tire gauge is accurate? I have seen two tire gauges show as much as 16 psi difference on the same tire. Is there a recommendation as to which tire gauges are the most accurate?”

What’s funny about this is for many years, as a Maintenance Warrant Officer in the Army, I was responsible for tool calibration programs. Certain tools required regular calibration to ensure accuracy. I use a quality tire pressure gauge, but after reading this question realized that after several years of using this gauge I have never had it checked for accuracy.

Many of the really inexpensive gauges ($5) you can purchase can’t be calibrated, and if the reading is inaccurate the gauge is worthless. This is why you should spend a little more ($15-$25) and get a quality pressure gauge that can be calibrated. I am a real believer in the old saying; you get what you pay for.

If you have any doubt about the accuracy of your tire pressure gauge there are a couple things you can do to check it.

1) You can check the air pressure in a tire with the gauge in question and then check the same tire with another gauge. If there is a significant difference in the readings (4 or more psi) between the two gauges one or both gauges may be inaccurate. If both gauges read within 1 to 2 psi of each other the gauges are more than likely accurate.

2) If you want a more precise method for checking the accuracy take the gauge to a local tire dealer or fleet truck maintenance facility and ask them to check it using a master gauge. A master gauge is a gauge that is certified to be accurate. But I caution you there are lots of tire dealers who don’t have their own tire pressure gauges calibrated.

Note: Don’t depend on pressure gauges at gas stations to be accurate. These are usually abused and neglected, raising concern over accuracy.

There are several different types of pressure gauges available on the market. One important thing to keep in mind is the pressure the gauge is rated for. Most automobile tires are inflated to around 32 psi, so a 0 to 60 psi gauge is sufficient. On the other hand some motorhome tires are inflated to 100 or more psi. It is important, for accuracy and to prevent damage to the gauge, that you get the right gauge for the job. A general rule of thumb is to find a gauge that can read double what the inflation pressure is set at. This isn’t always possible especially with tires inflated to 100 psi, so find a gauge rated for high pressure, like 160 psi.

Possibly the most common type of pressure gauge is the plunge or pencil type. Some of these are calibrated and some of the cheaper ones are not. As a general rule a common plunge type gauge you would purchase will be accurate to + or – 3 psi when it is new. The accuracy of these type gauges are also affected by temperature, humidity and altitude.

Note: Always check the tire pressure when the tires are cold, before traveling. If you check the tires when they are hot you will get a false (higher) reading and if you let air out of the tires they can be seriously underinflated when they are cold.

Like everything else these days’ things are switching from analog to digital. Analog tire pressure gauges were the standard for many years, but advancements in digital technology have improved on that standard. Analog dial gauges are about as accurate as the quality pencil type gauges. In numerous tests comparing different type gauges digital gauges were the most accurate tested.

Regardless of the type of gauge you choose there are high quality and low quality gauges available. Buying a cheap digital gauge would be the same as buying a cheap pencil type gauge. Here are a few things to keep in mind when it comes to tire pressure gauges.

1) Spend a few more dollars and get a quality pressure gauge.

2) If the gauge will be used for checking dual wheels on a motorhome the chuck end of the gauge should have a dual foot design to make the job much easier.

3) Always select a gauge rated higher than the inflation pressure of the tires you are checking. Applying more pressure than the gauge is rated for can damage the gauge and affect the accuracy. If you over-pressure a gauge have it tested for accuracy.

4) Try not to drop or jar the gauge. Store the gauge in some type of protective covering or case and in an area where it won’t be hit or damaged.

5) Periodically have the gauge tested for accuracy. At a minimum compare it to another quality gauge to see if both read the same, or close to the same pressure.

6) Most importantly, once you purchase a quality pressure gauge use it on a regular basis to check your RV and automobile tires.

Remember, properly inflated tires are safer, extend the life of the tires, improve fuel efficiency and lessen the chance of unexpected and premature tire failure.

Happy RV Learning,

Mark Polk
RV Education 101
RV University

Winter RV Battery Storage & Maintenance


I was recently asked a question and felt like the answer could be useful to lots of RVers, so I am using the question as the topic for this article.


Q: Hi Mark, we live in Colorado and we are preparing our RV for storage. I just had the RV winterized, but I am concerned about how or what to do to store my RV batteries. Any advice would be appreciated.


A: The two most common causes for RV battery failure are undercharging and overcharging. Undercharging is a result of batteries being repeatedly discharged and not fully recharged between cycles. If a battery is not recharged the sulfate material that attaches to the discharged portions of the plates begins to harden into crystals. Over time this sulfate cannot be converted back into active plate material and the battery is ruined. This also occurs when a battery remains discharged for an extended period of time, like during storage. Sulfation is the number one cause of battery failure. The second leading cause of battery failure is overcharging. Overcharging batteries results in severe water loss and plate corrosion. With that said let’s look at how to properly store your RV batteries.


Before we talk about storing the batteries we need to talk about battery safety. Lead acid batteries contain sulfuric acid which is extremely corrosive and can cause severe burns or even blindness. And the hydrogen gas that batteries produce, when they’re charging, is very explosive. When you work around batteries you need to wear safety glasses and gloves, remove all jewelry and do not smoke or use any open flames.


Caution: If you accidentally get battery acid on your skin, flush it with lots of water and if it gets in your eyes flush with low pressure water for 15 minutes and call a doctor.


When you put the RV in long term storage it’s a good idea to remove the batteries and put them in storage too. This is quite simple to do. The first thing we want to do is visually inspect the batteries for any obvious damage. Any fluid on or around the battery may be an indication that electrolyte is leaking from the battery. A damaged or leaking battery should be replaced immediately. Whenever you remove any battery always remember to remove the negative terminal or cable first, and then the positive cable.


Battery Tip: When you remove a battery turn off the ignition switch, all electrical switches, and any battery disconnect switches before you disconnect the battery cables. Whenever you remove any battery cables label them first so you remember how they go back on the battery next spring. When you reinstall the battery do it in the reverse order. Install the positive cable first and then the negative cable.


Clean the batteries with a 50/50 mixture of baking soda and water if necessary. Now you can check the electrolyte level in each cell and add distilled water if necessary. The minimum level required, before charging a battery, is at the top of the plates. If it’s below the plates add enough distilled water to cover the plates before you charge the battery.


Test the battery state of charge with a voltmeter or hydrometer and charge any batteries that are at or below 80% state of charge. An 80% charge is approximately 12.5 volts for a 12-volt battery and 6.25 volts for a 6-volt battery. Lead sulfation starts when a battery state of charge drops below 80%. After charging the batteries check and fill each cell to 1/8 inch below the fill well with distilled water. Overfilling cells will cause battery acid to overflow.


Caution: Batteries should only be charged in a well ventilated area and keep any sparks and open flames away from a battery being charged.


Check the electrolyte levels before and after charging batteries.
A discharged or partially charged battery will freeze much faster than a charged battery. Store the batteries in a cool dry place but not where they could freeze. Batteries in storage will loose a percentage of current through internal leakage. It’s not uncommon for a battery to discharge up to 10% a month when it is being stored. Cold temperatures slow this natural discharge process down and warmer temperatures speed the process up. Test the stored battery state of charge every month and charge batteries that are at or below an 80% state of charge.


Completely charge the batteries before re-installing them next spring. For optimum performance you can equalize the batteries after they are fully charged. Battery equalizing is a controlled overcharge on a flooded lead acid battery after it has been fully charged. Equalizing reverses the buildup of negative chemical effects like stratification, a condition where the water and acid separate and the acid concentration is greater at the bottom of the battery than at the top. Equalizing also helps remove some of the sulfate build up on the battery plates. Equalizing is fine as long as there is not excessive heating or electrolyte boiling over. Some battery chargers have an equalization cycle or charge setting. After charging a battery, set the battery charger on equalizing voltage and charge it again. You need to test the specific gravity every hour during equalizing.


Equalization is complete when the specific gravity readings no longer rise during the gassing or bubbling stage. Keep in mind if equalizing a battery is done correctly the electrolyte should not boil over but it will create a good bit of bubbling, and when the cycle is finished you will need to add distilled water to the cells.


Note: If you don’t feel comfortable working on or around lead acid batteries have battery maintenance done by an authorized service center.


If you decide to leave the batteries in the RV while it is in storage remember to check the state of charge monthly and charge any batteries at or below an 80% charge. If your RV converter charger charges the battery(s) at a constant rate (around 13.5 volts) this is too high for a float charge and can deplete the electrolyte over time. In this situation plug the RV in periodically and allow the converter charger to charge the battery(s) for 8 to 12 hours. Some RV converter multi-stage chargers and aftermarket chargers are designed to maintain a float charge on the battery without removing the batteries from the RV. Remember, for the converter charger to work the RV will need to be plugged in to electricity.


Watch a video clip on Saving your RV Batteries


For more in depth information on RV batteries check out our Deep Cycle Battery Care & Maintenance DVD


Happy Camping,


Mark Polk


Some Interesting RV Poll Results

The outcome of any poll depends on several factors like; what type of poll it is, how the questions are worded, who is asking the questions and of course who does and does not participate in the poll.


Each week we conduct an RV poll in our e-newsletter. The RV poll is not a scientific poll, a political poll or a marketing poll. It is basically used to give me some idea of what our newsletter readers are interested in, how they use their RVs and just for the fun of it. I thought it would be interesting to look back at some of our past RV polls and see how the participants responded.


Here's what I found out.

  • 85% travel with the refrigerator on and 15% travel with it off
  • 53% prefer diesel and 47% prefer gas
  • 79% eat more meals in the RV and 21% eat more meals out
    89% conduct a spring check-up on their RV before using it and 11% don't
  • 67% said the recession won't change plans to use the RV and 33% said it will
  • 72% said their average RV trips are one week or less and 28% said their average RV trips are two weeks or longer
  • 54% own motorized RV's and 46% own towable RV's
  • 91% plan two or more summer RV trips and 9% plan only one
    63% store the RV on their own property and 37% make other storage arrangements
  • 82% check the tire pressure before each trip and 18% don't
  • 24% said a hybrid RV chassis would affect their buying decision and 76% said it wouldn't have any affect
  • 90% said they use environmentally friendly holding tank chemicals and 10% don't
  • 63% use their RV in the winter and 37% don't
  • 51% RV green and 49% don't
  • 100% have taken advantage of free overnight parking at one time or another
  • 70% have stayed in a friends or relatives driveway before and 30% have not
  • 77% were against the new Corporate Average Fuel Economy (CAFE) regulations and 23% were not
  • 86% are not fulltime RVers and 14% are
  • 83% use a GPS in their RV and 17% don't. Of those, 62% were led down the wrong path one time or another, but 93% would still recommend a GPS to other RV owners
  • 81% were prepared for the digital TV switchover in their RV and 19% were not
  • 19% frequently stay at state or federal campgrounds, 34% stay at private campgrounds, 5% stay at public campgrounds and 42% stay at a combination of all three
  • 49% have experienced at least one tire blowout with their RV and 51% have not
  • 81% have stayed in their RV during severe weather and 19% have not
  • 70% have experienced rude behavior from other campers and 30% have not
  • 67% use a pre-departure checklist when they RV and 33% don't
  • 98% have one or more slide outs on their RV and 2% don't have any slide outs
  • 60% shower in the RV more than the campground bath house and 40% shower in the bath house more than the RV
  • 88% winterize their own RV and 12% have it winterized by an RV dealer
  • 34% take bottled water with them, 14% use filtered water and 52% use both bottled & filtered water in their RV
  • 92% take pets with them on RV trips and 8% don't
  • 59% wash their RV as needed, 30% wash it after each trip, 7% wash it before storing and 4% never wash it
  • 71% pack as much food as possible before leaving and 29% buy groceries when they arrive at their destination
  • 30% pre-cook meals before leaving and 70% don't
  • 30% traveled by RV last Thanksgiving, 36% traveled by car, 1% by plane and 33% stayed home
  • 36% have weighed their RV and 64% have not
  • 33% have used their RV as a guesthouse and 67% have not
  • 84% have cleaned their RV roof at some point and 16% have never cleaned their RV roof
  • 78% perform routine maintenance on their RV and 22% take it to a dealer for maintenance
  • 72% have dry camped with their RV and 28% have not
  • 81% have camped in a national or state park and 19% have not
  • 31% have had problems with rodents in their RV and 69% have not
To read more RV poll results visit these links:


More Interesting RV Poll Results
RV Poll Results (3rd Installment)
RV Poll Results (4th Installment)


Happy RV Learning,

Mark Polk
RV Education 101
RV University
RV Orientation
Go for the RV Gold
Follow us on FACEBOOK
RV Consumer

What's your RV Emergency Escape Plan?


When we plan a trip in our RV we tend to think about all of the good aspects of the upcoming adventure. Where we are going, what we’ll do when we get there, and all of the things we will see and experience along the way. What we don’t really think about is what if something happens during the trip and everybody needs to exit the RV in a hurry. What if there is a fire? What if the entry door is blocked and you can’t get out. What’s the plan? Is there a plan?

I don’t want to worry anybody. My intent is to bring awareness to the possibility that something like this could happen, so you can discuss it and be prepared in the event of an emergency. An RV emergency escape plan is just one of those things lots of folks don’t think about.

For starters, the National Fire Protection Association (NFPA) requires that RV’s have emergency escape windows. Make sure that everybody(old enough) traveling with you in the RV knows where the emergency escape window is located and how to use it. It’s a good idea to practice using it so you are familiar with how to get out of the RV in case of an emergency. Consider elderly persons and small children. Can they exit the emergency window without assistance, and if not what is the plan.
Here are some more important considerations when formulating your escape plan:

* In the event of an emergency the mission is to get everybody out of the RV quickly and in an orderly fashion.

*You should have an emergency escape plan for the front of the RV and the rear of the RV.

* Time is your biggest enemy if there is a fire. An RV can fill with smoke in as little as one minute.

* Design an escape plan specific to the needs of the individuals in the RV.

* Sketch your plan on paper and indicate which windows and doors can be used to escape. Review the plan with everybody in the RV. Make sure each adult understands their duties when it comes to assisting others.

* Make sure everybody knows where the emergency escape window is located and how to use it.

* Make sure everybody knows how to use other windows and door latches in the RV, before there is an emergency.

* Practice your escape plan so everybody is familiar with how to get out of the RV in case of an emergency.

* If possible, designate a meeting place outside where everybody will meet immediately after exiting the RV so you can get accountability.

* When everybody is safely out of the RV call 911 for help.

* Never re-enter a burning RV!

Most importantly, do not risk your personal safety, or the safety of others, attempting to put a fire out. The first step is to get everybody out of the RV and away from the fire safely. Have somebody call 911 for help, and if you can’t extinguish the fire within the first minute or so let the professionals handle it.
For more information on RV Safety be sure to check out our RV Safety Features, Tip & Tricks Ebook

Happy Camping,
Mark Polk