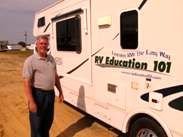
RV 101- RV Education 101 Tips for Improving Fuel Economy for the RV Consumer
1) Check and replace your air filter if it’s dirty. A clean air filter can improve your fuel economy up to 10%.
2) Check and adjust your tire pressure to the proper pressure for the load. This alone can increase fuel economy by 3%, not to mention preventing premature tire wear and failures caused by over or under-inflated tires. Tires can look normal when they are seriously under-inflated. Use a quality air pressure gauge and check your tires when they are cold, before traveling more than one mile.
3) For every 5mph you travel over 60mph is equivalent to paying ten cents more per gallon at the pump. If you are traveling down the Interstate at 70 mph add twenty cents to the price at the pump! Speeding and rapid acceleration reduces fuel economy anywhere from 5 to 33% depending on your individual driving habits.
4) Keep your vehicles tuned up and in top running condition. A poorly tuned engine can lower fuel economy by 10 to 20%. Poor emissions and/or a faulty oxygen sensor can cause up to 40% reduction in fuel economy.
5) Following recommended service and maintenance schedules/intervals will save a significant amount of fuel.
6) Using synthetic oils can increase fuel economy by 2%.
7) Adding weight that you don’t need reduces fuel economy significantly. A friend once told me, if you haven’t used it in the last 6 months you don’t need it!
See, it really is easy to improve our fuel economy. Try following these 7 easy steps to improve your fuel economy. You, and your wallet, will be glad you did.
For more RV 101 educational information visit http://www.rveducation101.com/ and http://www.rvconsumer.com/
What is an RV?
RVs come in many different types, sizes and price ranges. Some are very basic starting around $5,000 and provide basic sleeping arrangements and cooking facilities. On the other end of the spectrum there are luxury land yachts on wheels costing more than $1,000,000.
RVs are categorized in two groups, towable and motorized.
Towable RVs:
Towable RV's are towed behind a vehicle, and then disconnected and set up when you arrive at your destination. This allows you the benefit of using the tow vehicle to make a trip to the store, or go sight-seeing while you are camping. Towable RVs include folding camping trailers (pop-ups), truck campers, travel trailers, hybrid trailers, sport utility trailers (toy haulers) and 5th wheel trailers. In the majority of cases towable RV's are less expensive than motorized RV's simply because there is no engine or vehicle chassis. Towable RV's come in a variety of sizes, floorplans and price ranges. It is extremely important that you have a properly sized and equipped truck (or tow vehicle) to safely handle the size and weight trailer you are towing.
For more information on specific types of towable RV's click on a link below::
What is a pop-up?
What is a travel trailer?
What is a hybrid trailer?
What is a Sport Utility Trailer (SUT) or toy hauler?
What is a fifth wheel trailer?
Motorized RV's:
There are three classifications for motorized RVs, Type A, B, and C. Type A motorhomes are built on a special vehicle chassis and powered by either a gasoline or diesel engine. They are the type that look simila to a bus. Type B motorhomes are conversion vans that have been modified and equipped with all of the amenities found in other RV's, in a compact size. Type C motorhome are built on a cut-away van chassis and are the type you see with secton extending out over the vehicle cab. Motorized RV's can range anywhere from 21 to 45 feet in length and are available in a variety of floorplans and price ranges.
For more information on specific types of motorized RV's click on a link below:
What is a Type A motorhome?
What is a Type B motorhome?
What is a Type C motorhome?
Another type of RV is the Recreational Park Trailer (RPT). RPTs are basically designed to be used as temporary living quarters for recreation, camping, or seasonal use. In most cases these seasonal cottages are taken to a vacation spot, set up and left there on a permanent or semi-permanent basis. This may be in an RV park, resort area, or a tranquil location in the mountains, or at the coast, usually within a few hours drive from the owner’s residence.
For more information on Recreational Park Trailers click on the link below:
What is a Recreational Park Trailer?
Understanding more about each type of RV can help you decide which type is right for you and your family.
Happy RV Learning,
Mark Polk
RV Education 101
RV University
RV Orientation
Go for the RV Gold
Follow us on FACEBOOK
RV Consumer
Buying Tires for a Tow Vehicle
During a routine inspection of my truck I noticed the sidewalls of the tires had some cracking caused by too much exposure to the sun, and that the tread was just about down to the tread wear indicators. These were the original Michelin tires that came on the truck when it was new, and with over 65,000 miles on them I really can’t complain about replacing the tires.
When you are replacing the tires on a truck used for towing or hauling heavy loads an important consideration is the load range or rating of the tires. For light truck tires the load range lets you know the strength of the tire and the tires ability to hold air pressure. When I was growing up tire manufacturers referred to how many plies the tire had (the number of layers) to determine the load rating of the tire. The higher the ply rating the stronger the tire was and the more air pressure it could hold to support a heavier load. Nowadays they use an alphabetical rating to specify the load range of a light truck tire. The tire load ranges today don’t actually count the number of plies or layers in the tire, but the strength of the tire is comparable to the older ply ratings used years ago.
An easy way to compare today’s tire load ranges to the old ply rating system is to take the alphabetical load range designation of the tire and determine what number it is in the alphabet. For example if it is a D load range tire D is the fourth letter in the alphabet. Now multiply that by 2, so a D load range tire is equivalent in strength to an 8 ply tire. I have E load range tires, equivalent to a 10 ply tire, on my truck. The other important consideration is that the tires are inflated properly for the load they are carrying.
I personally like and use Michelin tires on my vehicles. I did some preliminary research on the Internet to see if there were any current sales for the type and size tires that were on my truck. Michelin was offering a $70.00 discount when you purchase four tires. I went to Sam’s Club to get the tires, but was told they were not in stock. The Sam’s Club employee told me they could order the tires and have them there in about three days.
I decided to try Sears first to see if the tires were in stock. The tire representative at Sears said they had the tires, but I noticed they were several dollars more than the price per tire that I got at Sam’s Club. I was told they would price match so I proceeded to ask about the $70.00 Michelin discount. The sales rep asked his manager and he agreed to give me the discount. When the sales rep totaled the sale it came to over $200 more than the Sam’s Club total figure for the same tires. I asked him how there could be that much difference for tires that are priced the same. When I looked at the printout I noticed it included a front end alignment and a road hazard insurance plan along with the new tires. I told the rep I wasn’t interested in a road hazard tire plan, and that there was nothing wrong with the front end alignment on my truck. He said the only way they would sell and warrant the tires was if they included the front end alignment. At this point I was a bit irate and told him to drop the tire alignment and road hazard plan and give me a new price. Then he said the $70 Michelin discount was based on the original price I was quoted and I would not get the discount on a new price quote. Needless to say I left and will probably never return to Sears, at least not to purchase tires.
When I returned home I found the same tires online and ended up saving about $20 per tire, after the shipping charges. When the tires get here I just need to have them mounted and balanced and I’ll be good to go for another 65,000 miles.
I always like to support our local economy, but when you have to deal with tires not in stock and higher prices for services you don’t want and/or need I will take my business elsewhere.
Keep in mind when you purchase tires for a truck that will be towing or hauling heavy loads you need to get tires that are rated for the load you will be hauling and properly inflate the tires for the load. If you doubt what the tire sales rep is telling you check the tire manufacturer load & inflation tables before purchasing the tires. If you question the price of the tires leave! You can always find them somewhere else at a fair price.
Happy RV Learning,
Mark Polk
RV Education 101
RV University
RV Orientation
Follow us on FACEBOOK
Optimum Trailer Braking
Let’s apply “you get what you pay for” to an important topic like towing a trailer. For the sake of an example let’s say you (the RV consumer) purchase a 6,000 pound travel trailer to tow behind your ½ ton truck. The brakes on the truck are designed to stop the truck, but not an additional 6,000 pounds behind the truck. You are aware that you need to purchase an electronic trailer brake controller to supply power from the tow vehicle to the trailer’s electric brakes. You soon discover there are lots of different choices when it comes to electric brake controllers, and they come in a wide price range too. Do you purchase the $50 time based model and hope it works effectively? Stopping a 6,000 pound trailer is not something you should take lightly. It is a safety issue for you, your loved ones and everybody else traveling on the same road as you.
This is where the phrase “you get what you pay for” really matters. You have the choice to purchase a less expensive, very basic, time delayed electric brake controller and save a few bucks, or you can spend more and get a network based controller that plugs into the On Board Diagnostic II (OBD II) connector in the truck cab and gathers data from the tow vehicle to effectively manage the trailer brakes. The less expensive model sends a pre-determined amount of power to the trailer brakes every time you step on the brake pedal. What if the pre-determined amount of power isn’t enough for the current conditions? The more expensive model is a network based controller. This DirecLink network based controller can observe the engine, transmission and vehicle speed and then analyze all of the data to determine the proper level of trailer braking required to safely stop the trailer, based on all of the current conditions. It links with your vehicle’s computer network and uses multiple data parameters in a proprietary way to create amazingly proportional trailer braking. For safety, reliability, performance and longevity there is no question you should go with the better network based controller.
Getting a high quality brake controller is a smart decision, but the only way to achieve optimum braking performance from the controller is to ensure that it is properly installed. If you use scotch-locks to make wire connections, rather than the correct type of sealed wire connectors, the more expensive brake controller might not work any better than the $50 model. The same is true if you use the wrong gauge wire over a certain distance, resulting in a drop in voltage and less efficient braking.
For optimum trailer brakes everything in the brake system must be in good working order.
In addition to proper installation of the network based brake controller it is extremely important that you perform routine maintenance on the remainder of the trailer brake system. This includes but is not limited to a 3,000 mile, or annual inspection of the trailer brake and bearing components. If you don’t feel comfortable performing this type of maintenance yourself you should have an authorized RV service center do it for you.
All too often a trailer sits for periods of time not being used, and in many cases this non-use is for extended periods of time. When it’s time to use the trailer we tend to just hook it up and drive off without really considering what may have gone wrong while it sat in storage. It’s common for a battery to discharge, for tires to be dangerously low on air, and the trailer plug contacts to get dirty and corroded. If the trailer brakes don’t work properly because of a bad contact in the plug, or a tire fails because of under inflation it puts us and others in harm’s way.
To help prevent these types of things from happening I want to include a simple pre-trip trailer checklist you can follow to make sure your trailer is ready to hit the road.
After properly hitching the trailer (i.e. WDH adjustments, sway control, safety chains) to the vehicle make the following checks:
■Inspect the trailer plug and vehicle receptacle contacts for dirt, debris and corrosion. Clean the plug and contacts as required, ensuring a proper connection. Plug the cord in and test all of the trailer lights.
■Connect the trailer break-away lanyard to a secure connection on the tow vehicle.
■Test the operation of the trailer brakes. Remove any wheel chocks. Pull the trailer forward slightly and press the brake pedal to verify the trailer brakes are engaging. Test the brake controller manual override for proper operation.
■Check all tires for abnormal wear and any weather cracking/checking. If any cracks in the tire sidewalls are deeper than 1/32” have the tire inspected by a professional before towing the trailer.
■Check and adjust tire pressure in accordance with the federal certification label on the trailer or using the tire manufacturer load and inflation tables.
■Check the condition of the battery. Check the water level in each cell and add distilled water as required. Check the battery state of charge with a multimeter or battery hydrometer. If you don’t feel comfortable working on or around lead acid battery’s have battery maintenance performed by an authorized service center.
■Every 3,000 miles, or annually, schedule a trailer brake and wheel bearing inspection.
For more great checklists check out our bestselling Checklists for RVers e-book with over 90 pages of checklists on all aspects of RVing.
Happy RV Learning,
Mark Polk
RV Education 101
RV University
RV Orientation
Follow us on FACEBOOK
BedSaver, Inexpensive Insurance for any Fifth Wheel Owner
Dropping the fifth wheel can happen quickly and easily. You're distracted at the campground and forget to lower the landing gear, or you're in a hurry, forget to chock the wheels and you pull the hitch latch, or maybe you think the hitch is locked and you pull forward, and BOOM! It can happen to anyone, even the most experienced fifth wheel owner. The next time you go to an RV dealership look at their service trucks, chances are one of them will have damaged bed rails too.
When this happens it can be extremely dangerous to anybody in the immediate area. It can also cause extensive damage to your tow vehicle and fifth wheel, not to mention how embarrassing it can be when other people are watching when it happens. Costs to repair damage to the tow vehicle and fifth wheel can range from $2,000 to more than $4,000, and hopefully nobody was injured when it happened. The thought of this happening is always in the back of your mind. This causes stress and interferes with enjoying your camping experience.
So how can you prevent this from happening to you? The BedSaver, by Blue Ox, is an inexpensive safety device that prevents the fifth wheel from dropping onto the bed rails of the tow vehicle. In the event of a hitch failure, or accident, the BedSaver will catch the fifth wheel pin before any damage occurs. I like to refer to the BedSaver as an inexpensive insurance policy, or better yet, piece of
mind for any fifth wheel owner. The BedSaver is available for most fifth wheel hitches and it's easy to install using regular household tools. Once it is installed it stays on the hitch and doesn't affect normal hitching or unhitching procedures.
Using a checklist for hitching and unhitching your fifth wheel can be extremely helpful too. I am including these checklists from my "Checklists for RVers" e-book. But, don't assume that just because you use a checklist you will never experience any fifth wheel hitching problems, or make any mistakes.
Hitching a 5th Wheel
* Set the hitch plate slightly lower than the coupler head so the trailer is lifted slightly as the hitch is mated. Do this by raising or lowering the jacks on the 5th wheel.
* Open the coupler lock so the king pin can engage the jaws on the hitch plate.
* Lower the tailgate and slowly back up. Have an assistant help you align the king pin with the coupler. Back up until the pin fully engages the coupler jaws. It may be necessary for the assistant to make minor adjustments to the height of the 5th wheel.
* Close the locking mechanism and the safety latch.
* Close the tailgate.
* Raise the 5th wheel jacks slightly off the ground (1 to 2 inches). Start the truck, put it in gear and slowly let off the brake pedal. This will help you check that it is properly hitched and locked.
* Now raise the 5th wheel jacks until there is plenty of clearance from the road.
* Connect the 12-volt trailer light cord to the receptacle on the tow vehicle.
* Connect the breakaway switch lanyard to a permanent fixture on the tow vehicle.
* Remove the wheel chocks.
* Check all lights for proper operation.
* Put on extended mirrors if applicable and hit the road.
Unhitching a 5th Wheel
* Chock the trailer wheels.
* Disconnect the trailer light cord and the breakaway switch lanyard.
* Place pieces of wood or other blocking material under the jacks and drop the landing gear. Put pins in landing gear and raise the trailer until all of the weight is off of the hitch plate.
* Open the coupler lock and safety latch.
* Lower the tailgate.
* Slowly pull the tow vehicle forward. It may be necessary to raise the trailer a bit more. You should be able to see daylight between the hitch plate and the king pin box.
Fifth wheel owners have a significant investment in their tow vehicle and fifth wheel. It only makes good sense to protect your investment with something as practical and inexpensive as the BedSaver. You don't want to be the fifth wheel owner who says, "That can only happen to the other guy!" The first time the fifth wheel pin drops and the BedSaver catches it, instead of the bed rails, it will be well worth the small investment. Get some piece of mind, get a BedSaver and let the other guy worry about it.
Happy RV Learning,
Mark Polk
RV Education 101
RV University
RV Orientation
Go for the RV Gold
Follow us on FACEBOOK
RV Consumer
Some Interesting RV Poll Results
Each week we conduct an RV poll in our e-newsletter. The RV poll is not a scientific poll, a political poll or a marketing poll. It is basically used to give me some idea of what our newsletter readers are interested in, how they use their RVs and just for the fun of it. I thought it would be interesting to look back at some of our past RV polls and see how the participants responded.
Here's what I found out.
- 85% travel with the refrigerator on and 15% travel with it off
- 53% prefer diesel and 47% prefer gas
- 79% eat more meals in the RV and 21% eat more meals out
89% conduct a spring check-up on their RV before using it and 11% don't - 67% said the recession won't change plans to use the RV and 33% said it will
- 72% said their average RV trips are one week or less and 28% said their average RV trips are two weeks or longer
- 54% own motorized RV's and 46% own towable RV's
- 91% plan two or more summer RV trips and 9% plan only one
63% store the RV on their own property and 37% make other storage arrangements - 82% check the tire pressure before each trip and 18% don't
- 24% said a hybrid RV chassis would affect their buying decision and 76% said it wouldn't have any affect
- 90% said they use environmentally friendly holding tank chemicals and 10% don't
- 63% use their RV in the winter and 37% don't
- 51% RV green and 49% don't
- 100% have taken advantage of free overnight parking at one time or another
- 70% have stayed in a friends or relatives driveway before and 30% have not
- 77% were against the new Corporate Average Fuel Economy (CAFE) regulations and 23% were not
- 86% are not fulltime RVers and 14% are
- 83% use a GPS in their RV and 17% don't. Of those, 62% were led down the wrong path one time or another, but 93% would still recommend a GPS to other RV owners
- 81% were prepared for the digital TV switchover in their RV and 19% were not
- 19% frequently stay at state or federal campgrounds, 34% stay at private campgrounds, 5% stay at public campgrounds and 42% stay at a combination of all three
- 49% have experienced at least one tire blowout with their RV and 51% have not
- 81% have stayed in their RV during severe weather and 19% have not
- 70% have experienced rude behavior from other campers and 30% have not
- 67% use a pre-departure checklist when they RV and 33% don't
- 98% have one or more slide outs on their RV and 2% don't have any slide outs
- 60% shower in the RV more than the campground bath house and 40% shower in the bath house more than the RV
- 88% winterize their own RV and 12% have it winterized by an RV dealer
- 34% take bottled water with them, 14% use filtered water and 52% use both bottled & filtered water in their RV
- 92% take pets with them on RV trips and 8% don't
- 59% wash their RV as needed, 30% wash it after each trip, 7% wash it before storing and 4% never wash it
- 71% pack as much food as possible before leaving and 29% buy groceries when they arrive at their destination
- 30% pre-cook meals before leaving and 70% don't
- 30% traveled by RV last Thanksgiving, 36% traveled by car, 1% by plane and 33% stayed home
- 36% have weighed their RV and 64% have not
- 33% have used their RV as a guesthouse and 67% have not
- 84% have cleaned their RV roof at some point and 16% have never cleaned their RV roof
- 78% perform routine maintenance on their RV and 22% take it to a dealer for maintenance
- 72% have dry camped with their RV and 28% have not
- 81% have camped in a national or state park and 19% have not
- 31% have had problems with rodents in their RV and 69% have not
More Interesting RV Poll Results
RV Poll Results (3rd Installment)
RV Poll Results (4th Installment)
Happy RV Learning,
Mark Polk
RV Education 101
RV University
RV Orientation
Go for the RV Gold
Follow us on FACEBOOK
RV Consumer
Preventive Maintenance Checks for an RV Generator
Here are some PM checks you can perform on a typical RV generator. In addition to these checks you should always follow the maintenance schedule and guidelines that came with your specific generator set.
Note: These PM checks are for a gasoline fueled generator. There are diesel propane fueled generators too. Some of these checks apply to all types, but some don’t. Consult your generator owner’s manual for maintenance checks and services for your specific generator.
1) Always check the oil level and the exhaust system prior to starting the generator. Starting and running a generator that is low on oil can result in costly damage to the generator’s engine. Add oil as required. Check your owner manual for the type of oil to use. A damaged exhaust system can result in carbon monoxide gas getting inside the RV. Always inspect the entire generator exhaust system prior to starting the generator. Never operate a generator with a damaged exhaust system!
2)Keep the generator set and the compartment it is housed in clean. You can use compressed air to assist in cleaning out the generator compartment and a clean shop rag to clean the generator set. While you are cleaning the generator check all electrical connectors for secure connections.
Note: always wear safety glasses when using compressed air.
3)Check all of the filters on the generator. A typical generator may have an air filter, fuel filter and oil filter. Check your generator owner manual for the types of filters your generator has and where they are located. Maintenance checks and services for a generator are based on hours of operation. You need to monitor the hour meter on your generator set for all maintenance intervals.
a)Check the air filter for cleanliness. You can remove it and inspect the fins on the back for signs of dirt or debris. You can tap the air filter on a flat surface to help remove some of the dirt and debris. Change a dirty filter, or change it at prescribed intervals. Inspect the air filter more often in dusty conditions.
b)The fuel filter will typically be an in-line type filter. Over time it filters out and collects enough debris that it can interfere with the flow of fuel. Check and replace the fuel filter at prescribed intervals.
c)We’ll talk about the oil filter in just a minute.
4)Change the oil and oil filter (if equipped). This is perhaps the most important PM Service you can perform on your generator to ensure years of reliable service. Change the oil and replace the oil filter at the recommended intervals. It’s really quite simple to do. Your generator owner’s manual will usually describe the steps to follow. If you don’t feel comfortable changing the oil and filter have an authorized RV service center do it for you.
5)Replace the spark plugs at recommended intervals. If you ever replaced the spark plugs in a vehicle you can replace the plugs in the generator, unless due to the constraints of the generator compartment you can’t access the spark plugs. In this case you may want to let an authorized RV service center do it for you. If you decide to do it yourself check your generator owner manual for the correct type of plug to use and double check the spark plug gap before installing the plugs. Do not over tighten spark plugs!
6)Exercise the generator. There are several reasons why you should start and exercise the generator on a regular basis. Moisture build up can cause damage to your generator. When you exercise your generator it heats up the generator windings and eliminates this moisture build up. This monthly exercise regime also lubricates all of the engine seals and components and helps to prevent carbon build up. So, what exactly do I mean when I say exercise your generator? For a gasoline generator I mean that you start and run the generator with at least a 50 % load, for at least two hours every month. It is extremely important that you run it with this minimum rated load. Generators are designed to run with a load placed on them. It’s always better to let your generator run for longer time periods than it is for short time periods. Check your generator owner’s manual for load ratings specific to your unit. Always try to avoid starting or stopping a generator when there is a 120 volt device or appliance turned on.
7)Add a fuel stabilizer during periods of storage or non-use. If it’s a motorhome add a fuel stabilizer to the motorhomes gas tank and run the generator long enough for the stabilizer to get through the fuel system. This will help prevent gas related problems on carbureted generators, like not starting or surging. These are problems you don’t need. Fuel stabilizers can protect the fuel system for up to six months, but keep in mind the importance to exercise the generator when possible.
Well there you have it. Follow these simple steps, and the maintenance and service instructions in the generator owner’s manual, and you can get years of reliable service from your generator set.
A couple of additional tips for generator maintenance are to keep the battery that is used to start the generator maintained, and when running the generator monitor the AC voltage and frequency output with some type of digital plug in meter. I recommend one that can test campground polarity, measure AC line voltage and AC frequency. Frequency is the number of times that electricity alternates per second. U.S. appliances are designed to operate at 60 cycles per second, or 60 hertz.
When you use your generator the governor in the generator must hold the speed constant at, or close to 60 hertz from no load on the generator to a full load. Depending on the load placed on the generator, AC voltage can range from 105 to 135 volts and the frequency can range from 58 to 63 hertz. Anything outside of these parameters can cause problems for your RV electrical system and/or generator set. The meter will let you know when the generator is not operating within the proper ranges and you can have it checked out and repaired before any damage occurs.
Happy Camping,
Mark J. Polk
RV Education 101
RV University
copyright 2009 by Mark Polk owner of RV Education 101
Extend the Life of your RV Awnings
Perhaps the most important component of an awning is the fabric. Fabric used on RV awnings is one of two types, acrylic or vinyl. Acrylic fabric is a woven cloth that lets air circulate through the fabric. This air circulation allows the fabric to dry quickly when it gets wet. Acrylic fabrics are water repellent, but not waterproof. If you have experience tent camping you know that you shouldn’t touch the underside of the tent when it’s wet. Touching the wet fabric allows water to seep through the fabric. The same applies to an acrylic awning fabric. Vinyl awning fabric is mildew resistant, but not necessarily mildew proof. Mildew can form on the dirt and dust that collects on the vinyl fabric. It will be worse in high temperatures, humidity and if the fabric is stored when it is wet.
Some awnings have an aluminum or vinyl wrap-around weather guard that protects the awning fabric when it’s in the travel or stored position. When you open the awning for the first time each year, or if it has been stored for a while, you will need to inspect the awning fabric for any signs of mildew or stains. Remember vinyl awnings will mildew. To prevent dirt from imbedding into the woven fabric of an acrylic awning fabric you should simply hose the fabric off on a routine basis. Avoid scrubbing acrylic awning fabric. Scrubbing can remove the water retardant finish. For stubborn stains blot the approved cleaner on the acrylic fabric with a sponge or soft cloth.
For more difficult stains or mildew on a vinyl awning fabric there are after market commercial cleaners made just for awning fabrics. One method that seems to work well is to spray the inside and outside of the awning fabric with the appropriate cleaner, then roll it up and let it sit for several minutes. This distributes the cleaner over the entire surface of the awning fabric and allows the cleaner time to work. Open the awning and thoroughly rinse both sides of the fabric. It may be necessary to scrub stubborn stains with a brush on a vinyl awning fabric before rinsing. You can clean the awning hardware with the same cleaner you use to wash the RV.
Note: Never use oil based or abrasive cleaners on awning fabrics. Clean and thoroughly rinse both sides of the awning fabric. Carefully follow all awning and cleaner manufacturer directions.
Inspecting the Awning
Inspect the awning fabric for any tears or excessive wear. Talk to your RV dealer about what materials to use to repair or patch the awning fabric.
Do not store the awning when the fabric is wet. Allow enough time for it to dry completely, on both sides, before storing the awning.
While the awning is out, inspect the awning hardware. The bottom awning brackets support most of the load from the awning. Check the lag screws in the awning brackets for secure mounting. Inspect the arm pivot holes for any enlarged holes or broken rivets in the handles.
Check for a warped roller tube. If the roller tube is warped it will be noticeable when you roll the awning out.
Inspect the awning end caps for secure mounting and broken rivets. Caution: Never attempt to remove the awning end caps. Spring tension can result in serious injury.
Make sure the awning rail is securely mounted to the side of the RV.
Note: Have any damaged or broken parts repaired before using the awning.
In addition to cleaning and inspecting your awning there are a few things to keep in mind when using the awning.
Always lower one end of the awning to allow for water runoff. The weight from water pooling on the awning fabric can cause extensive and costly damage.
Any wind gusts over 20 miles per hour can also cause extensive damage to the awning and to the RV. Never leave the awning out unattended. If everyone is leaving the campsite, store the awning in the travel position. When you go to bed, store the awning. Even when you are at the campsite, you should use awning tie downs to prevent any sudden damage caused by high wind gusts or a sudden storm.
You have the option to position the awning arms straight down and stake them to the ground, but you will get better support if they’re attached to the bottom awning brackets on the side of the RV. Remember, it is much easier to prevent damage to your awning than it is to repair it.
Awning Tip: Check with your RV insurance provider to make sure your RV awning is covered in the event of any damage. Some insurance companies require separate insurance coverage on the RV awnings.
For more in-depth information on RV awnings check out our RV Awning Use, Care & Accessories DVD
View a video clip on how to install a window awning in six easy steps
Well that about does it. With the proper care and a little preventive maintenance you and your RV awnings will have it made in the shade.
Happy Camping,
Mark J. Polk
RV Education 101
RV University
copyright 2009 by Mark Polk owner of RV Education 101
RV 101® - RV Winterizing 101 (Part 2)
We enjoy using our RV as much as possible throughout the year. But when you can’t use your RV, for whatever reasons and temperatures are approaching freezing, it’s important that you protect it. Last week I talked about preparing your RV’s interior, exterior and chassis for storage during the colder winter months. I mentioned at the beginning of the article that the RV plumbing system is the most vulnerable to damage caused by plummeting temperatures. The good news is it is really quite easy to protect the RV water system from this potential threat. I am including a checklist from my “Checklists for RVers” eBook to help walk you through the winterizing process.
Before you get started there are a few items you will need to have. These items can be found in most RV parts stores:
■ Non-toxic RV/Marine antifreeze. The amount depends on the layout and length of your plumbing lines. Two to three gallons will normally do.
■A water heater by-pass kit, if not already installed.
■ A tank wand to clean out the holding tanks, if you don’t have a built-in flushing system.
■A water pump converter kit, or tubing to connect to the inlet side of the water pump.
■ Basic hand tools to remove drain plugs.
Note: Be sure to read your owner’s manuals for unit specific winterizing guidelines. Follow the steps below that apply to your RV.
■If you have any inline water filters remove and/or bypass before starting.
■Drain the fresh water holding tank.
■Empty and flush the gray and black water holding tanks if it hasn’t already been done. If the RV doesn’t have a built-in flushing system clean the black tank out with a tank cleaning wand.
■Drain the water heater. Open the pressure relief valve and remove the drain plug.
Caution: Never drain the water heater when hot or under pressure. With no water hooked up to the RV and the water pump off, open a hot water faucet to remove any pressure on the system. Allow sufficient time for the tank to cool before draining.
■ Open all hot and cold faucets; don’t forget the toilet valve (pedal or lever) and the outside shower (if equipped).
■Locate and open the low point water drain lines.
■Use the water pump to help force most of the remaining water out of the system, but turn it off as soon as the system is drained to prevent damaging the pump.
Note: It is not necessary to get every drop of water out of the water system, but you want to get most of it out. The non-toxic RV antifreeze will prevent the small amount of remaining water from freezing.
■Recap all drains and close all faucets.
■ By-pass the water heater. If you do not have a by-pass kit installed the water heater will fill up with RV antifreeze before it goes through the water lines, wasting six or ten gallons of antifreeze.
Note: A water heater by-pass kit can save you money in two ways. It saves you from using an extra six or ten gallons of non-toxic RV antifreeze when it’s time to winterize your RV, and a bypass kit also prevents costly damage like ruptured water lines or a ruptured water heater tank. If water is left in the lines or tank they can freeze and expand, splitting the lines or tank. With a bypass kit you simply drain the water heater, put it in the by-pass mode and the antifreeze bypasses the tank and goes directly into the water lines.
■Install a water pump converter kit, or disconnect the inlet side of the water pump (the line coming from the fresh water holding tank to the pump) and connect tubing from the water pump inlet into a one gallon jug of RV antifreeze.
■ Turn the water pump on and pressurize the system. Starting with the closest faucet to the pump, slowly open the hot and then cold valves until the colored RV antifreeze appears. Replace the antifreeze container as required.
■Repeat this procedure on all faucets from the closest to the farthest away. Don’t forget the outside shower (if equipped).
■ Flush the toilet until antifreeze appears.
■Pour a cupful of antifreeze down every drain (all sinks, shower & tub drains).
■Pour some RV antifreeze in the toilet and flush into the holding tank to prevent any water in the tank from freezing.
■If your water heater has an electric heating element, turn it off. This will protect the element if the unit is plugged in (and the switch is on) while in storage.
■Make sure all faucets are closed.
■The unit is winterized.
Note: Consult your owner manuals for unit specific winterizing instructions for icemakers and washing machines.
Now, next spring when it’s time to head out in the RV you won’t have any unpleasant, not to mention costly, surprises waiting for.
For more great winterizing & storing information check out my Winterizing & Storing your RV E-book & my Winterizing & Storing your RV video
Happy Camping,
Mark J. Polk
RV Education 101
RV University
copyright 2009 by Mark Polk owner of RV Education 101
RV 101® - RV Winterizing 101 (Part 1)
The English dictionary definition for “winterize” is to prepare something, especially a house or an automobile, to withstand cold winter conditions. What I find interesting about this definition is that your RV is essentially a house and automobile combined. With that said, winterizing your RV would entail more than just preparing the water system for cold winter conditions. We would need to be concerned with preparing the RV’s interior, exterior, chassis, and plumbing from the harsh winter months.
Today I will discuss some tips for preparing the RV interior, exterior and the chassis for cold winter storage, and next week I will discuss preparing the plumbing system for the cold winter storage.
RV Interior
When RVs are stored for the winter it’s not uncommon for mice and squirrels to make their winter home in the RV. These animals are notorious for chewing through vehicle wiring, plastic and rubber components, resulting in extensive damage to the RV. If it’s a motorized RV start the engine periodically to keep any chewing squirrels out of the engine compartment area.
Possibly, the most important step is to try and prevent mice and other rodents from being able to access your RV. This can be difficult because they can enter the RV through some very small openings. Start by inspecting the underside of your RV for any gaps or holes. Fill these gaps using silicone or expanding foam. A word of caution, if you never used expanding foam before, you should experiment with it on something other than your RV first. When it dries it can expand a great deal more than you expect. Next, open drawers and cabinet doors inside your RV. Look in all of the corners and crevices, especially where plumbing and wiring enter the RV. If you can see any daylight mice can get in. Fill these areas with silicone or foam.
Remove all food from the RV when it’s being stored and thoroughly clean the RV to remove any remnants of food that might attract mice and other rodents. Some people say mothballs help deter mice from making their home in your RV, and others say an alternative to mothballs is dryer sheets, like Bounce. I have talked to people who swear they work and the smell is much more pleasant. If you are close to where your RV is being stored you may want to use conventional mouse traps and check for mice every week or so.
Next you should defrost the freezer compartment and clean the refrigerator. Leave the doors open and place baking soda in the compartments to absorb any odors. If the RV is in long-term storage, and won’t be plugged in to electricity, it’s a good idea to turn off the main breaker in the distribution panel. Turn the LP gas supply valve off at the cylinder(s) or tank. Close the window blinds to avoid sun exposure to the carpet, drapes and upholstery. Leave doors drawers and cabinets open. Clean the A/C filter(s). If you have vent covers installed on the overhead vents, that prevent rain from getting inside, leave them cracked open to allow for some ventilation. Remove any dry cell batteries from devices like smoke alarms, clocks etc.
RV Exterior
When you store your RV outside for extended periods the exterior begins to show signs of wear, caused by the constant exposure to the elements. Ozone in the air and ultraviolet, (UV) rays from the sun start to take their toll. Ozone causes the paint to fade and makes products like rubber and vinyl dry out, crack, and start to deteriorate. The UV rays from the sun make this aging process happen quicker. Before you store your RV you need to give the exterior a thorough cleaning. Whenever I’m washing or cleaning anything, whether it’s an automobile or the RV, I start from the top and work my way down. It’s a good idea to clean the RV roof before putting the RV in storage too. The type of roof your RV has will determine the cleaner you will need to use. Wash the exterior and if you’re really motivated wax it, using a quality wax formulated for the type of exterior surface your RV has. A good coat of wax protects your RV finish the same as it does an automobile. When you are cleaning the RV exterior inspect all roof seams, body seams and window sealant for any cracks and openings that would allow water to get in. Consult your RV dealer for sealants compatible with these materials and re-seal as required.
Don’t forget to clean the awning fabric, and let it dry completely before storing it. If you have a pop-up or hybrid trailer make sure all of the tenting material is clean and dry before storage.
Ideally you should try to store your RV under a covered area and on a solid surface like concrete. If this isn’t possible avoid parking under trees and in tall grass, fields or wooded areas. If the RV won’t be parked under some type of covered shelter you may want to invest in a cover. Covering your RV can be a logical and cost effective way to help protect your investment. If you decide to use a cover make sure it is made of a breathable material.
Service all locks with a spray lubricant and lubricate all hinges. Insects are attracted to the odorant added to LP gas. You may want to cover LP gas appliance vents to prevent insects from making their winter home inside these vents. If you do cover the vents, remember to remove the cover next spring.
RV Chassis
Just like the exterior of the RV, the tires on your RV can be damaged by the harmful UV rays from the sun. Inflate the tires to the manufacturer’s recommended pressure and cover the tires with covers that will block out the sunlight. Place something like a piece of wood between the ground and the tires. Frozen ground and petroleum based surfaces, like asphalt, can damage tires over time. Make sure that whatever you use to block the tires is larger than the footprint of the tire. No portion of the tire should hang over the edge of the tire block; this can cause internal damage to the tire. For trailers, chock the wheels front and rear. If you are storing a pop-up outdoors angle the tongue downward to assist in snow and water run-off.
Battery maintenance is an important part of winter storage preparation. If you plan to start the unit while in storage, and to periodically plug the unit into shore power leave the batteries in the unit. Plugging it into shore power once a month for about eight hours will help keep the coach batteries topped off. At a minimum you should check and adjust the water levels in all batteries and make sure the batteries are fully charged. A discharged battery will freeze much quicker than a fully charged battery. If the RV is in long-term storage it’s better to remove the batteries and store them where they will not freeze. In either case keep the batteries fully charged when they are in storage.
Note: If your converter charger doesn’t have a three stage charging system (or storage maintenance mode) don’t leave the unit plugged in constantly. This could overcharge the batteries and deplete the electrolyte levels.
If it’s a motorized RV you should fill the fuel tank prior to storage and add a fuel stabilizer. Run the engine and the generator long enough for the stabilizer to get through the entire fuel system. Change the oil and oil filter on the engine and the generator prior to storage. Acids accumulate in used oil and can corrode engine bearings, especially while sitting for long periods of time. If possible exercise the generator for at least two hours every month with a minimum of a ½ rated load on it. Consult your generator owner’s manual for load ratings.
Winterizing Part 2: How to prepare the RV plumbing system for the cold winter months.
If you would like to learn more about winterizing & storing your RV check out our Winterizing & Storing your RV ebook
and Winterizing and Storing Your RV video
Happy Camping,
My First Real RV Adventure
It was Thanksgiving and deer hunting season was quickly approaching, which in North Central Pennsylvania is very similar to a Federal holiday. I asked my boss if I could borrow an old travel trailer to use for a deer hunting trip and to my surprise he actually said yes. I don’t remember all of the details about the travel trailer, but I do know it was a Shasta because it had the classic wings on each back corner. I would guess that it was a mid-to-late 60’s model and it was close to 20-feet long. The only conditions for borrowing the trailer were:
1) To bring it back in one piece and
2) Not to use the water system because it was winterized and the temperatures were in the low teens.
Antlered deer hunting season started the Monday following Thanksgiving and I invited my best friend to go with me. We were going to head up into the foothills on Saturday to set things up and do some last minute scouting. I had a 1969 Chevy Blazer. It was a full size, K5 model, with a six-cylinder engine and rust holes in the body the size of softballs. Now, you would think that working for an RV dealership I would have access to, and use, the proper hitch work and brake control to tow the trailer. I do remember wiring a plug for the trailer lights, but figured since I wouldn’t be towing the trailer on a regular basis I would forgo the brakes and just drop the trailer on the ball and go.
Keep in mind I was a teenager, and knew everything back then. Kind of like how my teenage son knows everything now! There were no pre-trip checks or inspections. We picked up the bare essentials, a pot and pan, some groceries, our sleeping bags and hunting equipment and off we went. It was about a sixty-mile trip to our favorite hunting destination. The first thirty-five miles was on two-lane paved roads and the last twenty-five miles was a winding, snow covered dirt road barely wide enough for one vehicle. If you encountered traffic going the opposite direction somebody had to back up until there was a spot wide enough for both vehicles to safely pass. I do remember the Blazer didn’t seem to steer quite like normal and if I had to stop quickly I would have hit whatever it was that was making me stop so quickly. I took a deep sigh of relief after the white-knuckle experience of getting to our destination and thanked my lucky stars that the trailer was still in one piece. Little did I know that getting there was just the beginning of my first real RV adventure!
We set the trailer up, which at the time was really nothing more than leveling it from front to rear using the tongue jack and turning the LP gas supply on. Then we settled in the trailer for the first night. We figured since it was cold outside we didn’t need to use the refrigerator, so we left our groceries in the Blazer. The furnace was the old style that you had to light manually. Soon after I got it to light it warmed up enough inside to take our gloves and coats off. For dinner we heated up some pork and beans on the range top and ate them out of the pan because we forgot to bring any plates. Afterwards we played a card game called set-back and eventually turned in for a good nights sleep. The next morning I went to the Blazer to get some bacon and eggs for breakfast. The eggs were frozen solid. We fried some bacon and later that morning we used the frozen eggs for target practice to sight our hunting rifles in. We washed the pans in a nearby, nearly frozen stream, since we didn’t have any water, and the rest of the day was spent scouting the snow covered hills for signs of deer. Then it was back to the cozy, but somewhat drafty Shasta trailer.
After another entree of pork and beans I put all of the empty cans and other garbage in a plastic bag and set it outside the door. The next morning was opening day. It was difficult to relax and go to bed that night, but knowing we would be getting up early we forced ourselves to turn in for the night. The first major event of the night was waking up around midnight because it felt like 10 degrees below zero inside the trailer. The trailer only had one full and one partially filled 20-pound LP gas bottle, and with the furnace running non-stop since we arrived they were both empty. Fortunately I did have enough forethought to bring two spare 20-pound LP bottles with us. I told my friend that since I got the trailer for us to use he would have to get out of his sleeping bag, change the bottles and re-light the furnace. After some reluctance and a few choice words he stumbled outside and changed them over. Soon it was warm again and we were both back to sleep.
Sometime around three in the morning the trailer began to shake, I mean literally shake back and forth. At first I thought I was dreaming but soon realized I wasn’t. I reached up and turned a small overhead light and looked over at my friend to see if he was awake. Not having any clue what was happening we both stared, wide-eyed, at each other. I pulled the small curtain away from the window and peered outside. It took a minute to focus my eyes in the dark, but I soon realized that there were two bears outside; a small black bear cub and its not so small mother pushing against the side of the trailer. Not really sure what to do we both got our hunting rifles, loaded a round in the chamber, and stood back, ready for when the bear would come busting through the door or a window. We waited for what seemed like forever at the time, but it was probably a minute or two before the shaking stopped. We glanced out the window again and there were no signs of the bears anywhere. Needless to say we didn’t get anymore sleep before it was time to head out to our favorite hunting spots early that morning. When we walked out of the trailer, with flashlights in hand, we soon realized why the black bears stopped to visit us that night. There were pork and bean cans and other garbage scattered everywhere around our makeshift campsite.
Another reason this memory remains so clear in my mind is because at 8:10 AM on opening day I shot my first 8-point whitetail buck on a ridge about 80 yards from where I was sitting. My friend heard the shot and came over to check it out. After field dressing the deer it took us about two hours to drag it down the long ravine, back to the trailer. Knowing that we had enough LP gas for one more night we fired up the furnace and ate some more pork and beans. After making sure there was no garbage outside we settled in to the warm, cozy Shasta trailer and played cards while I recounted the events of the great whitetail deer hunt over-and-over again.
We did manage to get the trailer back home safely, and other than some remnants of hungry black bear paw prints on the side of the trailer it was still in one piece. That nearly disastrous weekend hunting trip, in freezing cold weather, spent in the small Shasta travel trailer, is when I got bit by the RV bug. Forty-one years and six RVs later, we are still making new RV memories every year.
There are many different types of RVs. In our RV101® video get some helpful tips on selecting the right type of RV for you.
https://youtu.be/5uqxd9nuqaQ Happy Camping!
Mark J. Polk
RV 101® Travel Trailer Ultimate Video & E-book Bundle
https://rvonlinetraining.com/p/travel-trailer-ultimate-e-book-and-video-bundle
RV 101® 5th Wheel Ultimate Video & E-book Bundle
https://rvonlinetraining.com/p/rv-101-5th-wheel-ultimate-video-e-book-bundle
RV 101® Motorhome Ultimate Video & E-book Bundle
https://rvonlinetraining.com/p/rv-101-motorhome-ultimate-video-e-book-bundle
Travel Trailer & 5th Wheel Trailer RV Orientation Video Training Course
https://rvonlinetraining.com/p/rv-101-rv-orientation-for-travel-trailer-s-5th-wheel-trailers
Tow Your Travel Trailer Like a Pro Video Training Course
https://rvonlinetraining.com/p/rv-101-trailer-towing-basics
Tow Your 5th Wheel Like a Pro Complete Online Video Training Course
https://rvonlinetraining.com/p/tow-your-5th-wheel-like-a-pro
Motorhome RV Orientation Video Training Course
https://rvonlinetraining.com/p/motorhome-rv-orientation-video-training-course
Drive Your Motorhome Like A Pro Complete Online Video Training Course
https://rvonlinetraining.com/p/drive-your-motorhome-like-a-pro
RV Care & Preventive Maintenance RV DIY® Online Video Training
https://rvonlinetraining.com/p/rv-101-rv-care-preventive-maintenance-online-video-training
RV Essential Items Video Training Course
https://rvonlinetraining.com/p/rv-essential-items
Winterizing and Storing Your RV Video Training Course
https://rvonlinetraining.com/p/winterizing-and-storing-your-rv-video
Travel Trailer 4 Video Bargain Set Plus Free RV Checklist ebook
https://rvonlinetraining.com/p/travel-trailer-video-bundle
5th Wheel 4 Video Bargain Set Plus Free RV Checklist ebook
https://rvonlinetraining.com/p/5th-wheel-video-bundle
Motorhome 4 Video Bargain Set Plus Free RV Checklist ebook
https://rvonlinetraining.com/p/motorhome-video-bundle
———————–
A Collection of RV Education 101 E-Books – 9 RV E-BOOK BUNDLE SET
https://rvonlinetraining.com/p/a-collection-of-rv-education-101-e-books-9-rv-e-book-bundle-set
An Introduction to RVs E-book Training Course
https://rvonlinetraining.com/p/an-introduction-to-rvs
Insider’s Guide to Buying an RV E-Book Training Course
https://rvonlinetraining.com/p/insider-s-guide-to-buying-an-rv-downloadable-pdf-e-book
Owning & Operating an RV E-Book Training Course
https://rvonlinetraining.com/p/owning-operating-an-rv
The Original Checklists for RVers E-Book Training Course
https://rvonlinetraining.com/p/the-original-checklist-s-for-rvers
RV Campground Basics E-Book Training Course
https://rvonlinetraining.com/p/rv-campground-basics-e-book-course
RV Safety Features, Tips & Tricks E-book Training Course
https://rvonlinetraining.com/p/rv-safety-features-tips-tricks
RV Care & Maintenance E-Book Training Course
https://rvonlinetraining.com/p/rv-care-maintenance-e-book-course
Winterizing & Storing Your RV E-Book Training Course
https://rvonlinetraining.com/p/winterizing-storing-your-rv-e-book
RV Battery Care & Maintenance E-Book Training Course
https://rvonlinetraining.com/p/rv-battery-care-maintenance
Trailer Towing Basics E-Book Training Course
https://rvonlinetraining.com/p/trailer-towing-basics-e-book