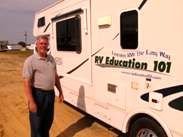
As we head toward colder temperatures, I would like to suggest a few preventive maintenance checks to prepare your RV for the fall and winter camping seasons. Please don’t confuse these checks with winterizing your RV or preparing it for winter storage.
In no particular order, here are my top 7 pre-winter RV checks:
1. Inspect your RV batteries
Check all battery connections for secure mounting. Clean the batteries with a 50/50 mixture of baking soda and water, if necessary. If you have lead-acid batteries, check the electrolyte level in each cell and add distilled water, if necessary. Many older converter chargers provide a constant charge of approximately 13.5 volts, which is too high for fully-charged batteries and can cause the electrolyte to boiled off, resulting in an early death for the batteries.
Check water levels weekly, at a minimum, when using the RV. Test the battery state-of-charge and charge any batteries that are at or below 80 percent. A discharged or partially-charged battery will freeze much faster than a fully-charged battery. Use a digital voltmeter to measure voltage and get a quick picture of the batteries’ depth of discharge. If you don’t feel comfortable working on or around batteries, have a reputable RV service center perform battery maintenance for you.
Note: A 12-volt battery that is charged should read 12.5 to 12.7 volts. Readings less than 12.5 indicate the battery state of charge is below 80 percent and the battery needs to be charged. A 6-volt battery that is charged should read 6.25 to 6.37 volts. Readings below 6.25 indicate the battery state of charge is below 80 percent and the battery needs to be charged.
2. Test automotive antifreeze
The antifreeze in your tow vehicle or motorhome radiator should always have a 50- to 70-percent concentration of antifreeze to water. Water does a good job helping to cool an engine but it freezes quickly during cold winter temperatures. Water can also cause certain metals to rust and corrode over time. The proper concentration of antifreeze is necessary to provide freeze protection and chemical protection against corrosion.
To test the antifreeze, use quality test strips, a float-type hydrometer or a refractometer. A refractometer is the most accurate testing device.
Inspect all coolant hoses for signs of damage or leaks. Coolant hoses deteriorate from the inside out. Inspect all hoses for wear, cracks, soft spots, brittle areas and leaks. Inspect hose clamps for secure mounting and replace any damaged coolant hoses or clamps as required
3. Use a fuel stabilizer product like STA-BIL
Fuel stabilizers provide excellent protection against stale fuel during periods of storage. They contain corrosion inhibitors, remove water and help to clean fuel injectors. There are fuel stabilizers designed for use with gasoline and diesel engines. I use a fuel stabilizer in gas-powered lawn equipment, ATVs, boats, motorcycles and RVs.
4. Furnace checkup
One LP-gas appliance that gets overlooked during warm weather is the forced-air furnace. Most service requirements for the furnace need to be accomplished by a reputable RV service center, but there are a few things the owner can do to prepare the furnace for cold-weather operation.
The battery plays an important role in the proper operation of the furnace. Keeping lead-acid batteries watered and fully charged will prevent many furnace-related problems. Inspect furnace ducting that is above floor level for damage, such as crushed ducting or obstructions that could affect furnace operation. Make sure the furnace air return is not blocked or restricted. Test the operation of the furnace before the day arrives when you actually need it. Have a certified technician test your LP-gas system annually for proper appliance operating pressure and leaks.
5. Inspect all safety devices and replace all dry-cell batteries
Carbon monoxide is deadly. Test the CO detector, LP-gas leak detector and smoke alarm for proper operation every time you use your RV. Instruct individuals on symptoms and what to do if they are exposed to carbon monoxide or if they hear LP-gas leak detector alarms. Replace all dry-cell batteries when you change the settings on your clocks in the spring and fall. Make sure you have a charged fire extinguisher on hand and that you and other adults know how to operate it.
6. Clean, inspect and reseal your roof as necessary
Not that this is directly related to fall or winter use, but I like to inspect the roof twice a year, at a minimum, and I think spring and fall are good times of the year to make these checks.
Note: Exercise caution any time you work on the roof of your motorhome. The roof surface can be slippery and a fall can result in serious injury, or worse.
Clean your roof with an approved cleaner for the type of roofing material your motorhome has. Every time you clean the roof, inspect the sealants around all of the openings and the seams on the roof. Water will take the path of least resistance, and if there is the smallest opening, it will find it. Thoroughly inspect the roof sealants for potential leaks and reseal any areas of the roof seams and around openings where you suspect a leak. Make sure you use sealants compatible with your roofing material. Keep in mind that your warranty can be voided if you fail to perform some of these required inspections. Check your motorhome owner’s manual for roof inspection intervals.
7. Plan for non-use
If you don’t plan to use your RV over the fall and winter months, winterize the plumbing system to prevent freezing. Prepare all other systems for short or long-term storage.
Check out our Winterizing & Storing DVD
Winterizing & Storing E-book
Happy RV Learning,
Mark Polk
RV Education 101
RV University
RV Orientation
Go for the RV Gold
Follow us on FACEBOOK
RV Consumer
Showing posts with label rv consumer. Show all posts
Showing posts with label rv consumer. Show all posts


RV 101- RV Education 101 Tips for Improving Fuel Economy for the RV Consumer

1) Check and replace your air filter if it’s dirty. A clean air filter can improve your fuel economy up to 10%.
2) Check and adjust your tire pressure to the proper pressure for the load. This alone can increase fuel economy by 3%, not to mention preventing premature tire wear and failures caused by over or under-inflated tires. Tires can look normal when they are seriously under-inflated. Use a quality air pressure gauge and check your tires when they are cold, before traveling more than one mile.
3) For every 5mph you travel over 60mph is equivalent to paying ten cents more per gallon at the pump. If you are traveling down the Interstate at 70 mph add twenty cents to the price at the pump! Speeding and rapid acceleration reduces fuel economy anywhere from 5 to 33% depending on your individual driving habits.
4) Keep your vehicles tuned up and in top running condition. A poorly tuned engine can lower fuel economy by 10 to 20%. Poor emissions and/or a faulty oxygen sensor can cause up to 40% reduction in fuel economy.
5) Following recommended service and maintenance schedules/intervals will save a significant amount of fuel.
6) Using synthetic oils can increase fuel economy by 2%.
7) Adding weight that you don’t need reduces fuel economy significantly. A friend once told me, if you haven’t used it in the last 6 months you don’t need it!
See, it really is easy to improve our fuel economy. Try following these 7 easy steps to improve your fuel economy. You, and your wallet, will be glad you did.
For more RV 101 educational information visit http://www.rveducation101.com/ and http://www.rvconsumer.com/
RV Education 101 Announces Launch of New RV Consumer Site

Tagged as “The Ultimate RV Education Center” Polk says, “This site is a culmination of all of our RV training efforts over the past decade, and is a one stop RV training site for the entire RV consumer’s training needs. One day I realized that if I consolidated all of our RV training material into one RV training site, it would in fact be the premier RV education center.”
The RV training material Polk is referring to is his 18-RV instructional DVD’s, 13-published RV E-books, 3-published RV books, 4-RV online training programs, hundreds of published RV articles, RV product installation videos and RV product reviews.
Dawn Polk, co-owner and marketing director, said, “Our thought behind this new site was to organize the vast field of RV’s and RVing into six major categories and offer the RV consumer invaluable information in each of these areas. The six categories are: RV consumer training, RV consumer buying, RV consumer safety, RV consumer products, RV consumer articles and advice and last but certainly not least, enjoying your RV. To help promote our new site and to introduce our RV videos on demand online training program we are offering a free RV safety e-course to anybody that would like to take it. You can visit www.rvconsumer.com for more details on the free RV safety e-course.
Polk’s other RV educational sites are http://www.rveducation101.com/ and http://www.rvuniversity.com/. The primary focus of these RV training sites has been to educate RV owners on how to properly and safely use and maintain their RV, using visual and written training materials. RV Education 101 has helped educate more than a quarter of a million RV enthusiasts over the past decade.
For more information on these RV educational sites visit www.rvconsumer.com, http://www.rveducation101.com/
and http://www.rvuniversity.com/
xxx
RVIA Trade Show in Louisiville 2010 Part 5

If you own a Type A motorhome that was built on an F-53 Ford chassis this picture gives you an idea of what the chassis looks like before they start to manufacture the motorhome.


This is an interesting picture of the direction some hybrid trailers are going. Notice the extended bunk end on the side of the trailer as opposed to being in the front or rear of the trailer. Manufactured by Livin Lite.

Slide-outs, slide-outs and more slide-outs. RV manufacturers, like this Fleetwood motorhome, keep finding new places to put slide-outs and we enjoy the added space they provide us.
Happy RV Learning,
Mark Polk
RV Education 101
RV University
RV Orientation
Go for the RV Gold
Follow us on FACEBOOK
RV Consumer
RV Owner Maintenance Mishaps

1) Checking and adding air when the tires are hot. I see it all the time, people checking their tire pressure when the tires are hot. You should always check and inflate tires when the tires are cold, before traveling more than one mile. Hot air expands and will give you a false reading. If the tires are already hot wait several hours before checking and adjusting inflation pressure.
2) Neglecting to periodically check the water level in batteries. 85% of lead acid batteries manufactured in the U.S. die before they should. One of the leading causes for battery failure is overcharging the battery. Overcharging a battery results in severe water loss and plate corrosion. This is a common problem with RV’s. The RV converter has a built in battery charger and most RV owners are under the impression that if you leave the RV plugged in when the RV is in storage it will keep the batteries topped off. While keeping batteries topped off is extremely important the problem is that many, but not all, RV converter chargers provide a constant charge of about 13.5 volts which is too high for fully charged batteries and the electrolyte is boiled off resulting in an early death for the batteries. There have been advances in converter charger technology and many of today’s converter chargers are 3 stage chargers that will prevent batteries from overcharging. Another problem is during times of high battery usage and recharging the electrolyte is boiled off. Periodically checking and adjusting the water level in the batteries can save and extend the life expectancy of the battery. When you add water use mineral free water. Distilled water is best and only fill the battery cell to 1/8 inch below the vent well.
3) Not rinsing and flushing the black water holding tank after you empty it. The only way to get a long service-free life from the RV black water holding tank is to rinse and flush the tank after you empty it. Some RVs have a built in system for flushing the black water tank, but many don’t. If your RV doesn’t have a built in flushing system there are aftermarket products like tank cleaning wands and reverse flush valves that will assist in keeping your black water tank clean, clog-free and odor-free. Watch a short video on tank cleaning products.
4) Not performing pre-departure checks. I think nearly every RVer, at one time or another has learned this valuable lesson. Pre-departure checks or a final walk-around before leaving can save you costly repair bills. Common RV repairs relating to this are repairs to the steps, TV antenna, awnings and power cords. Take a minute to walk around the RV, and look on top and underneath before heading out.
5) Not periodically inspecting your RV for water damage. Water leaks on an RV can cause extensive damage and can be extremely costly to repair. To protect your investment and your wallet you need to take the time to inspect the RV for water leaks. The outside of your RV may look fine but the internal damage caused by water over a period of time can result in the entire roof, floor or wall rotting away without you even knowing it, until it’s too late. To prevent a leak before it starts thoroughly inspect all roof and body seams, sealants and around any openings cut in the RV roof or sidewalls. Reseal any seams or sealants that show signs of cracking or separation. Consult your RV owner manual for inspection intervals and for the type of sealants compatible with different types of materials.
6) Not performing routine safety checks. It’s not uncommon for RV’s to sit in storage for periods of time. If dry cell batteries aren’t removed from devices like smoke detectors and carbon monoxide detectors the devices won’t work when you need them. By simply getting in a habit of checking the smoke, CO, and LP gas leak detectors prior to each trip you can prevent this from happening. Follow the testing instructions in the owner’s manual or on the device itself. If you remove dry cell batteries during storage remember to re-install them next spring. You also need to get in a habit of inspecting the fire extinguisher before each trip. Look to see if the arrow is pointing in the green area in the sight gauge. If it reads empty or needs charging replace it or have it recharged immediately. If it’s a dry powder type fire extinguisher the arrow pointing in the green doesn’t always guarantee that it will work. Every month you should turn dry powder extinguishers upside down, tap on the bottom of the extinguisher and shake it so the powder that settled on the bottom is released. Make sure you know how to operate the fire extinguisher too. A simple pre-trip checklist can serve as a reminder to test all safety devices prior to leaving on a trip.
7) Not maintaining the RV water system. The potable water system in your RV requires some maintenance to keep it trouble free. Something I’ve run into quite often is the complaint that there is a stale odor coming from the RV water system. When you return from a trip and you’re not going to use the RV for a while you need to drain the entire water system to prevent it from getting stale and musty. You should drain the water heater, low point water drains and the fresh water holding tank. Caution: Never drain the water heater tank when it is hot or under pressure. With the drains still open you can turn the water pump on for a moment to help force any remaining water out of the system. Do not let the pump continue to run once the water stops draining. Close all of the drains.
If by accident you forget to drain the water system and you get that notorious stale odor all is not lost. You just need to sanitize the water system. Start by draining all of the old water out of the system, and then close all of the drains. Take a quarter cup of house hold bleach for every fifteen gallons of water that your fresh water tank holds. Mix the bleach into a one-gallon container and pour it into the fresh water holding tank. Fill the fresh water tank completely full of water. Turn the water pump on, open all hot and cold faucets and run the water until you smell the bleach at each faucet. Close the faucets and let it sit for about 12 hours. Drain the entire system and re-fill the fresh water tank with potable water. Open all of the faucets and run the water until you no longer smell any bleach. It may be necessary to repeat this process again to eliminate all signs of bleach from the water system. Once this is done it is safe to use your water system. It’s also a good idea to use a water filter at campgrounds and to keep bottled water on hand for drinking.
If you don’t feel comfortable performing any of these steps you should take the RV to an authorized RV service center to have the maintenance performed.
What are some of your RV owner maintenance mishaps?
Happy RV Learning,
Mark Polk
RV Education 101
RV University
Exercising your RV Generator

Click on video player for more tips on caring for your RV generator.
When I worked at a RV dealership, every spring our service department was booked with appointments for generators that either wouldn’t start, or if they did start they had that all too familiar surging sound. This was a result of letting the generator sit for periods of time without starting and exercising it. Lack of use is one of the biggest problems with generators. In gasoline generators the fuel breaks down and gums up causing hard starting and surging problems. This can happen in as short a period of time as two months.
Running and exercising a generator is just one aspect of owning and using a generator. Let’s start from the beginning. RV generators are what truly make your RV fully self-contained. What a feature, instant electricity at the push of a button. We take electricity for granted in our homes because we don’t have to do anything to get it, with the exception of paying our monthly electric bill. This is part of the problem with RV generators, we expect the electricity to be there when we need or want it just like in our house. The problem is this magical source of electricity requires a certain amount of care and maintenance from the owner.
Safety first! Always keep in mind when you use a generator there is carbon monoxide. You should always inspect the exhaust system on the generator set before using it. Do not operate a generator with a damaged exhaust system. If you’re using a portable generator set make sure the exhaust is directed away from the camping area. Test your carbon monoxide detector for proper operation prior to using the generator.

RV generators are extremely dependable and in many cases will out last the RV if they are properly maintained and cared for. They do not require your constant attention, just some basic maintenance. The first thing you need to understand about maintaining your generator is that they need to be exercised on a regular basis. I mentioned a moment ago that gasoline generators could have fuel related problems in as little as two months when sitting idle. This is one of the biggest problems, but it can easily be prevented if you get in a habit of exercising the generator on a monthly basis.
Some people think that this can be avoided by adding a fuel preservative to the fuel tank and then running the generator long enough to get the preservative through the generator set. You definitely should use a fuel preservative whenever the unit will be in storage, but there are many other reasons to start and exercise the generator on a regular basis. Moisture build up can cause damage to your generator. When you exercise your generator it heats up the generator windings and eliminates this moisture build up. This monthly exercise regime also lubricates all of the engine seals and components and helps to prevent carbon build up.
So, what exactly do I mean when I say exercise your generator? For a gasoline generator I mean that you start and run the generator with at least a 50 percent load for at least two hours every month. It is extremely important that you run it with this minimum rated load. Generators are designed to run with a load placed on them. It’s always better to exercise the generator for longer time periods than it is for short periods. Check your generator owner’s manual for load ratings specific to your unit.
Other maintenance intervals for generators are based on usage. Your generator set will have an hour meter so you can monitor the usage. Consult your owner’s manual for maintenance intervals. The bottom line is, do not hesitate to use your generator and when you do use it put a load on it. A little exercise and preventive maintenance will keep your generator in top operating condition and provide many years of faithful service.
Happy RV Learning,
Mark Polk
RV Education 101
RV University
RV Orientation
Go for the RV Gold
Follow us on FACEBOOK
RV Consumer
Braking Laws
Most U.S. States and Canadian Provinces have their own laws on the requirement for brakes on a towed trailer. The word trailer also applies to a vehicle being towed behind a motor home. These laws are normally based on the amount of weight being towed. Not only is it illegal to exceed these weight limits without brakes, but your insurance company may not cover you in the event of an accident involving a trailer with no braking system. The most important reason is for your safety and the safety of others.
For a complete list of braking laws for the U.S. and Canada go to http://www.roadmasterinc.com/products/braking/map.html
The brakes on a tow vehicle or motor home are designed by the vehicle manufacturer to stop the weight of that particular vehicle, not the additional weight being towed behind it. This additional weight adds a substantial increase to the distance required to stop safely.
Travel trailers and 5th wheels come equipped with electric brakes and RV dealers educate the RV consumer on the requirements for adding an electronic brake control to the tow vehicle. Some pop-ups are ordered with brakes and some without. Again, this is often times based on the braking laws for the state you live in. My advice is if you’re going to purchase a pop-up get one that has brakes.
The real culprit for disregarding braking laws is a motor home towing a vehicle behind it. Most people assume that because of the size of the motor home there is no need for a supplemental brake system on the towed vehicle and sometimes RV dealers fail to communicate the requirement for a supplemental braking system.
I for one was guilty of towing a vehicle without a braking system for quite some time. A close call, while driving through a major city during rush hour, suddenly educated me on how important it is. Another thing that surprises people is how much the vehicle they’re towing actually weighs. Take your towed vehicle to a set of scales and have it weighed. Make sure it has everything in it that will be in it when you are towing it. After you weigh it double check to make sure the receiver on the motor home is rated to tow that amount of weight and that you aren’t exceeding any of the motor home weight ratings like the Gross Combined Weight Rating (GCWR). The GCWR is the maximum permissible weight of the fully loaded motor home and the fully loaded towed vehicle combined. Most RV chassis manufacturers base their GCWR on the assumption that a supplemental brake system is being used.
Regardless of the brake system that best suits your individual needs the important thing is that you have one. There are many reasons to have a braking system on your towed vehicle.
1) It’s the law
2) It can void your vehicle warranty
3) It can void your insurance
4) It will reduce wear and tear on RV brakes and other components
5) Liability
But, most importantly it SAFELY reduces the stopping distance and helps to protect you, your loved ones and the safety of others.
Happy RV Learning,
Mark Polk
RV Education 101
RV University
RV Orientation
Go for the RV Gold
Follow us on FACEBOOK
RV Consumer
For a complete list of braking laws for the U.S. and Canada go to http://www.roadmasterinc.com/products/braking/map.html
The brakes on a tow vehicle or motor home are designed by the vehicle manufacturer to stop the weight of that particular vehicle, not the additional weight being towed behind it. This additional weight adds a substantial increase to the distance required to stop safely.
Travel trailers and 5th wheels come equipped with electric brakes and RV dealers educate the RV consumer on the requirements for adding an electronic brake control to the tow vehicle. Some pop-ups are ordered with brakes and some without. Again, this is often times based on the braking laws for the state you live in. My advice is if you’re going to purchase a pop-up get one that has brakes.
The real culprit for disregarding braking laws is a motor home towing a vehicle behind it. Most people assume that because of the size of the motor home there is no need for a supplemental brake system on the towed vehicle and sometimes RV dealers fail to communicate the requirement for a supplemental braking system.
I for one was guilty of towing a vehicle without a braking system for quite some time. A close call, while driving through a major city during rush hour, suddenly educated me on how important it is. Another thing that surprises people is how much the vehicle they’re towing actually weighs. Take your towed vehicle to a set of scales and have it weighed. Make sure it has everything in it that will be in it when you are towing it. After you weigh it double check to make sure the receiver on the motor home is rated to tow that amount of weight and that you aren’t exceeding any of the motor home weight ratings like the Gross Combined Weight Rating (GCWR). The GCWR is the maximum permissible weight of the fully loaded motor home and the fully loaded towed vehicle combined. Most RV chassis manufacturers base their GCWR on the assumption that a supplemental brake system is being used.
Regardless of the brake system that best suits your individual needs the important thing is that you have one. There are many reasons to have a braking system on your towed vehicle.
1) It’s the law
2) It can void your vehicle warranty
3) It can void your insurance
4) It will reduce wear and tear on RV brakes and other components
5) Liability
But, most importantly it SAFELY reduces the stopping distance and helps to protect you, your loved ones and the safety of others.
Happy RV Learning,
Mark Polk
RV Education 101
RV University
RV Orientation
Go for the RV Gold
Follow us on FACEBOOK
RV Consumer
Gas Vs Diesel
Should I buy gas or diesel? This question has fueled many a heated debate over the years. A universal response you could expect to hear to this question goes something like this; diesels cost more than gas, don’t buy a diesel unless you plan to put a bunch of miles on it and keep it for a long time. That’s the only way you can justify the extra cost of a diesel.
Several years ago there was some truth to this somewhat typical response. But things are changing, especially when you are talking about motorhomes. Today, the cost of some gasoline powered motorhomes is about the same as many of the entry level diesel motorhomes available on the market. This higher cost is associated with advancements in gasoline RV chassis’ design; with greater Gross Vehicle Weight Ratings (GVWR) to accommodate coach designs offering 3 and 4 slideouts on the RV. And don’t forget to factor in new technology in gasoline engine and transmission design over the past several years too.
The old response, of diesels costing more, does hold true with some of the specialized diesel chassis manufacturers, but it’s not just the engine that accounts for the higher price tag. You are moving to a higher plateau across the board. For the most part gasoline RV chassis’ are heavy duty truck chassis’ modified for Recreation Vehicle use, whereas many diesel chassis’ are a bus chassis. These bus chassis’ have even greater GVWR’s, air brakes, air ride suspension systems, larger transmissions, rear mounted diesel engines and more. They handle better, ride better and cost more. I always say you get what you pay for.
Other than the cost factor, what are we really talking about when it comes down to gas versus diesel? Say for example, in a truck you plan to use for towing a trailer. This is where we need to factor in the engine itself. This is also where torque and horsepower come into the equation.
Explaining torque and horsepower can get extremely technical, and we want to keep this simple and easy to understand. With that said, torque is basically the force or energy required to move something. Torque is the measurement of force, and force is measured in reference to a twisting or rotating shaft. In English terms torque is measured in pounds-feet, but is more commonly referred to as foot-pounds. So in keeping it simple let’s just say that torque can be thought of as the amount of turning force it takes to move one pound of weight the distance of one foot.
Horsepower on the other hand is torque X RPM’s. Torque is how much work is being done, and horsepower is how fast you get the actual work done. What’s interesting is, an engine rated at 350 horsepower only produces that horsepower at a rated peak power RPM. This RPM range, for a gasoline engine, is often between 5,000 and 6,000 RPM’s. When an engine is idling the horsepower is significantly lower, and as the RPM’s increase so does the horsepower. When you are towing a trailer the engine speed is more likely to be in a lower RPM range, which means you have much less available horsepower than the engines rated horsepower. Horsepower is measured by a dynamometer. A dynamometer puts a load on the engine and measures the amount of power the engine produces against the load at various speeds. Even at the rated peak power RPM you really won’t get the rated horsepower, because a percentage is lost through auxiliary equipment on the engine and the process of getting it back to the wheels.
In a diesel engine the horsepower peaks at a lower RPM, and there is more torque at a lower RPM compared to a gasoline engine. This results in a diesel engine having much more power at a lower RPM, around the RPM range you will be towing at. This higher torque and higher horsepower at a lower RPM equates to better towing.
There are many other factors involved in the question of gas versus diesel that you will need to consider. What are the maintenance costs involved, cost difference between fuel types, fuel economy, your budget, and the resale value? Whether it’s for a tow vehicle or a motorhome, take your time and make a well informed decision when comparing gas to diesel.
If the question is which truck will tow more or which motorhome has more torque the diesel will win hands down, but I honestly have no complaints with our gas powered motorhome either. Especially when considering the price!
Happy RV Learning,
Mark Polk
RV Education 101
RV University
RV Orientation
Go for the RV Gold
Follow us on FACEBOOK
RV Consumer
Several years ago there was some truth to this somewhat typical response. But things are changing, especially when you are talking about motorhomes. Today, the cost of some gasoline powered motorhomes is about the same as many of the entry level diesel motorhomes available on the market. This higher cost is associated with advancements in gasoline RV chassis’ design; with greater Gross Vehicle Weight Ratings (GVWR) to accommodate coach designs offering 3 and 4 slideouts on the RV. And don’t forget to factor in new technology in gasoline engine and transmission design over the past several years too.
The old response, of diesels costing more, does hold true with some of the specialized diesel chassis manufacturers, but it’s not just the engine that accounts for the higher price tag. You are moving to a higher plateau across the board. For the most part gasoline RV chassis’ are heavy duty truck chassis’ modified for Recreation Vehicle use, whereas many diesel chassis’ are a bus chassis. These bus chassis’ have even greater GVWR’s, air brakes, air ride suspension systems, larger transmissions, rear mounted diesel engines and more. They handle better, ride better and cost more. I always say you get what you pay for.
Other than the cost factor, what are we really talking about when it comes down to gas versus diesel? Say for example, in a truck you plan to use for towing a trailer. This is where we need to factor in the engine itself. This is also where torque and horsepower come into the equation.
Explaining torque and horsepower can get extremely technical, and we want to keep this simple and easy to understand. With that said, torque is basically the force or energy required to move something. Torque is the measurement of force, and force is measured in reference to a twisting or rotating shaft. In English terms torque is measured in pounds-feet, but is more commonly referred to as foot-pounds. So in keeping it simple let’s just say that torque can be thought of as the amount of turning force it takes to move one pound of weight the distance of one foot.
Horsepower on the other hand is torque X RPM’s. Torque is how much work is being done, and horsepower is how fast you get the actual work done. What’s interesting is, an engine rated at 350 horsepower only produces that horsepower at a rated peak power RPM. This RPM range, for a gasoline engine, is often between 5,000 and 6,000 RPM’s. When an engine is idling the horsepower is significantly lower, and as the RPM’s increase so does the horsepower. When you are towing a trailer the engine speed is more likely to be in a lower RPM range, which means you have much less available horsepower than the engines rated horsepower. Horsepower is measured by a dynamometer. A dynamometer puts a load on the engine and measures the amount of power the engine produces against the load at various speeds. Even at the rated peak power RPM you really won’t get the rated horsepower, because a percentage is lost through auxiliary equipment on the engine and the process of getting it back to the wheels.
In a diesel engine the horsepower peaks at a lower RPM, and there is more torque at a lower RPM compared to a gasoline engine. This results in a diesel engine having much more power at a lower RPM, around the RPM range you will be towing at. This higher torque and higher horsepower at a lower RPM equates to better towing.
There are many other factors involved in the question of gas versus diesel that you will need to consider. What are the maintenance costs involved, cost difference between fuel types, fuel economy, your budget, and the resale value? Whether it’s for a tow vehicle or a motorhome, take your time and make a well informed decision when comparing gas to diesel.
If the question is which truck will tow more or which motorhome has more torque the diesel will win hands down, but I honestly have no complaints with our gas powered motorhome either. Especially when considering the price!
Happy RV Learning,
Mark Polk
RV Education 101
RV University
RV Orientation
Go for the RV Gold
Follow us on FACEBOOK
RV Consumer
Buying Tires for a Tow Vehicle

During a routine inspection of my truck I noticed the sidewalls of the tires had some cracking caused by too much exposure to the sun, and that the tread was just about down to the tread wear indicators. These were the original Michelin tires that came on the truck when it was new, and with over 65,000 miles on them I really can’t complain about replacing the tires.
When you are replacing the tires on a truck used for towing or hauling heavy loads an important consideration is the load range or rating of the tires. For light truck tires the load range lets you know the strength of the tire and the tires ability to hold air pressure. When I was growing up tire manufacturers referred to how many plies the tire had (the number of layers) to determine the load rating of the tire. The higher the ply rating the stronger the tire was and the more air pressure it could hold to support a heavier load. Nowadays they use an alphabetical rating to specify the load range of a light truck tire. The tire load ranges today don’t actually count the number of plies or layers in the tire, but the strength of the tire is comparable to the older ply ratings used years ago.
An easy way to compare today’s tire load ranges to the old ply rating system is to take the alphabetical load range designation of the tire and determine what number it is in the alphabet. For example if it is a D load range tire D is the fourth letter in the alphabet. Now multiply that by 2, so a D load range tire is equivalent in strength to an 8 ply tire. I have E load range tires, equivalent to a 10 ply tire, on my truck. The other important consideration is that the tires are inflated properly for the load they are carrying.
I personally like and use Michelin tires on my vehicles. I did some preliminary research on the Internet to see if there were any current sales for the type and size tires that were on my truck. Michelin was offering a $70.00 discount when you purchase four tires. I went to Sam’s Club to get the tires, but was told they were not in stock. The Sam’s Club employee told me they could order the tires and have them there in about three days.
I decided to try Sears first to see if the tires were in stock. The tire representative at Sears said they had the tires, but I noticed they were several dollars more than the price per tire that I got at Sam’s Club. I was told they would price match so I proceeded to ask about the $70.00 Michelin discount. The sales rep asked his manager and he agreed to give me the discount. When the sales rep totaled the sale it came to over $200 more than the Sam’s Club total figure for the same tires. I asked him how there could be that much difference for tires that are priced the same. When I looked at the printout I noticed it included a front end alignment and a road hazard insurance plan along with the new tires. I told the rep I wasn’t interested in a road hazard tire plan, and that there was nothing wrong with the front end alignment on my truck. He said the only way they would sell and warrant the tires was if they included the front end alignment. At this point I was a bit irate and told him to drop the tire alignment and road hazard plan and give me a new price. Then he said the $70 Michelin discount was based on the original price I was quoted and I would not get the discount on a new price quote. Needless to say I left and will probably never return to Sears, at least not to purchase tires.
When I returned home I found the same tires online and ended up saving about $20 per tire, after the shipping charges. When the tires get here I just need to have them mounted and balanced and I’ll be good to go for another 65,000 miles.
I always like to support our local economy, but when you have to deal with tires not in stock and higher prices for services you don’t want and/or need I will take my business elsewhere.
Keep in mind when you purchase tires for a truck that will be towing or hauling heavy loads you need to get tires that are rated for the load you will be hauling and properly inflate the tires for the load. If you doubt what the tire sales rep is telling you check the tire manufacturer load & inflation tables before purchasing the tires. If you question the price of the tires leave! You can always find them somewhere else at a fair price.
Happy RV Learning,
Mark Polk
RV Education 101
RV University
RV Orientation
Follow us on FACEBOOK
Daily Preventive Maintenance Travel Checks

Now I’ll be the first one to admit when I am on a shorter trip, say 1,000 miles or less, I don’t usually check the fluid levels or tire pressure every day before traveling. But, when we are driving at elevations of 7,000 feet plus I think it’s important to check a few things before leaving each day. Driving through mountainous terrain in hot temperatures can be hard on the engine, transmission and tires.
At a minimum I like to make the following Preventive Maintenance checks before each travel day.
1) Check the tow vehicle or motorhome fluid levels. This includes engine oil, transmission fluid, power steering, coolant level and windshield washer fluid level. Adjust all fluid levels according to owner manual instructions.
2) Check the gGenerator oil and generator exhaust system. When it’s hot outside we usually run the generator when we are traveling so we can use the roof air conditioner and other electrical devices. Caution: Do not use the generator if there is any damage to the exhaust system.
3) Tire pressure. I use a Tire Pressure Monitoring System (TPMS) so I can monitor the tire pressure and tire temperature while traveling. If you don’t use a TPMS you should check the tire pressure periodically.
4) Hitch work, lights and brakes on the towed trailer or towed vehicle.
5) Check for any leaks. Look under the vehicle for any evidence of leaks. Have any leaks checked out and repaired before leaving.
Keep in mind that this list does not replace any pre-trip checks that you might make before traveling each day. It is simply a short list of some daily preventive maintenance items you can make to help prevent potential problems from occurring.
Our bestselling Checklists for RVers e-book has over 90 pages of checklists on all aspects of RVing.
Happy RV Learning,
Mark Polk
RV Education 101
RV University
RV Orientation
Go for the RV Gold
Follow us on FACEBOOK
RV Consumer
Backing a Trailer, Unassisted

If the backing maneuver is more than just backing in a straight line, and a turn is required, try to always back from the left side (drivers side). Backing from the left will allow you a better view of where the trailer is going. Backing from the right side (passengers side) is your blind side and it is nearly impossible to tell where the trailer is going.
Backing a trailer kind of goes against our natural instincts; what I mean is when you turn the wheel left you expect the vehicle to go left. When you’re backing a trailer if you turn the wheel left the trailer goes to the right. Fortunately there is a way to back a trailer, unassisted, without having to work against our natural instincts. This may sound a bit confusing at first, but if you think about it, it makes sense and the good thing is it works.
It is extremely important that you inspect the area behind and around where you will be backing. Look for any obstacles that may be in the way to include low hanging tree branches, picnic tables and utility hook-ups. You need to stop occasionally and inspect the area immediately behind the trailer. Caution: If children are present in the area ask somebody to watch behind the trailer while you back in.
It is a good idea to place some orange traffic cones along the path you want the trailer to follow, when you’re backing. If you decide it’s not necessary to mark a path you do need to place some type of object in your view where you want the back of the trailer to stop at.
In the assisted method we kept our hand on the top of the steering wheel and did exactly what the spotter told us to do. In the unassisted method we place our hand on the bottom of the steering wheel in the center. Now if you want the back of the trailer to go to your left you slowly turn the wheel to your left as you back. To go to your right slowly turn the wheel to your right as you back. By placing your hand at the bottom of the steering wheel you don’t have to confuse yourself with turning it in the opposite direction. Remember the two biggest mistakes are turning the steering wheel too much and holding it in the turned position too long. If either of these mistakes happen it may be necessary to pull forward and start over.
It may also be necessary to stop, get out and check your progress, especially if you’re backing from the right (your blind side). Another important aspect of backing a trailer is to learn when to begin turning the wheel in the opposite direction to put the trailer and tow vehicle back on a straight course. This requires practice, for some people, not so much; for others quite a bit. Take your trailer to a large open area where you can practice and before long you’ll be backing in at the campground like a seasoned veteran.
Happy RV Learning,
Mark Polk
RV Education 101
RV University
RV Orientation
Go for the RV Gold
Follow us on FACEBOOK
RV Consumer
Trailer Backing Technique

For many RVers, the thought of backing a trailer into the campsite can make your palms start to sweat and your stress level go off the chart. When I worked for an RV dealership we were constantly rearranging the sales lot, moving and backing trailers. When we set-up RV shows, in an effort to use all available space, we would back units within inches of walls, RVs and other obstacles.
The technique we used for backing trailers was almost fool proof, when there were two people working together. If you have trouble backing your trailer or pop-up try this. First decide who will drive and who will spot and give directions. Let’s say your wife is driving. For this technique to work, you are her eyes, and she needs to do exactly what you tell her to do. This, of course, also means if there is an accident it’s your fault!
First conduct a thorough inspection behind the trailer where you will be backing. Always watch for children and pets. (If children are in the area ask somebody to watch the back of the trailer) When you are ready to back it in, you stand off to the side, in front of the vehicle where you can see the trailer and communicate with your wife. With the window down and the radio off, she puts her hand on the top of the steering wheel and slowly turns the wheel in the direction you tell her. If you want the back of the trailer to go to your right you tell her to slowly turn the steering wheel to her right. If you want the back of the trailer to go to your left tell her to slowly turn the steering wheel to her left. You can stop whenever necessary to check the opposite side of the trailer and behind the trailer.
The key to driving is slowly turning and backing in the direction the spotter tells you to. The two biggest mistakes made are turning the steering wheel too much and holding it in the turned position too long. If either of these mistakes occurs it will require greater correction to get straightened out, and if you continue backing while holding the wheel in that position for too long the tow vehicle and trailer can jackknife.
Don’t get upset if you need to pull forward and start over. With a little practice you’ll soon be backing like the pros, practice being the keyword. The more you practice the better you’ll get.
Happy RV Learning,
Mark Polk
RV Education 101
RV University
RV Orientation
Go for the RV Gold
Follow us on FACEBOOK
RV Consumer
Install a Window Awning in 6 Easy Steps
In the past I have received several e-mails from fellow RVers questioning how difficult it is to install a window awning on their RV. My reply was that this is one of those do-it-yourself things most RV owners can install and save some money at the same time.
Window awnings are a nice addition to your RV. They provide us with shade, keep rain away from the RV windows, and protect the interior fabrics and upholstery from damage caused by the sun. And the good news is they are really easy to install. You can save well over $100 in labor fees, and have the satisfaction of knowing you did it yourself. Watch the installation video for easy to follow directions.
Note: The instructions provided here are for installing an A&E Elite window awning.
When your window awning arrives unpack it and make sure all required parts are on hand. Let’s get started with the installation.

Apply a caulking compound on the back of the awning rail before securing it. I use putty tape that you can purchase from an RV dealer. Position and center the awning rail approximately 5″ above the top of the window. Secure the awning rail with #6- x 1/2″ sheet metal screws provided

Secure the awning arms to the top casting using the 1/4″ x 3/4″ bolts provided. Both arms are identical.
Now unroll just enough fabric so you can slide the bead into the awning rail. If too much fabric is unrolled before you release the preset tension, there will not be the required amount of tension needed to properly roll the awning back up after use.

Position the bottom mounting bracket of each arm so the top of the end cap on each side of the tube is level with the opening of the awning rail. This insures the awning shield wraps up tightly. Mark the location of the bottom mounting bracket holes.
If the brackets will be secured to a wood structure, drill four 1/8″ diameter holes and secure the bottom brackets using four #10 screws. Apply caulking compound to screws before inserting. If the brackets are only secured to the skin of the RV, use a #5 drill bit, and secure the bottom mounting bracket using 3/16″ x 1″ Oscar Rivets. Apply caulking compound to rivets. Repeat on the other awning arm bracket.

A & E window awning torsions are pre- wound at the factory. Remove the cotter pin that is holding factory pre-set tension. The cotter pin is in the roller tube end cap. Twist the roller tube as if unrolling the awning while pulling on cotter pin. Caution: When cotter pins are removed, springs are under tension. The awning will attempt to close. Keep your body and clothing clear of hardware and roller tube. Repeat on the other side. The awning should roll up snugly against the side of the vehicle.

After the roller tube assembly is mounted on the RV, open the awning to its full extension by pulling down on the pull strap. Center the strap in the awning, then move the loop of the pull strap toward the RV and under the window to locate the placement of the window strap hanger.
Locate the strap hanger so that the top loop of the strap is engaged onto the hanger, allowing for minor height adjustment of the awning. Mark the location and install the strap hanger with three #10 x 3/4″ screws or 3/16″ x 1″ Oscar Rivets as required. Apply caulking compound to all screws or rivets before inserting.

For awnings with a metal weather shield, install #6 self-tapping screws into the awning rail immediately next to the metal hinge. Repeat this on other side. These screws hold the awning in place.
Your window awning installation is complete and ready to use.
For more information on all of your RV awnings check out our
RV Awning Use, Care & Accessories DVD

Mark Polk
RV Education 101
Follow us on FACEBOOK
Subscribe to our Free Digital RV Consumer Magazine:
BedSaver, Inexpensive Insurance for any Fifth Wheel Owner
I would like to ask all of the fifth wheel owners out there a question. Did you ever, or have you ever seen somebody else, drop the fifth wheel onto the bed rails of the truck while hitching or unhitching? If you've been RVing for a while you have probably seen this happen, maybe even more than once. When you're at the campground look at the other trucks that are pulling fivers and you will likely see one with damaged bed rails.
Dropping the fifth wheel can happen quickly and easily. You're distracted at the campground and forget to lower the landing gear, or you're in a hurry, forget to chock the wheels and you pull the hitch latch, or maybe you think the hitch is locked and you pull forward, and BOOM! It can happen to anyone, even the most experienced fifth wheel owner. The next time you go to an RV dealership look at their service trucks, chances are one of them will have damaged bed rails too.
When this happens it can be extremely dangerous to anybody in the immediate area. It can also cause extensive damage to your tow vehicle and fifth wheel, not to mention how embarrassing it can be when other people are watching when it happens. Costs to repair damage to the tow vehicle and fifth wheel can range from $2,000 to more than $4,000, and hopefully nobody was injured when it happened. The thought of this happening is always in the back of your mind. This causes stress and interferes with enjoying your camping experience.
So how can you prevent this from happening to you? The BedSaver, by Blue Ox, is an inexpensive safety device that prevents the fifth wheel from dropping onto the bed rails of the tow vehicle. In the event of a hitch failure, or accident, the BedSaver will catch the fifth wheel pin before any damage occurs. I like to refer to the BedSaver as an inexpensive insurance policy, or better yet, piece of
mind for any fifth wheel owner. The BedSaver is available for most fifth wheel hitches and it's easy to install using regular household tools. Once it is installed it stays on the hitch and doesn't affect normal hitching or unhitching procedures.
Using a checklist for hitching and unhitching your fifth wheel can be extremely helpful too. I am including these checklists from my "Checklists for RVers" e-book. But, don't assume that just because you use a checklist you will never experience any fifth wheel hitching problems, or make any mistakes.
Hitching a 5th Wheel
* Set the hitch plate slightly lower than the coupler head so the trailer is lifted slightly as the hitch is mated. Do this by raising or lowering the jacks on the 5th wheel.
* Open the coupler lock so the king pin can engage the jaws on the hitch plate.
* Lower the tailgate and slowly back up. Have an assistant help you align the king pin with the coupler. Back up until the pin fully engages the coupler jaws. It may be necessary for the assistant to make minor adjustments to the height of the 5th wheel.
* Close the locking mechanism and the safety latch.
* Close the tailgate.
* Raise the 5th wheel jacks slightly off the ground (1 to 2 inches). Start the truck, put it in gear and slowly let off the brake pedal. This will help you check that it is properly hitched and locked.
* Now raise the 5th wheel jacks until there is plenty of clearance from the road.
* Connect the 12-volt trailer light cord to the receptacle on the tow vehicle.
* Connect the breakaway switch lanyard to a permanent fixture on the tow vehicle.
* Remove the wheel chocks.
* Check all lights for proper operation.
* Put on extended mirrors if applicable and hit the road.
Unhitching a 5th Wheel
* Chock the trailer wheels.
* Disconnect the trailer light cord and the breakaway switch lanyard.
* Place pieces of wood or other blocking material under the jacks and drop the landing gear. Put pins in landing gear and raise the trailer until all of the weight is off of the hitch plate.
* Open the coupler lock and safety latch.
* Lower the tailgate.
* Slowly pull the tow vehicle forward. It may be necessary to raise the trailer a bit more. You should be able to see daylight between the hitch plate and the king pin box.
Fifth wheel owners have a significant investment in their tow vehicle and fifth wheel. It only makes good sense to protect your investment with something as practical and inexpensive as the BedSaver. You don't want to be the fifth wheel owner who says, "That can only happen to the other guy!" The first time the fifth wheel pin drops and the BedSaver catches it, instead of the bed rails, it will be well worth the small investment. Get some piece of mind, get a BedSaver and let the other guy worry about it.
Happy RV Learning,
Mark Polk
RV Education 101
RV University
RV Orientation
Go for the RV Gold
Follow us on FACEBOOK
RV Consumer
Dropping the fifth wheel can happen quickly and easily. You're distracted at the campground and forget to lower the landing gear, or you're in a hurry, forget to chock the wheels and you pull the hitch latch, or maybe you think the hitch is locked and you pull forward, and BOOM! It can happen to anyone, even the most experienced fifth wheel owner. The next time you go to an RV dealership look at their service trucks, chances are one of them will have damaged bed rails too.
When this happens it can be extremely dangerous to anybody in the immediate area. It can also cause extensive damage to your tow vehicle and fifth wheel, not to mention how embarrassing it can be when other people are watching when it happens. Costs to repair damage to the tow vehicle and fifth wheel can range from $2,000 to more than $4,000, and hopefully nobody was injured when it happened. The thought of this happening is always in the back of your mind. This causes stress and interferes with enjoying your camping experience.
So how can you prevent this from happening to you? The BedSaver, by Blue Ox, is an inexpensive safety device that prevents the fifth wheel from dropping onto the bed rails of the tow vehicle. In the event of a hitch failure, or accident, the BedSaver will catch the fifth wheel pin before any damage occurs. I like to refer to the BedSaver as an inexpensive insurance policy, or better yet, piece of
mind for any fifth wheel owner. The BedSaver is available for most fifth wheel hitches and it's easy to install using regular household tools. Once it is installed it stays on the hitch and doesn't affect normal hitching or unhitching procedures.
Using a checklist for hitching and unhitching your fifth wheel can be extremely helpful too. I am including these checklists from my "Checklists for RVers" e-book. But, don't assume that just because you use a checklist you will never experience any fifth wheel hitching problems, or make any mistakes.
Hitching a 5th Wheel
* Set the hitch plate slightly lower than the coupler head so the trailer is lifted slightly as the hitch is mated. Do this by raising or lowering the jacks on the 5th wheel.
* Open the coupler lock so the king pin can engage the jaws on the hitch plate.
* Lower the tailgate and slowly back up. Have an assistant help you align the king pin with the coupler. Back up until the pin fully engages the coupler jaws. It may be necessary for the assistant to make minor adjustments to the height of the 5th wheel.
* Close the locking mechanism and the safety latch.
* Close the tailgate.
* Raise the 5th wheel jacks slightly off the ground (1 to 2 inches). Start the truck, put it in gear and slowly let off the brake pedal. This will help you check that it is properly hitched and locked.
* Now raise the 5th wheel jacks until there is plenty of clearance from the road.
* Connect the 12-volt trailer light cord to the receptacle on the tow vehicle.
* Connect the breakaway switch lanyard to a permanent fixture on the tow vehicle.
* Remove the wheel chocks.
* Check all lights for proper operation.
* Put on extended mirrors if applicable and hit the road.
Unhitching a 5th Wheel
* Chock the trailer wheels.
* Disconnect the trailer light cord and the breakaway switch lanyard.
* Place pieces of wood or other blocking material under the jacks and drop the landing gear. Put pins in landing gear and raise the trailer until all of the weight is off of the hitch plate.
* Open the coupler lock and safety latch.
* Lower the tailgate.
* Slowly pull the tow vehicle forward. It may be necessary to raise the trailer a bit more. You should be able to see daylight between the hitch plate and the king pin box.
Fifth wheel owners have a significant investment in their tow vehicle and fifth wheel. It only makes good sense to protect your investment with something as practical and inexpensive as the BedSaver. You don't want to be the fifth wheel owner who says, "That can only happen to the other guy!" The first time the fifth wheel pin drops and the BedSaver catches it, instead of the bed rails, it will be well worth the small investment. Get some piece of mind, get a BedSaver and let the other guy worry about it.
Happy RV Learning,
Mark Polk
RV Education 101
RV University
RV Orientation
Go for the RV Gold
Follow us on FACEBOOK
RV Consumer
Time to go Camping, but First…
It’s time again for my annual RV spring preparation checklist. If your RV has been sitting idle all winter you need to whip it back into shape for another season of camping. At first glance this checklist looks like it would take two days to complete, but it’s actually something you can do on a Saturday when there’s nothing else to do. Following a checklist helps make sure nothing is overlooked.
■ Depending on how your unit was winterized it will need to be de-winterized.
■ Every spring I like to sanitize the water system. Watch the video.
■ Inspect plumbing for water leaks. With the water system pressurized, either by the water pump or hooked up to city water, inspect the plumbing for any water leaks. Check the operation of the toilet.
■ Remove any protective covering that you may have put over LP gas vents or outside vents to keep insects or rodents out. Remove any mousetraps, mothballs or other items you may have put out. Open all doors, cabinets and compartments and check for rodent intrusion. Clean as required.
■ Wash the unit thoroughly. This is a good time to inspect the roof and body seams, and window sealant for cracks or damage that would allow water to get in. Consult a dealer for sealants compatible with these materials and reseal as required.
■ Inspect the operation of the awning and check the awning fabric for any damage. Clean the awning fabric if necessary and let the fabric dry thoroughly before storing.
■ Inspect the tires for signs of dry rot and wear. Inflate all tires to the recommended tire pressure. Check the lug nuts for proper torque. Any damage evident on the tires should be inspected by a qualified service center.
■ Lubricate all hinges and locks with a graphite spray lubricant.
■ Inspect and clean the RVs interior.
■ Plug in any appliances that you unplugged for storage and replace any dry cell batteries you may have removed. This is a good time to put new batteries in items like smoke alarms, carbon monoxide detectors and clocks.
■ Test the operation of the carbon monoxide alarm, LP gas leak detector and smoke alarm.
■ Check the fire extinguisher. Make sure it is fully charged. A discharged fire extinguisher should be replaced immediately. If it is a dry powder type turn it upside down and tap on the bottom to help release the powder that settled on the bottom.
■ Reset any breakers you may have turned off. If you removed any fuses for storage re-install them.
■ Clean or replace air conditioner filters if it wasn’t done prior to storage and remove any covers that were put over air conditioners.
■ Open vents and windows and air the unit out.
■ If you removed the coach and chassis batteries for storage install them. Whether they were removed or not check the electrolyte levels, clean the terminals and clamps, and check the charge level in all batteries. Recharge batteries as necessary.
■ Check the operation of the electric steps if applicable. Lubricate step mechanism.
■ Test the operation of the hydraulic jacks if applicable. Check hydraulic fluid level.
■ If you didn’t change the oil and filters in the generator prior to storage this is a good time to do it. Inspect the generator exhaust system for damage prior to starting. Start and run the generator for two hours with at least a half rated load on it. Consult the generators owner manual for load ratings.
■ Turn the generator off and plug the unit into shore power. Turn the refrigerator on in the electric mode. Allow sufficient time to cool and check for proper operation.
■ Check all 12-volt interior lights and accessories.
■ Test the monitor panel for proper operation.
■ Check the operation of slide-outs if applicable.
■ Check the remaining 120-volt appliances for proper operation.
■ Test the Ground Fault Interrupter (GFI) for proper operation.
■ Turn the refrigerator off, leave the doors open and allow sufficient time for it to get to room temperature so it can be checked in the LP gas mode.
Note: Before using the LP gas system it’s a good idea to have a leak test and gas operating pressure test preformed. A qualified technician with the proper equipment should do these tests.
■Once this is accomplished, turn the LP gas valve on and check the operation of all LP gas appliances. Be sure the water heater is full of water before testing the water heater. If a gas appliance is not operating properly have it inspected by a qualified technician. Insects are attracted to the odorant added to LP gas and build nests that can affect the appliance from operating properly.
■ If your unit was in long-term storage and you didn’t change the engine oil and filter prior to storage this would be a good time to do it or schedule to have it done.
■ Check all fluid levels in transmission, power steering, engine coolant, engine oil, windshield washer and brakes. Consult vehicle owner’s manual.
■ Start the engine and check for proper readings on all gauges. Check for proper operation of dash air conditioner.
■ Check the condition of windshield wiper blades and replace if necessary.
■ Check the operation of all chassis lights.
■ In addition to this if you have a pop-up or travel trailer the wheel bearings and brakes (if equipped) should be inspected at least once annually. Inspect any canvas for dry rot and tears; inspect all hitch work and coupler for damage. Inspect the breakaway switch and pigtail for proper operation.
This list is not all-inclusive, but it seems to work for me. Now for the fun part, load your clothes, food, and personal belongings, hit the road and have fun exploring this wonderful country we live in.
This checklist was taken from our Checklist for RVers Ebook
Happy RV Learning,
Mark Polk
RV Education 101
RV University
RV Orientation
Go for the RV Gold
Follow us on FACEBOOK
RV Consumer
■ Depending on how your unit was winterized it will need to be de-winterized.
■ Every spring I like to sanitize the water system. Watch the video.
■ Inspect plumbing for water leaks. With the water system pressurized, either by the water pump or hooked up to city water, inspect the plumbing for any water leaks. Check the operation of the toilet.
■ Remove any protective covering that you may have put over LP gas vents or outside vents to keep insects or rodents out. Remove any mousetraps, mothballs or other items you may have put out. Open all doors, cabinets and compartments and check for rodent intrusion. Clean as required.
■ Wash the unit thoroughly. This is a good time to inspect the roof and body seams, and window sealant for cracks or damage that would allow water to get in. Consult a dealer for sealants compatible with these materials and reseal as required.
■ Inspect the operation of the awning and check the awning fabric for any damage. Clean the awning fabric if necessary and let the fabric dry thoroughly before storing.
■ Inspect the tires for signs of dry rot and wear. Inflate all tires to the recommended tire pressure. Check the lug nuts for proper torque. Any damage evident on the tires should be inspected by a qualified service center.
■ Lubricate all hinges and locks with a graphite spray lubricant.
■ Inspect and clean the RVs interior.
■ Plug in any appliances that you unplugged for storage and replace any dry cell batteries you may have removed. This is a good time to put new batteries in items like smoke alarms, carbon monoxide detectors and clocks.
■ Test the operation of the carbon monoxide alarm, LP gas leak detector and smoke alarm.
■ Check the fire extinguisher. Make sure it is fully charged. A discharged fire extinguisher should be replaced immediately. If it is a dry powder type turn it upside down and tap on the bottom to help release the powder that settled on the bottom.
■ Reset any breakers you may have turned off. If you removed any fuses for storage re-install them.
■ Clean or replace air conditioner filters if it wasn’t done prior to storage and remove any covers that were put over air conditioners.
■ Open vents and windows and air the unit out.
■ If you removed the coach and chassis batteries for storage install them. Whether they were removed or not check the electrolyte levels, clean the terminals and clamps, and check the charge level in all batteries. Recharge batteries as necessary.
■ Check the operation of the electric steps if applicable. Lubricate step mechanism.
■ Test the operation of the hydraulic jacks if applicable. Check hydraulic fluid level.
■ If you didn’t change the oil and filters in the generator prior to storage this is a good time to do it. Inspect the generator exhaust system for damage prior to starting. Start and run the generator for two hours with at least a half rated load on it. Consult the generators owner manual for load ratings.
■ Turn the generator off and plug the unit into shore power. Turn the refrigerator on in the electric mode. Allow sufficient time to cool and check for proper operation.
■ Check all 12-volt interior lights and accessories.
■ Test the monitor panel for proper operation.
■ Check the operation of slide-outs if applicable.
■ Check the remaining 120-volt appliances for proper operation.
■ Test the Ground Fault Interrupter (GFI) for proper operation.
■ Turn the refrigerator off, leave the doors open and allow sufficient time for it to get to room temperature so it can be checked in the LP gas mode.
Note: Before using the LP gas system it’s a good idea to have a leak test and gas operating pressure test preformed. A qualified technician with the proper equipment should do these tests.
■Once this is accomplished, turn the LP gas valve on and check the operation of all LP gas appliances. Be sure the water heater is full of water before testing the water heater. If a gas appliance is not operating properly have it inspected by a qualified technician. Insects are attracted to the odorant added to LP gas and build nests that can affect the appliance from operating properly.
■ If your unit was in long-term storage and you didn’t change the engine oil and filter prior to storage this would be a good time to do it or schedule to have it done.
■ Check all fluid levels in transmission, power steering, engine coolant, engine oil, windshield washer and brakes. Consult vehicle owner’s manual.
■ Start the engine and check for proper readings on all gauges. Check for proper operation of dash air conditioner.
■ Check the condition of windshield wiper blades and replace if necessary.
■ Check the operation of all chassis lights.
■ In addition to this if you have a pop-up or travel trailer the wheel bearings and brakes (if equipped) should be inspected at least once annually. Inspect any canvas for dry rot and tears; inspect all hitch work and coupler for damage. Inspect the breakaway switch and pigtail for proper operation.
This list is not all-inclusive, but it seems to work for me. Now for the fun part, load your clothes, food, and personal belongings, hit the road and have fun exploring this wonderful country we live in.
This checklist was taken from our Checklist for RVers Ebook
Happy RV Learning,
Mark Polk
RV Education 101
RV University
RV Orientation
Go for the RV Gold
Follow us on FACEBOOK
RV Consumer
Ways to Save on RV Insurance
Today I wanted to talk about saving a little money. When it comes to your RV, one way to save a little money is to look for some discounts on your RV insurance premium. Having the proper type of insurance coverage on your RV is extremely important but it can be a little pricey too, especially when you are not always using your RV. In this day and age finding ways to lower any of our bills is just the smart thing to do. Let’s take a closer look at some simple ways to trim a little off of your RV insurance premium.
■Many RV insurance companies provide discounts to customers who are members of some type of RV association or club. Discounts vary by insurance company. Call your RV insurance company agent and ask for a listing of associations or clubs you can join to receive a discount.
Note: Association discounts are often given for participants in RV manufacturing associations and clubs too.
■Driver safety courses often qualify an RV owner for discounts with some RV insurance companies. Your insurance agent can inform you of what programs qualify for discounts.
Note: Qualified driver safety courses are often offered at large RV rallies such as at FMCA rallies.
■A clean driving record will reduce your insurance premium. It usually takes 3 years (36 months) for accidents and moving violations/citations to stop impacting your insurance rates.
■Another way to reduce your insurance premium is to buy multiple policies from the same insurance company. This is called a multi-policy discount. As an example, companies like National Interstate Insurance Company offer discounts when an individual buys an RV policy and a companion auto policy.
■Homeowner’s discounts are a common way to lower your insurance premium. Ask your insurance agent for more information.
■Some insurance companies offer discounts if you pay your premium in full up front.
■Adding a security device to your RV such as an audible alarm will often qualify for a discount.
As an added note your credit score can heavily impact your insurance rates, so improving your credit score may improve the premium you pay. Credit usage is not allowed in all states, so it varies from state-to-state and carrier-by-carrier. Ask your insurance provider for more information about using credit scores.
Keep in mind that most insurance companies will not stack discounts. As an example, even if you are a member of multiple qualified associations and you have taken a qualified driver safety course, the insurance company will most likely give you one 5% discount.
I would like to thank National Interstate Insurance Company for its contributions to this article.
Happy Camping,
Mark Polk
RV Education 101
RV University
Facebook
■Many RV insurance companies provide discounts to customers who are members of some type of RV association or club. Discounts vary by insurance company. Call your RV insurance company agent and ask for a listing of associations or clubs you can join to receive a discount.
Note: Association discounts are often given for participants in RV manufacturing associations and clubs too.
■Driver safety courses often qualify an RV owner for discounts with some RV insurance companies. Your insurance agent can inform you of what programs qualify for discounts.
Note: Qualified driver safety courses are often offered at large RV rallies such as at FMCA rallies.
■A clean driving record will reduce your insurance premium. It usually takes 3 years (36 months) for accidents and moving violations/citations to stop impacting your insurance rates.
■Another way to reduce your insurance premium is to buy multiple policies from the same insurance company. This is called a multi-policy discount. As an example, companies like National Interstate Insurance Company offer discounts when an individual buys an RV policy and a companion auto policy.
■Homeowner’s discounts are a common way to lower your insurance premium. Ask your insurance agent for more information.
■Some insurance companies offer discounts if you pay your premium in full up front.
■Adding a security device to your RV such as an audible alarm will often qualify for a discount.
As an added note your credit score can heavily impact your insurance rates, so improving your credit score may improve the premium you pay. Credit usage is not allowed in all states, so it varies from state-to-state and carrier-by-carrier. Ask your insurance provider for more information about using credit scores.
Keep in mind that most insurance companies will not stack discounts. As an example, even if you are a member of multiple qualified associations and you have taken a qualified driver safety course, the insurance company will most likely give you one 5% discount.
I would like to thank National Interstate Insurance Company for its contributions to this article.
Happy Camping,
Mark Polk
RV Education 101
RV University
Analog vs Digital TV
I’m sure you have all heard that in 2009 all analog television signal transmission will cease. This applies not only to viewing television in your home, but in your RV too (I hear there will be a grace period but I’m not sure for how long). All analog TVs will require some type of receiver to convert digital, over the air signals, to analog signals that older TVs can display. With a receiver, you can still use your analog TV to receive digital signals, so there is no need to buy another TV! So what is the easiest way to deal with this problem in our RV’s?
Here’s how things currently work in your RV. Between your analog television set, TV antenna and a built in NTSC tuner you are able to pick up free off air programming like ABC, NBC and CBS channels. Analog television has been the standard broadcast technology since TV’s have been around. Analog technology uses magnetic waves to transmit and display the picture and sound you are seeing and hearing. When you are spending the night in a rural type area analog reception is poor, resulting in the poor color, snowy and static picture you see.
Several years ago local television channels started broadcasting a free digital signal in addition to an analog signal. Digital broadcasting technology transmits the information used to make a TV picture and sound as data bits, like a computer. Digital broadcast technology can carry much more information than analog technology, resulting in a DVD quality picture and sound that will never have a poor, snowy or static picture. The problem is your analog TV cannot receive digital broadcast signals, at least not until now.
Winegard recently came out with a digital HD receiver that connects easily between your TV antenna and your analog TV to deliver these crystal clear digital channels. I mentioned earlier that local channels started broadcasting free digital signals several years ago. To receive this free, over the air digital programming you simply connect the Winegard receiver to your TV and scan in the digital channels for the area you are staying in, using the receiver. The Winegard receiver has a built in ATSC tuner that decodes the free digital signals and displays them on your analog television.
Let’s say, for example, that you receive the local NBC affiliate broadcast in your area on channel 10. If your TV antenna is directed towards that station’s origin, and you turn your analog TV to channel 10 you receive the programming. This is an analog channel for the local NBC affiliate. This local channel is also broadcasting a digital signal. Digital channels are multicast, meaning you could pick up as many as six additional channels from the local NBC digital signal. Once you scan the digital signal into memory, on the digital receiver, the digital channel will appear on your TV as the standard analog channel plus a dash (-) or a dot (.) and a number.
It sounds more confusing than it really is, let me try and explain it better. I said a moment ago, as an example, that the local NBC affiliate is broadcast on channel 10 in your area. The digital channels for NBC might appear as 10-1, 10-2, 10-3 etc. 10-1 would be the standard digital channel for regular NBC programming. The additional multicast digital channels (10-2, 10-3, 10-4 etc.) might be a 24 hour news broadcast, 24 hour weather broadcast, 24 hour movie, sports, special features broadcast and more. So, not only is the picture and sound crystal clear, but you are receiving more channels. The same is true of the other local programming available in your area like ABC and CBS. When you tune in your digital channels all available multicasting channels in your area will be available.
If the Winegard receiver is connected to a High Definition capable TV you will receive any free, over the air High Definition programming automatically too. So when things switch over not only will you be able to keep your old analog TV in the RV, but the picture will look like it’s being viewed on a brand new TV.
Mark J. Polk
RV Education 101
Here’s how things currently work in your RV. Between your analog television set, TV antenna and a built in NTSC tuner you are able to pick up free off air programming like ABC, NBC and CBS channels. Analog television has been the standard broadcast technology since TV’s have been around. Analog technology uses magnetic waves to transmit and display the picture and sound you are seeing and hearing. When you are spending the night in a rural type area analog reception is poor, resulting in the poor color, snowy and static picture you see.
Several years ago local television channels started broadcasting a free digital signal in addition to an analog signal. Digital broadcasting technology transmits the information used to make a TV picture and sound as data bits, like a computer. Digital broadcast technology can carry much more information than analog technology, resulting in a DVD quality picture and sound that will never have a poor, snowy or static picture. The problem is your analog TV cannot receive digital broadcast signals, at least not until now.
Winegard recently came out with a digital HD receiver that connects easily between your TV antenna and your analog TV to deliver these crystal clear digital channels. I mentioned earlier that local channels started broadcasting free digital signals several years ago. To receive this free, over the air digital programming you simply connect the Winegard receiver to your TV and scan in the digital channels for the area you are staying in, using the receiver. The Winegard receiver has a built in ATSC tuner that decodes the free digital signals and displays them on your analog television.
Let’s say, for example, that you receive the local NBC affiliate broadcast in your area on channel 10. If your TV antenna is directed towards that station’s origin, and you turn your analog TV to channel 10 you receive the programming. This is an analog channel for the local NBC affiliate. This local channel is also broadcasting a digital signal. Digital channels are multicast, meaning you could pick up as many as six additional channels from the local NBC digital signal. Once you scan the digital signal into memory, on the digital receiver, the digital channel will appear on your TV as the standard analog channel plus a dash (-) or a dot (.) and a number.
It sounds more confusing than it really is, let me try and explain it better. I said a moment ago, as an example, that the local NBC affiliate is broadcast on channel 10 in your area. The digital channels for NBC might appear as 10-1, 10-2, 10-3 etc. 10-1 would be the standard digital channel for regular NBC programming. The additional multicast digital channels (10-2, 10-3, 10-4 etc.) might be a 24 hour news broadcast, 24 hour weather broadcast, 24 hour movie, sports, special features broadcast and more. So, not only is the picture and sound crystal clear, but you are receiving more channels. The same is true of the other local programming available in your area like ABC and CBS. When you tune in your digital channels all available multicasting channels in your area will be available.
If the Winegard receiver is connected to a High Definition capable TV you will receive any free, over the air High Definition programming automatically too. So when things switch over not only will you be able to keep your old analog TV in the RV, but the picture will look like it’s being viewed on a brand new TV.
Mark J. Polk
RV Education 101
Subscribe to:
Posts (Atom)